Aller au contenu principal

Sansa e260R Front Panel Replacement

Ce dont vous avez besoin

  1. Sansa e260R Front Panel Replacement, Rear Case: étape 1, image 1 de 1
    • Before disassembling the device, make sure it is powered off.

    • Remove the four 1.5mm screws on the back of the device.

  2. Sansa e260R Front Panel Replacement: étape 2, image 1 de 1
    • Using a plastic opening tool, lift the metal backing from the front of the device.

  3. Sansa e260R Front Panel Replacement: étape 3, image 1 de 1
    • Pull the rear panel off of the Sansa e260R.

  4. Sansa e260R Front Panel Replacement, Battery: étape 4, image 1 de 1
    • Grip the bottom of the battery with your thumb and forefinger and pull it away from the device.

  5. Sansa e260R Front Panel Replacement, Front Panel: étape 5, image 1 de 1
    • Remove the four 1.5mm screws on the inner casing of the device.

    • These screws are very small and hard to extract from the casing. It may be helpful to use a magnetic screwdriver.

  6. Sansa e260R Front Panel Replacement: étape 6, image 1 de 1
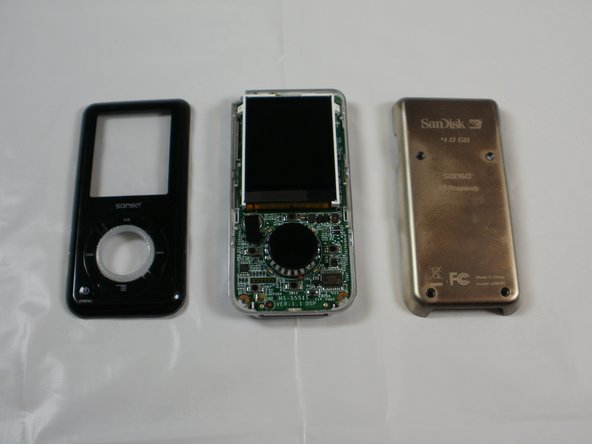
    • Flip the device so that the front is facing you.

    • Slide a plastic opening tool between the plastic front cover and the metal back cover of the device.

  7. Sansa e260R Front Panel Replacement: étape 7, image 1 de 2 Sansa e260R Front Panel Replacement: étape 7, image 2 de 2
    • Pull the front cover away from the rest of the device.

Conclusion

To reassemble your device, follow these instructions in reverse order.

Casey Smith

Membre depuis le 01/20/12

108 Réputation

3 tutoriels rédigés

Équipe

Cal Poly, Team 8-15, Maness Winter 2012 Membre de l'équipe Cal Poly, Team 8-15, Maness Winter 2012

CPSU-MANESS-W12S8G15

5 membres

5 tutoriels rédigés

0 commentaires

Ajouter un commentaire

Nombre de vues :

Dernières 24 heures : 0

7 derniers jours : 0

30 derniers jours : 3

Total : 1,964