Aller au contenu principal

Sanyo-PM 8200 Back Casing Replacement

Conditions préalables uniquement
Ce tutoriel est uniquement destiné à être utilisé comme prérequis d'autres tutoriels. Il ne se suffit pas à lui-même.

Ce dont vous avez besoin

  1. Sanyo-PM 8200 Back Casing Replacement, Back Casing: étape 1, image 1 de 1
    • Use a push pin or tweezers to remove the neoprene screw-cover located on the upper, left corner of the back casing.

  2. Sanyo-PM 8200 Back Casing Replacement: étape 2, image 1 de 1
    • Unscrew all four, 5mm Tri-Wing screws.

  3. Sanyo-PM 8200 Back Casing Replacement: étape 3, image 1 de 2 Sanyo-PM 8200 Back Casing Replacement: étape 3, image 2 de 2
    • Pry the back casing off the device using a spudger. Work your way along the edges to completely separate the back casing from the device.

    • This step may require extra force. But too much force could break the back casing.

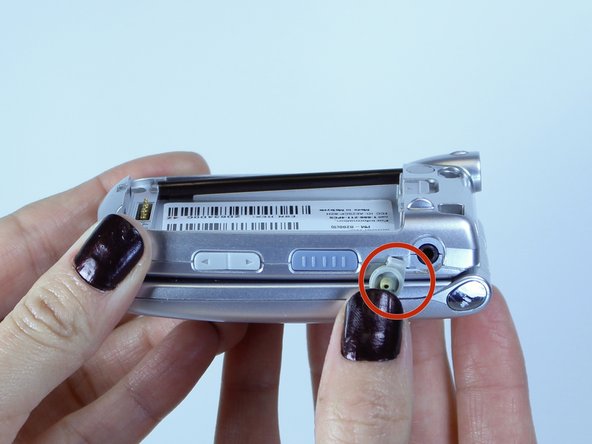
    • Remove the headphone jack cover when separating the back casing. The headphone jack is located on the opposite side of the antenna.

Conclusion

To reassemble your device, follow these instructions in reverse order.

Cassandra Stavros

Membre depuis le 10/07/14

28 Réputation

2 tutoriels rédigés

Équipe

USF Tampa, Team 1-6, Leahy Fall 2014 Membre de l'équipe USF Tampa, Team 1-6, Leahy Fall 2014

USFT-LEAHY-F14S1G6

6 membres

10 tutoriels rédigés

0 commentaires

Ajouter un commentaire

Nombre de vues :

Dernières 24 heures : 0

7 derniers jours : 0

30 derniers jours : 0

Total : 43