Il est possible que cette traduction ne reflète pas les dernières mises à jour du tutoriel source. Aidez à mettre à jour la traduction ou bien consultez le tutoriel source.
Ce dont vous avez besoin
-
-
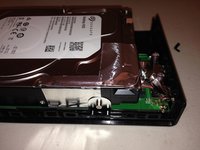
J'avais besoin d'un disque dur et il n'y a pas de magasins d'informatique bon marché dans la région, j'ai donc acheté un Seagate Backup Plus Hub chez Costco pour retirer le disque.
-
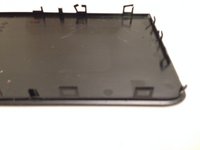
Vous pouvez voir où j'ai cassé le boîtier en essayant de le retirer.
-
-
-
Le boîtier en plastique est composé de trois parties maintenues ensemble par des clips.
-
Vous êtes censé enlever le dessus plat en premier, puis les côtés.
-
Malheureusement, je ne savais pas à quoi ça ressemblait à l'intérieur, et je ne sais toujours pas comment ouvrir les clips sans les casser.
-
-
-
-
Voici quelques gros plans. Vous pouvez voir où j'ai cassé la plupart des clips en plastique.
-
-
-
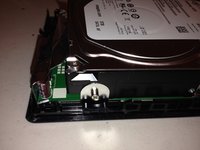
Le disque dur est un Seagate ST5000DM000-1FK178
-
Le lecteur est optimisé pour le stockage, il est donc LARGE et LENT.
-
Certaines personnes le retirent d'un boîtier et le vendent sur Ebay ou Amazon. Vous obtenez un gros disque, mais pas un très bon.
-
Je vais devoir acheter un autre lecteur.
-


Je n'ai pas pu le remettre en place. Et cela s'est avéré être une mauvaise idée car le lecteur est très lent.
Je n'ai pas pu le remettre en place. Et cela s'est avéré être une mauvaise idée car le lecteur est très lent.
Annulation : je n'ai pas terminé ce tutoriel.
7 autres ont terminé cette réparation.
Merci à ces traducteurs :
90%
[deleted] nous aide à réparer le monde ! Vous voulez contribuer ?
Commencez à traduire ›
13 commentaires
I just wanted to add to this guide. I tried to disassemble it as well. I started by removing the top. As you described I could not find a way to remove the plastic top without damaging the plastic clips. Once the top was removed I was able to remove all the internal components without any issues. To remove the hard drive I unclipped all the plastic clips on the inside of the frame, lifted up the frame and slid the hard drive out of the back of the case.
I have the 8TB version. It uses a Seagate Archive HDD based on SMR technology. It is not fast but good for inexpensive mass storage.
By removing the plastic clips, the casing can easily hold itself together, when only removing the top and wile NOT damaging the HDD frame.
By removing the top i only made some small cosmetic damage at the buttom of the HDD frame and the plastic top as the only damge to the case. (And the of course the plastic clips)
I could not se any way to NOT damage the plastic clips.
Part 1
Use a very small blade screwdriver to get into the gap between rear panel and the large cover that goes round the front and surrounds the 2 usb externals.
Starting at one edge force the tip of the screwdriver in and twist till you get a little gap, then unsert a larger screwdriver blade and twist till the clip pops off.
Move little screww driver to the other side of the bigger one and then move the larger screw driver pass the little one and twist etc
When you get past half way use two more screwdrivers to do the same around the corner where you started. Once you pop a clip around the corner leave the larger screwdriver in the gap and return to the end piece. (Doing the corner now helps stop the end clips slipping back into place.
Continue the end and then do two clips around the corner, then return to the other side and do two clips, then back to the other side and do two clips.
From here you should be able to do the rest with your hands by tilting the cover up.
Part 2
Once the cover is off the drive and electronics just slips out by turning the case open side down, four screws behind the rubber vibration washers and you can unplug it.
Reassembly must be done exactly in reverse from a tilted position at the2 x usb plugs end. You will damage some clips, but I got mine back together ok.
My interest was simply getting the drive out so I could use it connected as a native SATA drive. Expect to wreck the case if this is your goal. As proposed above, remove the flat size. Metal prying tools in my iFixit kit were better for this, the overall strength of this assemble case bested the plastic “pry” tools. Once I had the assembly open, the back (power) end of the system went next; average sized pliers cracked the back and I could pry it and one side away. Eventually you will have a metal chassis in hand. remove the four side screws, and the drive pops off the power/data ports quite easily. If you want to preserve the case disassembly is NOT advised. It appears it was made to snap together and break upon disassembly. Total “destructive” disassembly took about 20 minutes.