Introduction
Lorsque l'aspirateur est activé, les phares doivent s'allumer simultanément.
Si les phares ne s'allument pas, les feux peuvent être inopérants en raison de dysfonctionnements électriques ou de composants cassés.
Suivez ce guide pour remplacer vos phares Shark Rotator Powered Lift-Away.
Ce dont vous avez besoin
Vidéo d'introduction
-
-
Appuyez sur le bouton de levage et tirez la poignée vers le haut pour séparer le corps de la section de la baguette.
-
-
-
-
Dévissez les 13 vis (entourées en jaune) à l'aide d'un tournevis cruciforme.
-
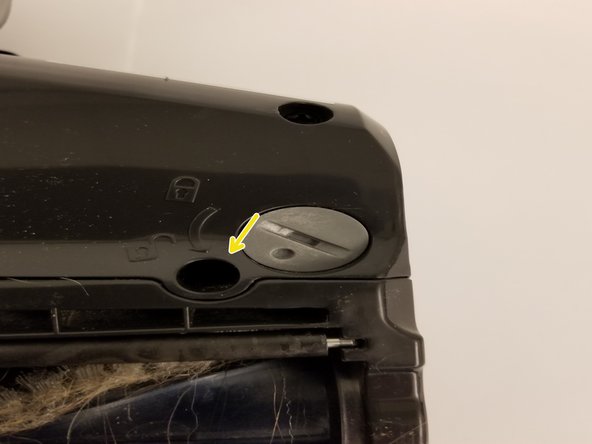
Retirez la vis (entourée en rouge) qui a une tête Torx (peut être une tête Phillips sur certains modèles).
-
Retirez la vis horizontale (entourée en orange) qui fixe le panneau latéral gris (nécessaire pour retirer le capuchon blanc de la brosse rotative à l'étape 8)
The 13 Philips screws are Torxt 25 screws not philips head screws it’s a Special torx drive tool.
You forgot to explain how to remove the two silver end caps one of them has a philips head screw that has to be removed from the inside,
and it’s hard to find because it’s usually full of lint.
On model NV 752 the torx screw is a T20, not T25. and it is the screw that is in the middle of the unit, not on the end where the red circle is shown above. This is not for the feint of heart. I have now replaced the roller and I am having trouble putting it back together again.
I have replaced roller brushes on other vacuums and this doesn’t have to be this difficult people. I love my Shark but may reconsider buying another based on how difficult it is to replace this roller brush.
I agree with you. The designer knew nothing about "design for assembly" and "design for servicing". I was a design engineer for over 30 years for generators. Those are two important aspects of design. Also, one tries to minimize the number of screws and attempts to make then all the same size. Anyone attempting this for the first time will rate this replacement as difficult. So why is a recessed torx bit required? Obviously, they want service reps to make money.
Tim Gurr -
My model number is UV770QCH but it's similar to NV 750 W. I too had a Phillips screw hidden on the belt side under the brush. There was a Phillips screw that ran horizontal to the brush roll cassette that was very difficult to find. As others noted, it was located in a different position from the one pictured in this demo. Also, it was covered in lint and very awkward to reach (glad to have small hands for once). Most other screws required a Torx 20. Four screws (including hidden under brush screw) needed a 2.0 50ml Phillips. Hopefully, my new brush roller lasts a while.
-
-
-
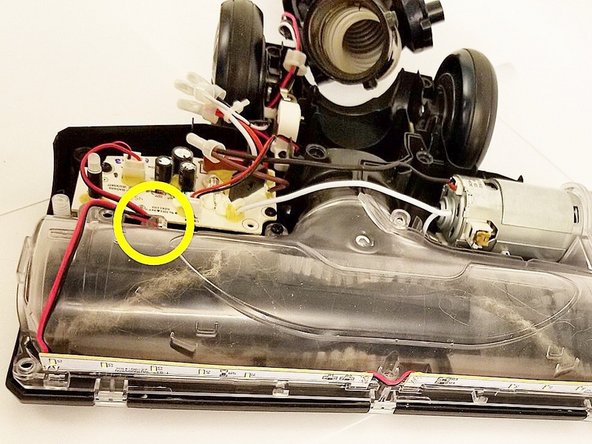
Détachez les fils rouge et noir du phare du clip en plastique comme illustré.
-


Pour remonter votre appareil, suivez ces instructions dans l'ordre inverse.
Pour remonter votre appareil, suivez ces instructions dans l'ordre inverse.
Annulation : je n'ai pas terminé ce tutoriel.
Une autre personne a terminé cette réparation.
Merci à ces traducteurs :
100%
[deleted] nous aide à réparer le monde ! Vous voulez contribuer ?
Commencez à traduire ›
Équipe

Cal Poly, Team S9-G3, Banghart Fall 2017 Membre de l'équipe Cal Poly, Team S9-G3, Banghart Fall 2017
CPSU-BANGHART-F17S9G3
4 membres
12 tutoriels rédigés
3 commentaires
Shark sent a brand new replacement nozzle to me (covered in their 5yr warranty) but head lights STILL DO NOT WORK - which makes me wonder where else the issue could be because the above “fix” would not have fixed my vacuum head lights.
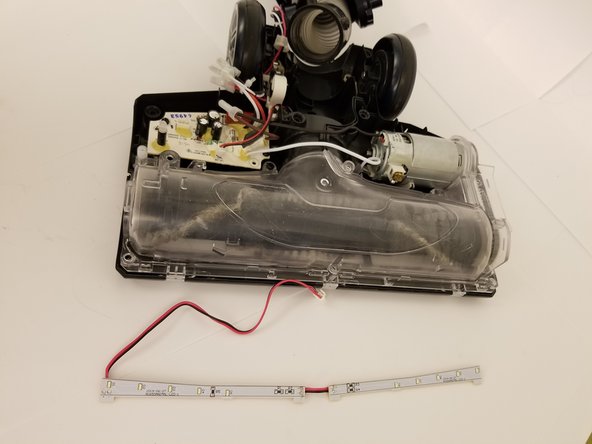
These steps are great, but how do you ACTUALLY replace the led light strip itself? Do u need a special strip? Just any led strip? U left a few more steps out. Is like to replace mine instead of buying a whole new vacuum head.
Protip: Print out a copy of the first photo for step 6 as large as will fit on the page. Tape it to a piece of foam board and poke the screws into it as you remove them. This makes it easy to remember which screw came from where.