Ce tutoriel a des changements plus récents. Passer à la dernière version non vérifiée.
Introduction
The microphone capsule is the main part that makes the microphone work. It is essential that this part is functioning properly.
Ce dont vous avez besoin
-
-
Grab the microphone base with one hand. With the other hand, grab just below the grille (the collar). Twist the collar clockwise to loosen it.
-
-
-
-
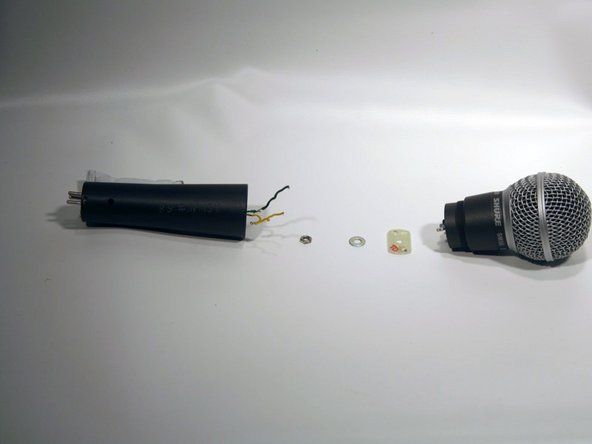
Using an adjustable wrench, remove the nut and the washer behind the face plate by twisting the nut counterclockwise.
-


Once installed, reassemble the microphone following the steps in reverse.
Once installed, reassemble the microphone following the steps in reverse.
Annulation : je n'ai pas terminé ce tutoriel.
7 autres ont terminé cette réparation.
Équipe

Cal Poly, Team 7-53, Forte Fall 2012 Membre de l'équipe Cal Poly, Team 7-53, Forte Fall 2012
CPSU-FORTE-F12S7G53
5 membres
20 tutoriels rédigés
5 commentaires
Thanks for that,
Can i just replace the capsule as seen in the last picture?
Has it to be resoldered? Where do those very fine copper wires go?
It's been a few years since I made the guide and no longer have any microphones nearby to examen, but if I remember correctly, there is no soldering between the capsule and the housing. I believe the housing is soldered to the rest of the body with the silver leads at the bottom left of the picture.
You can unscrew just the grill.