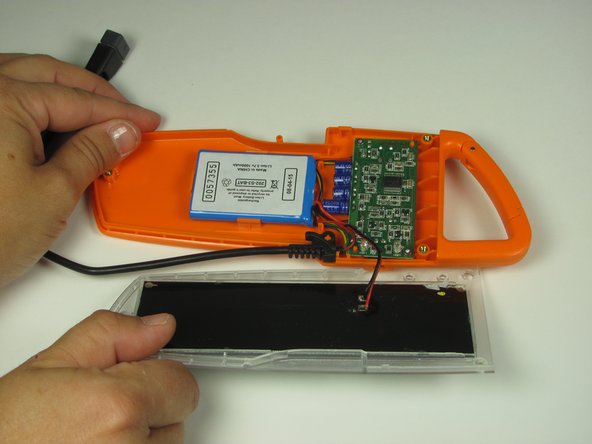
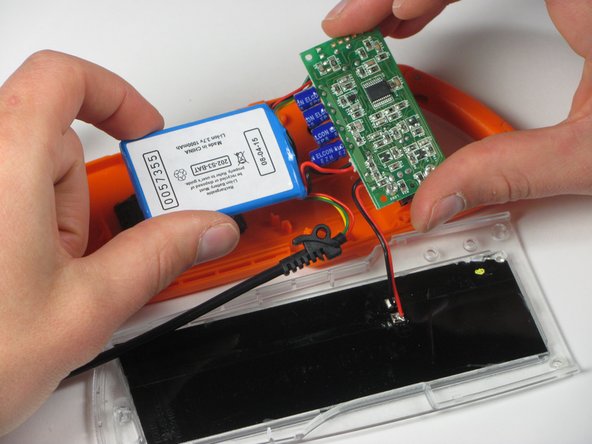
Aller au contenu principal

Solio Rocsta Internal Components Replacement

Tutoriel Archivé
Ce tutoriel est conservé uniquement à des fins de suivis historiques. Utilisez la version actuelle du tutoriel pour effectuer votre réparation.

Ce dont vous avez besoin

  1. Solio Rocsta Internal Components Replacement, Internal Components: étape 1, image 1 de 1
    • Remove the three 7mm Torx T7 screws.

  2. Solio Rocsta Internal Components Replacement: étape 2, image 1 de 3 Solio Rocsta Internal Components Replacement: étape 2, image 2 de 3 Solio Rocsta Internal Components Replacement: étape 2, image 3 de 3
    • Insert the flat end of the spudger between the top panel and the body.

    • Use the spudger as a lever to carefully pry apart the two panels.

    • As you pry, take care not to break the small orange clip holding the top to the body.

    • Lift the panel above and away to disconnect the panel from the body.

    • Be careful when lifting because you could break the wiring connecting the motherboard to the panel.

  3. Solio Rocsta Internal Components Replacement: étape 3, image 1 de 2 Solio Rocsta Internal Components Replacement: étape 3, image 2 de 2
    • Lift the panel off the body and set it next to the device.

    • Remember to use caution when lifting because you could break the wiring connecting the motherboard to the panel.

  4. Solio Rocsta Internal Components Replacement: étape 4, image 1 de 1
    • Remove the two 6mm Torx T6 screws from the motherboard.

  5. Solio Rocsta Internal Components Replacement: étape 5, image 1 de 2 Solio Rocsta Internal Components Replacement: étape 5, image 2 de 2
    • Lift the end of the USB cord out of the body.

    • The cord fits over an orange peg.

  6. Solio Rocsta Internal Components Replacement: étape 6, image 1 de 3 Solio Rocsta Internal Components Replacement: étape 6, image 2 de 3 Solio Rocsta Internal Components Replacement: étape 6, image 3 de 3
    • Lift up the battery with your fingers or with the flat end of the spudger.

    • Be prepared to use force because the battery is adhered to the body.

    • Do not try to remove the battery completely because the wiring connects to the motherboard.

  7. Solio Rocsta Internal Components Replacement: étape 7, image 1 de 2 Solio Rocsta Internal Components Replacement: étape 7, image 2 de 2
    • Remove the battery and the motherboard from the body.

Conclusion

To reassemble your device, follow these instructions in reverse order.

Une autre personne a terminé cette réparation.

Aimee Whiteside

Membre depuis le 05/21/15

1 Réputation

1 tutoriel rédigé

Équipe

iFixit, Team 1-1, Goldberg SU 2015 Membre de l'équipe iFixit, Team 1-1, Goldberg SU 2015

FIX-GOLDBERG-SU15S1G1

3 membres

1 tutoriel rédigé

0 commentaires

Ajouter un commentaire

Nombre de vues :

Dernières 24 heures : 0

7 derniers jours : 0

30 derniers jours : 0

Total : 58