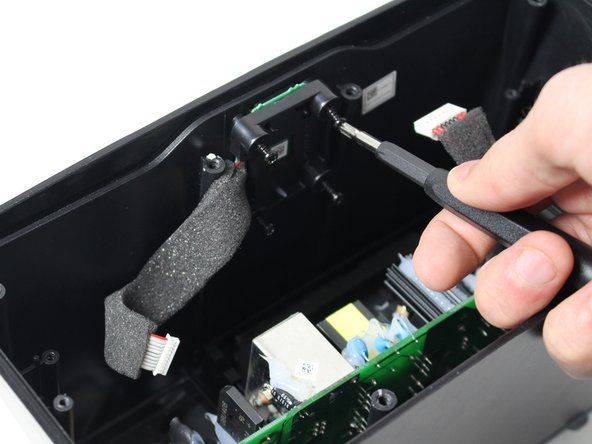
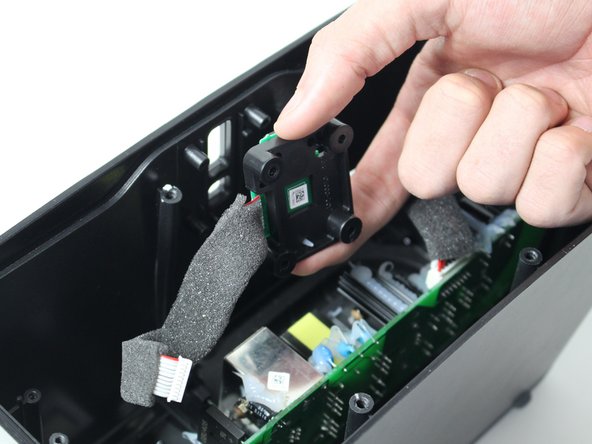
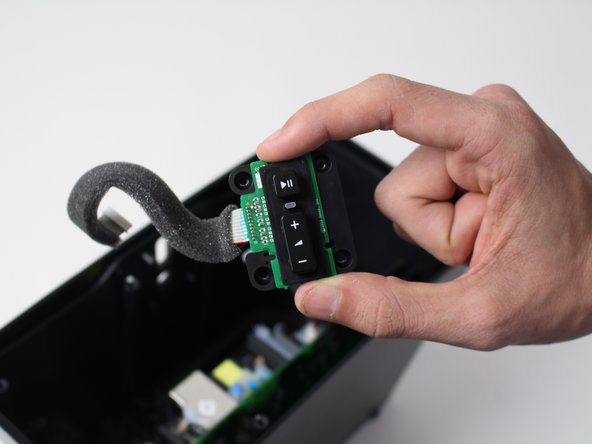
Aller au contenu principal

Sonos Play 3 Volume Button Board Replacement

Ce dont vous avez besoin

  1. Sonos Play 3 Volume Button Board Replacement, Speaker Grille: étape 1, image 1 de 2 Sonos Play 3 Volume Button Board Replacement, Speaker Grille: étape 1, image 2 de 2
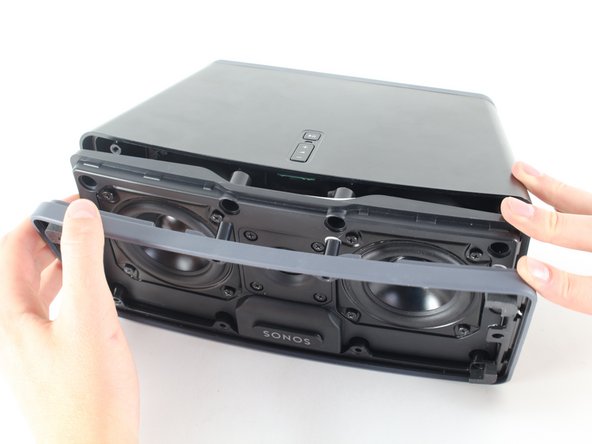
    • Insert a spudger along the edge of the screen and gently use it to pull the screen away from the casing. Slide the spudger along the length of the grill to detach all the clips holding it in place.

  2. Sonos Play 3 Volume Button Board Replacement: étape 2, image 1 de 1
    • Gently pull the screen away from the body of the speaker, revealing the tweeter and two mid-range drivers behind it.

    • There may be a kind of black sticky adhesive holding the screen clips to the rest of the body; however, it was previously removed on our model.

  3. Sonos Play 3 Volume Button Board Replacement, Front Speaker Panel: étape 3, image 1 de 2 Sonos Play 3 Volume Button Board Replacement, Front Speaker Panel: étape 3, image 2 de 2
    • Unscrew eight 1.5 inch Phillips #2 screws attaching the front speaker panel to the box.

    • Unscrew the single 1 inch Phillips #2 screw located on the left side of the panel. This may be hidden beneath the warranty void sticker that you'll want to remove.

    • Unscrew the single 3/4 inch Phillips #2 screw, which is the last thing holding the front panel to the casing.

  4. Sonos Play 3 Volume Button Board Replacement: étape 4, image 1 de 3 Sonos Play 3 Volume Button Board Replacement: étape 4, image 2 de 3 Sonos Play 3 Volume Button Board Replacement: étape 4, image 3 de 3
    • Remove the front panel carefully.

    • Note that there are two layers to the panel that should stay in their original order.

  5. Sonos Play 3 Volume Button Board Replacement: étape 5, image 1 de 2 Sonos Play 3 Volume Button Board Replacement: étape 5, image 2 de 2
    • Disconnect the front panel from the motherboard by gently reaching in and pushing the tab underneath the wire connector and pulling towards you.

  6. Sonos Play 3 Volume Button Board Replacement: étape 6, image 1 de 2 Sonos Play 3 Volume Button Board Replacement: étape 6, image 2 de 2
    • Gently remove the wireless card located at the bottom of the front speaker panel by pulling up and out with your index finger and thumb.

  7. Sonos Play 3 Volume Button Board Replacement, Motherboard: étape 7, image 1 de 2 Sonos Play 3 Volume Button Board Replacement, Motherboard: étape 7, image 2 de 2
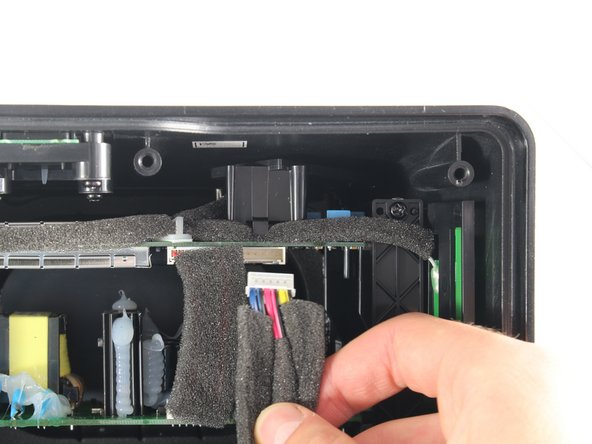
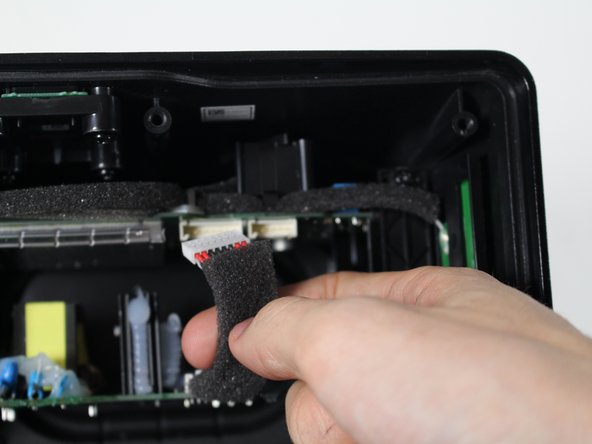
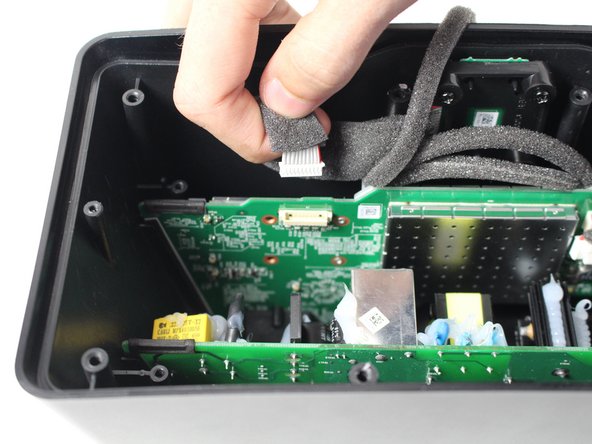
    • Disconnect the motherboard from the power supply board by gently reaching in and pushing the tab underneath the wire connector and pulling towards you.

  8. Sonos Play 3 Volume Button Board Replacement: étape 8, image 1 de 2 Sonos Play 3 Volume Button Board Replacement: étape 8, image 2 de 2
    • Disconnect the motherboard from the volume button board by gently grabbing the connector and pulling it towards you.

  9. Sonos Play 3 Volume Button Board Replacement: étape 9, image 1 de 1
    • Using a Phillips #2 screwdriver, remove the 4 screws securing the two plastic panels down.

  10. Sonos Play 3 Volume Button Board Replacement: étape 10, image 1 de 2 Sonos Play 3 Volume Button Board Replacement: étape 10, image 2 de 2
    • Remove the two plastic panels on either side of the device that hold the motherboard and power supply board in place.

  11. Sonos Play 3 Volume Button Board Replacement: étape 11, image 1 de 1
    • Using a Phillips screwdriver, unscrew the two screws in the back of the device that hold the motherboard in place.

  12. Sonos Play 3 Volume Button Board Replacement: étape 12, image 1 de 3 Sonos Play 3 Volume Button Board Replacement: étape 12, image 2 de 3 Sonos Play 3 Volume Button Board Replacement: étape 12, image 3 de 3
    • Gently remove the motherboard from the Sonos device by sliding it straight back towards you.

    • When putting the motherboard back inside the device, make sure it slides in the slots smoothly on both sides.

  13. Sonos Play 3 Volume Button Board Replacement, Volume Button Board: étape 13, image 1 de 3 Sonos Play 3 Volume Button Board Replacement, Volume Button Board: étape 13, image 2 de 3 Sonos Play 3 Volume Button Board Replacement, Volume Button Board: étape 13, image 3 de 3
    • Remove the four screws securing the button board to the case.

    • You may need a special screwdriver to remove the bottom two screws. We used the flexible shaft attachment from our iFixit 54 Bit Driver Kit

  14. Sonos Play 3 Volume Button Board Replacement: étape 14, image 1 de 3 Sonos Play 3 Volume Button Board Replacement: étape 14, image 2 de 3 Sonos Play 3 Volume Button Board Replacement: étape 14, image 3 de 3
    • Gently pull the button board toward you and then remove from the case.

Conclusion

To reassemble your device, follow these instructions in reverse order.

Une autre personne a terminé cette réparation.

Christina Santini

Membre depuis le 04/14/16

1 350 Réputation

7 tutoriels rédigés

Équipe

Cal Poly, Team 25-6, Maness Spring 2016 Membre de l'équipe Cal Poly, Team 25-6, Maness Spring 2016

CPSU-MANESS-S16S25G6

4 membres

14 tutoriels rédigés

0 commentaires

Ajouter un commentaire

Nombre de vues :

Dernières 24 heures : 0

7 derniers jours : 1

30 derniers jours : 9

Total : 774