Aller au contenu principal

Sonos Playbase Ethernet Port Replacement

Ce dont vous avez besoin

  1. Sonos Playbase Ethernet Port Replacement, Bottom Panel: étape 1, image 1 de 3 Sonos Playbase Ethernet Port Replacement, Bottom Panel: étape 1, image 2 de 3 Sonos Playbase Ethernet Port Replacement, Bottom Panel: étape 1, image 3 de 3
    Outil utilisé dans cette étape :
    Pro Tech Toolkit
    $74.95
    J'achète
    • Turn the Playbase upside down so that the "Sonos Playbase" imprint is face up.

    • Remove the bottom panel with an Opening Tool by inserting underneath and prying upwards.

    • Melt the adhesive with an iOpener for ease of opening

    • Use a Metal Spudger if the plastic spudgers do not work.

    • Take care to avoid damaging the plastic or the device if using a metal spudger.

  2. Sonos Playbase Ethernet Port Replacement: étape 2, image 1 de 2 Sonos Playbase Ethernet Port Replacement: étape 2, image 2 de 2
    Outil utilisé dans cette étape :
    Pro Tech Toolkit
    $74.95
    J'achète
    • Remove the fourteen 11mm T-10 screws by turning counter-clockwise.

    • Remove the seven 44mm T-20 screws by turning counter-clockwise.

    • Remove the twenty-two 34mm T-20 screws by turning counter-clockwise.

    • Record where each screw belongs for easier reassembly.

  3. Sonos Playbase Ethernet Port Replacement: étape 3, image 1 de 2 Sonos Playbase Ethernet Port Replacement: étape 3, image 2 de 2
    Outil utilisé dans cette étape :
    Pro Tech Toolkit
    $74.95
    J'achète
    • Remove the metal plate with a Opening Tool by inserting underneath and prying upwards.

    • Use a metal spudger if plastic openers do not work.

    • Take care to avoid damaging the plastic or the device if using a metal spudger.

  4. Sonos Playbase Ethernet Port Replacement, Ethernet Port: étape 4, image 1 de 2 Sonos Playbase Ethernet Port Replacement, Ethernet Port: étape 4, image 2 de 2
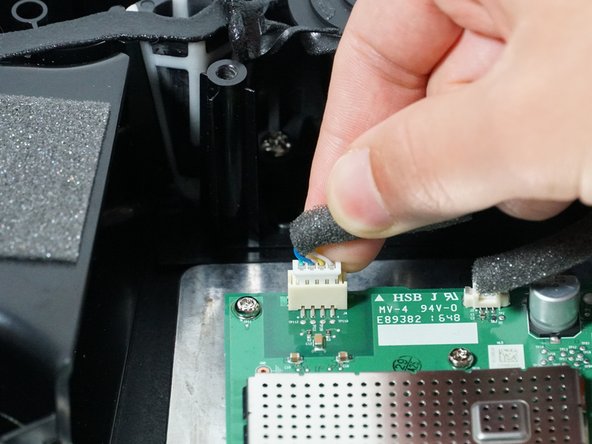
    • Unplug the Ethernet Port from the main circuit board by pinching the white clip and pulling upward.

  5. Sonos Playbase Ethernet Port Replacement: étape 5, image 1 de 2 Sonos Playbase Ethernet Port Replacement: étape 5, image 2 de 2
    Outil utilisé dans cette étape :
    Pro Tech Toolkit
    $74.95
    J'achète
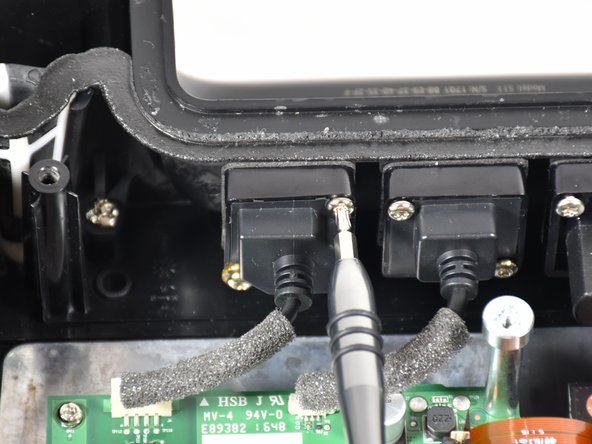
    • Remove the two 18 mm T-10 screws holding the Ethernet Port in place by turning them counterclockwise.

  6. Sonos Playbase Ethernet Port Replacement: étape 6, image 1 de 2 Sonos Playbase Ethernet Port Replacement: étape 6, image 2 de 2
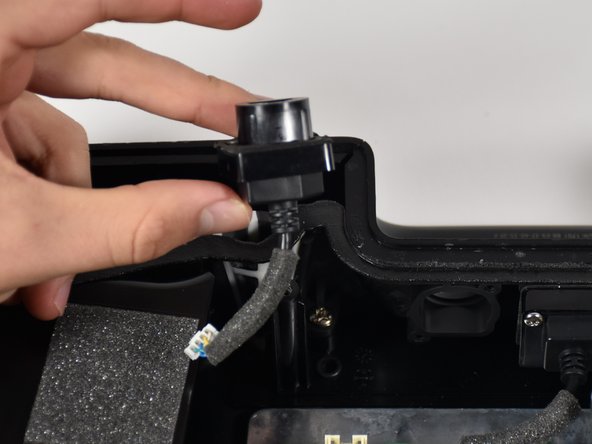
    • Remove the Ethernet Port from the housing by pinching from both sides and pulling it out.

Conclusion

To reassemble your device, follow these instructions in reverse order.

James Andrews

Membre depuis le 10/08/18

421 Réputation

4 tutoriels rédigés

Équipe

Cal Poly, Team S17-G2, White Fall 2018 Membre de l'équipe Cal Poly, Team S17-G2, White Fall 2018

CPSU-WHITE-F18S17G2

4 membres

8 tutoriels rédigés

Un commentaire

I actually have a broken ethernet port on a playbase. Do you have any idea where I can buy a replacement port?

Thanks,

D

david paler - Réponse

Ajouter un commentaire

Nombre de vues :

Dernières 24 heures : 0

7 derniers jours : 3

30 derniers jours : 9

Total : 1,431