Aller au contenu principal

Sony Alpha NEX-C3 LCD Screen Replacement

Ce dont vous avez besoin

  1. Sony Alpha NEX-C3 LCD Screen Replacement, LCD Screen: étape 1, image 1 de 1
    • Turn off the camera by sliding the power switch.

  2. Sony Alpha NEX-C3 LCD Screen Replacement: étape 2, image 1 de 1
    • Tilt up the LCD screen.

  3. Sony Alpha NEX-C3 LCD Screen Replacement: étape 3, image 1 de 1
    • Use a Phillips head 000 screwdriver to remove the two 2.0mm screws on the bottom of the LCD screen.

  4. Sony Alpha NEX-C3 LCD Screen Replacement: étape 4, image 1 de 3 Sony Alpha NEX-C3 LCD Screen Replacement: étape 4, image 2 de 3 Sony Alpha NEX-C3 LCD Screen Replacement: étape 4, image 3 de 3
    • Use a Phillips head 000 screwdriver to remove the two 1.0mm screws on the smaller backplate of the LCD screen that covers the ribbon cable.

    • The smaller backplate should easily come off. Put it to the side.

  5. Sony Alpha NEX-C3 LCD Screen Replacement: étape 5, image 1 de 2 Sony Alpha NEX-C3 LCD Screen Replacement: étape 5, image 2 de 2
    • Use a Phillips head 000 screwdriver to remove the two 1.0mm screws on the bigger backplate of the LCD.

  6. Sony Alpha NEX-C3 LCD Screen Replacement: étape 6, image 1 de 2 Sony Alpha NEX-C3 LCD Screen Replacement: étape 6, image 2 de 2
    • Using the plastic opening tool, remove the larger backplate from the LCD screen.

  7. Sony Alpha NEX-C3 LCD Screen Replacement: étape 7, image 1 de 1
    • With your hands, gently remove the black plastic piece on the backside of the LCD screen.

  8. Sony Alpha NEX-C3 LCD Screen Replacement: étape 8, image 1 de 2 Sony Alpha NEX-C3 LCD Screen Replacement: étape 8, image 2 de 2
    Outil utilisé dans cette étape :
    Tweezers
    $4.99
    J'achète
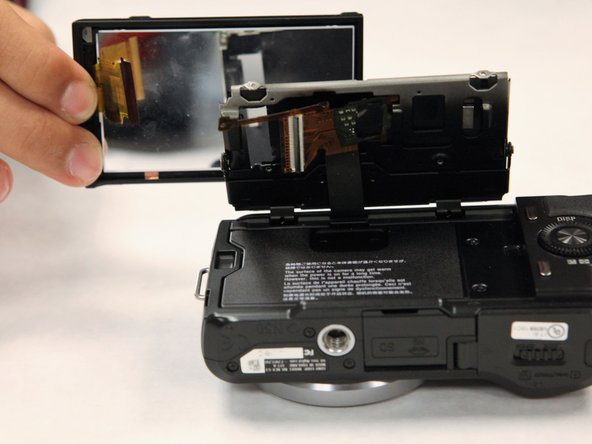
    • Using tweezers, gently pull up and away on the ribbon cable connected to the motherboard, after which, the LCD screen should come off.

    • The motherboard ribbon cable has a specific connector.

Conclusion

To reassemble your device, follow these instructions in reverse order. However, when installing the ribbon cable, the connector has a specific step. The connector has a tiny flap that clamps down onto the ribbon cable in order to make it secure.

Une autre personne a terminé cette réparation.

Jonathan Chen

Membre depuis le 10/17/17

690 Réputation

6 tutoriels rédigés

Équipe

UC Santa Barbara, Team S1-G1, Weedon Fall 2017 Membre de l'équipe UC Santa Barbara, Team S1-G1, Weedon Fall 2017

UCSB-WEEDON-F17S1G1

3 membres

13 tutoriels rédigés

Un commentaire

Sir, my unit has many lines that appear on the screen. However, the lcd glass is pristine & has no cracks. Which part is defective? Is the lcd mother board the culprit? Thank you.

Stevie B - Réponse

Ajouter un commentaire

Nombre de vues :

Dernières 24 heures : 0

7 derniers jours : 4

30 derniers jours : 36

Total : 2,490