Aller au contenu principal

Sony BDP-BX510 Motherboard Replacement

Ce dont vous avez besoin

  1. Sony BDP-BX510 Motherboard Replacement, Outer Cover: étape 1, image 1 de 1
    • Plug in the device to turn it on, then press the eject ( ⏏ ) button to open the tray.

  2. Sony BDP-BX510 Motherboard Replacement: étape 2, image 1 de 2 Sony BDP-BX510 Motherboard Replacement: étape 2, image 2 de 2
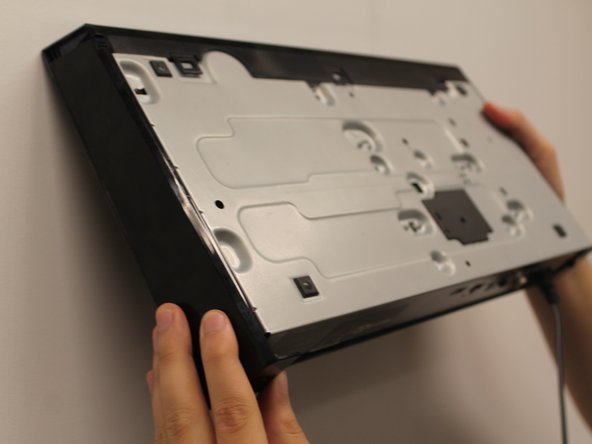
    • To remove the tray cover, hold both sides of the tray cover and gently apply a downward pressure.

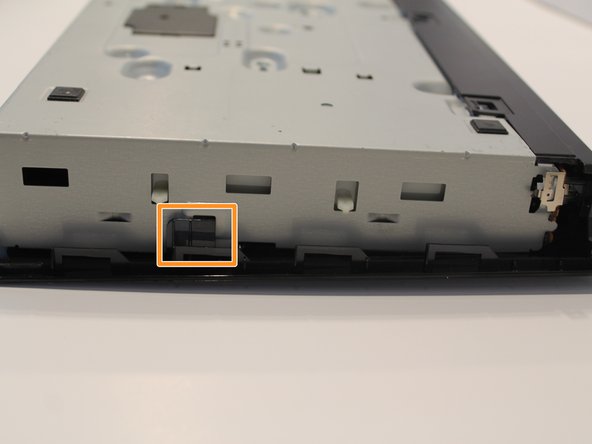
    • Apply slightly more pressure to the left side until it unhooks then unhook the right side.

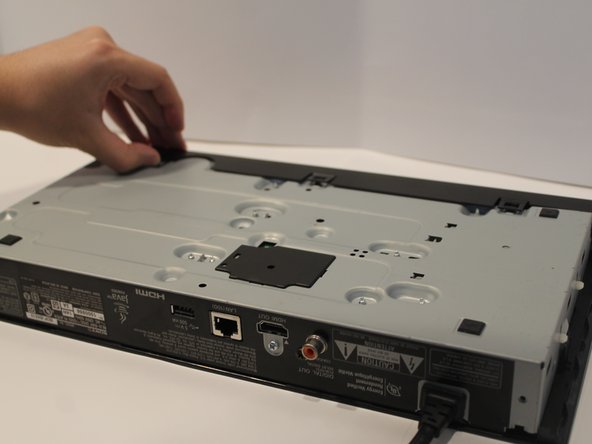
    • Close the disk tray by pressing the eject button again, then power off the device and unplug it.

    • Do not use too much force to remove the tray cover as you may break it.

  3. Sony BDP-BX510 Motherboard Replacement: étape 3, image 1 de 2 Sony BDP-BX510 Motherboard Replacement: étape 3, image 2 de 2
    • Turn to the back of the device.

    • Remove the two 7mm Phillips #2 screws.

    • Slide the two plastic covers on both sides of the device towards the back of the device to remove them.

  4. Sony BDP-BX510 Motherboard Replacement: étape 4, image 1 de 3 Sony BDP-BX510 Motherboard Replacement: étape 4, image 2 de 3 Sony BDP-BX510 Motherboard Replacement: étape 4, image 3 de 3
    • Turn the device so you can see the bottom.

    • Unclip the three black plastic clips on the bottom of the device.

    • Unclip one clip on each side of the device.

  5. Sony BDP-BX510 Motherboard Replacement: étape 5, image 1 de 1
    • Slide the cover forward to remove.

  6. Sony BDP-BX510 Motherboard Replacement, Motherboard: étape 6, image 1 de 1
    • Pull out the power cord from the device.

  7. Sony BDP-BX510 Motherboard Replacement: étape 7, image 1 de 1
    Outil utilisé dans cette étape :
    Tweezers
    $4.99
    J'achète
    • Pull out these cables from the motherboard.

    • Using tweezers, lift the black tab on the connector of the large 45 pin connector on the motherboard.

    • Pull the large 45 pin ribbon cable out of the connector in the motherboard.

    • Do not use excessive force to remove the cables and do not forcibly pull out the 45 pin ribbon cable as you could damage it. Once the black tab is lifted it should come out easily.

  8. Sony BDP-BX510 Motherboard Replacement: étape 8, image 1 de 2 Sony BDP-BX510 Motherboard Replacement: étape 8, image 2 de 2
    • Remove the two 5mm Phillips #1 screws.

    • Lift the side of the power module and remove it.

  9. Sony BDP-BX510 Motherboard Replacement: étape 9, image 1 de 2 Sony BDP-BX510 Motherboard Replacement: étape 9, image 2 de 2
    • Remove the three 5mm Phillips #1 screws.

    • Turn the device over to the backside.

    • Use tweezers or metal spudger to take off the metal clasp for the metal brace near the center on the bottom of the device.

    • Remove the metal brace.

  10. Sony BDP-BX510 Motherboard Replacement: étape 10, image 1 de 3 Sony BDP-BX510 Motherboard Replacement: étape 10, image 2 de 3 Sony BDP-BX510 Motherboard Replacement: étape 10, image 3 de 3
    • Turn to the back of the device.

    • Remove the silver 3mm Phillips #1 screw.

    • Remove the black 7mm Phillips #1 screw.

    • Lift the side of the motherboard and pull it out.

Conclusion

To reassemble your device, follow these instructions in reverse order.

Tae (Tim) Im

Membre depuis le 01/14/20

279 Réputation

3 tutoriels rédigés

Équipe

York University, Team S1-G10, Woodhouse Winter 2020 Membre de l'équipe York University, Team S1-G10, Woodhouse Winter 2020

YORK-WOODHOUSE-W20S1G10

2 membres

6 tutoriels rédigés

0 commentaires

Ajouter un commentaire

Nombre de vues :

Dernières 24 heures : 0

7 derniers jours : 3

30 derniers jours : 11

Total : 212