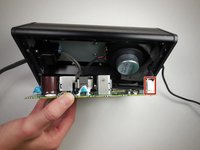
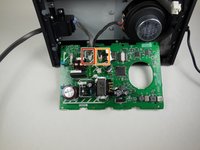
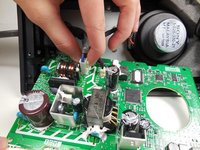
Aller au contenu principal

Sony CPF-IP001 Subwoofer Housing Disassembly

Conditions préalables uniquement
Ce tutoriel est uniquement destiné à être utilisé comme prérequis d'autres tutoriels. Il ne se suffit pas à lui-même.

Ce dont vous avez besoin

  1. Sony CPF-IP001 Subwoofer Housing Disassembly, Subwoofer Housing Disassembly: étape 1, image 1 de 2 Sony CPF-IP001 Subwoofer Housing Disassembly, Subwoofer Housing Disassembly: étape 1, image 2 de 2
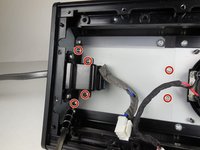
    • Remove fourteen 8 mm Phillips #2 screws from the bottom of the subwoofer.

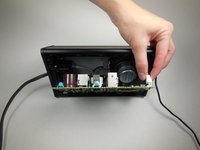
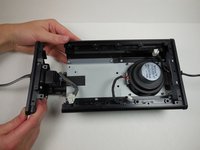
    • Once all of the screws are removed, the cover can be taken off using a metal spudger.

  2. Sony CPF-IP001 Subwoofer Housing Disassembly: étape 2, image 1 de 2 Sony CPF-IP001 Subwoofer Housing Disassembly: étape 2, image 2 de 2
    • Remove eight 14 mm Phillips #2 screws holding the circuit board in place.

    • Using the plastic opening tool, carefully remove the circuit board.

    • There will be 3 wires connected to the opposite side of the circuit board. Be careful not to pull the board out of the device too far and damage these wires.

  3. Sony CPF-IP001 Subwoofer Housing Disassembly: étape 3, image 1 de 2 Sony CPF-IP001 Subwoofer Housing Disassembly: étape 3, image 2 de 2
    • Remove the first of the three wires by squeezing the clip and pulling it out.

    • After disconnecting the first wire, the two attached wires can be more easily accessed.

  4. Sony CPF-IP001 Subwoofer Housing Disassembly: étape 4, image 1 de 3 Sony CPF-IP001 Subwoofer Housing Disassembly: étape 4, image 2 de 3 Sony CPF-IP001 Subwoofer Housing Disassembly: étape 4, image 3 de 3
    Outil utilisé dans cette étape :
    Tweezers
    $4.99
    • Remove the wire furthest to the left by squeezing the clip and pulling it out.

    • Detach the third wire by carefully using the tweezers.

    • The circuit board is now completely detached and can be set aside.

  5. Sony CPF-IP001 Subwoofer Housing Disassembly: étape 5, image 1 de 2 Sony CPF-IP001 Subwoofer Housing Disassembly: étape 5, image 2 de 2
    • Remove six 8 mm Phillips #2 screws.

    • Slide the side panel with the power cord out from the housing.

    • The side panel with the power cord will come out as a whole unit with the subwoofer air tunnel.

Conclusion

To reassemble your device, follow these instructions in reverse order.

Une autre personne a terminé cette réparation.

Mike Bolton

Membre depuis le 04/14/15

473 Réputation

4 tutoriels rédigés

Équipe

Cal Poly, Team 6-14, Maness Spring 2015 Membre de l'équipe Cal Poly, Team 6-14, Maness Spring 2015

CPSU-MANESS-S15S6G14

4 membres

8 tutoriels rédigés

0 commentaires

Ajouter un commentaire

Nombre de vues :

Dernières 24 heures : 0

7 derniers jours : 0

30 derniers jours : 0

Total : 78