Aller au contenu principal

Sony Cyber-shot DSC-W730 Flash Control Board Replacement

Ce dont vous avez besoin

  1. Sony Cyber-shot DSC-W730 Flash Control Board Replacement, Removing the Case: étape 1, image 1 de 3 Sony Cyber-shot DSC-W730 Flash Control Board Replacement, Removing the Case: étape 1, image 2 de 3 Sony Cyber-shot DSC-W730 Flash Control Board Replacement, Removing the Case: étape 1, image 3 de 3
    • Open the battery/memory card door and remove the 6 screws (.35cm) with a Philips 000 screwdriver. There will be two screws on the left and right sides, and two on the bottom.

  2. Sony Cyber-shot DSC-W730 Flash Control Board Replacement: étape 2, image 1 de 3 Sony Cyber-shot DSC-W730 Flash Control Board Replacement: étape 2, image 2 de 3 Sony Cyber-shot DSC-W730 Flash Control Board Replacement: étape 2, image 3 de 3
    • Take off the front part of the case with a plastic opening tool.

  3. Sony Cyber-shot DSC-W730 Flash Control Board Replacement: étape 3, image 1 de 2 Sony Cyber-shot DSC-W730 Flash Control Board Replacement: étape 3, image 2 de 2
    • Pull off the two silver side pieces on the left and right sides.

  4. Sony Cyber-shot DSC-W730 Flash Control Board Replacement: étape 4, image 1 de 2 Sony Cyber-shot DSC-W730 Flash Control Board Replacement: étape 4, image 2 de 2
    • Remove the main back piece. It should easily lift off.

  5. Sony Cyber-shot DSC-W730 Flash Control Board Replacement: étape 5, image 1 de 3 Sony Cyber-shot DSC-W730 Flash Control Board Replacement: étape 5, image 2 de 3 Sony Cyber-shot DSC-W730 Flash Control Board Replacement: étape 5, image 3 de 3
    • Unscrew the .45cm screw located on the upper right corner on the back of the camera. Once the screw is off, use the spudger and unclip the piece holding the top down on the upper left on the front of the camera. It should lift off with ease.

  6. Sony Cyber-shot DSC-W730 Flash Control Board Replacement, LCD Control Board: étape 6, image 1 de 2 Sony Cyber-shot DSC-W730 Flash Control Board Replacement, LCD Control Board: étape 6, image 2 de 2
    • Flip over the control board then use tweezers to pull out the ribbon connecting the circuit board to the motherboard.

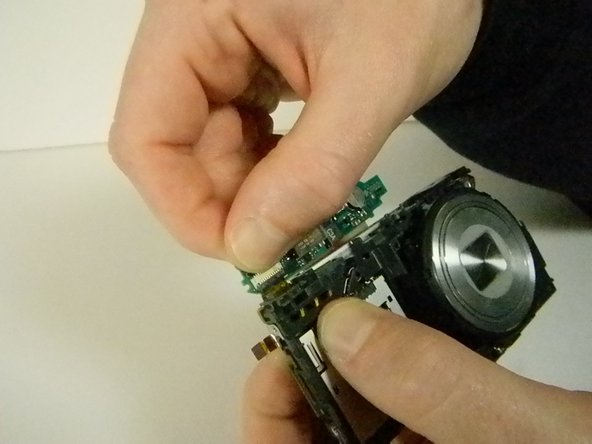
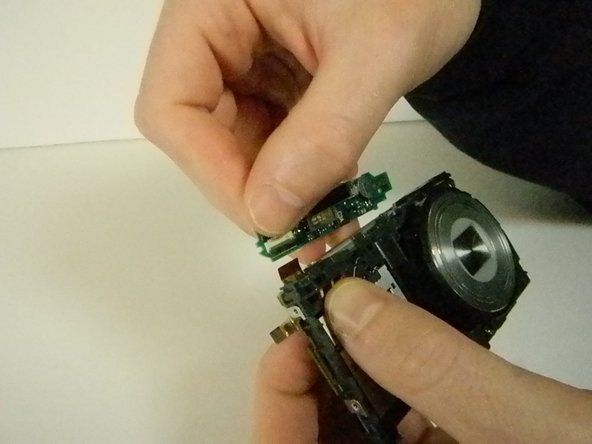
  7. Sony Cyber-shot DSC-W730 Flash Control Board Replacement, Caption/Flash Control Board: étape 7, image 1 de 3 Sony Cyber-shot DSC-W730 Flash Control Board Replacement, Caption/Flash Control Board: étape 7, image 2 de 3 Sony Cyber-shot DSC-W730 Flash Control Board Replacement, Caption/Flash Control Board: étape 7, image 3 de 3
    • Once the case is off, hold down the ribbon near the LCD screen that connects the flash to the camera. While doing this, carefully lift the control board that contains the flash until the ribbon is no longer connected.

  8. Sony Cyber-shot DSC-W730 Flash Control Board Replacement: étape 8, image 1 de 1
    • Once you have removed the piece this is what it will look like.

Conclusion

To reassemble your device, follow these instructions in reverse order.

Douglas Howe

Membre depuis le 01/08/15

510 Réputation

4 tutoriels rédigés

Équipe

USF Tampa, Team 9-4, Blackwell Winter 2015 Membre de l'équipe USF Tampa, Team 9-4, Blackwell Winter 2015

USFT-BLACKWELL-W15S9G4

3 membres

12 tutoriels rédigés

0 commentaires

Ajouter un commentaire

Nombre de vues :

Dernières 24 heures : 0

7 derniers jours : 1

30 derniers jours : 4

Total : 718