Introduction
Make sure you have the necessary tools in order to complete the lens replacement for the Sony Cyber Shot WX80 and be sure to have a steady hand when dealing with the smaller and more fragile parts.
Ce dont vous avez besoin
-
-
Begin by removing all six #00 40mm by 10mm black screws holding the outer frame together with the Phillips #00 Precision Screwdriver.
-
-
-
-
Remove the #00 screw from the right hand side (from the LCD screen side) which is adjacent to the master control dial. Reference the first image.
-
Use a spudger or plastic opening tools to pry up the LCD screen and free the two metal tangs on the left side. Reference the second image.
-
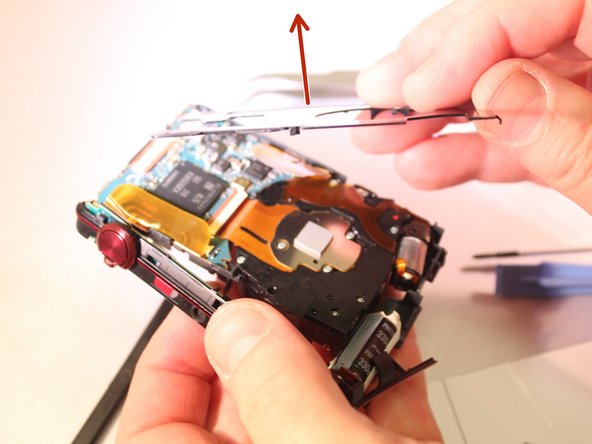
Lift up two more metal tabs held down by a thin red plastic strap on the right (master control dial) side. Reference the third image.
-
-
-
Using a pair of tweezers, remove the blue ribbon from its connection located toward to the top right of the device. Reference the first image.
-
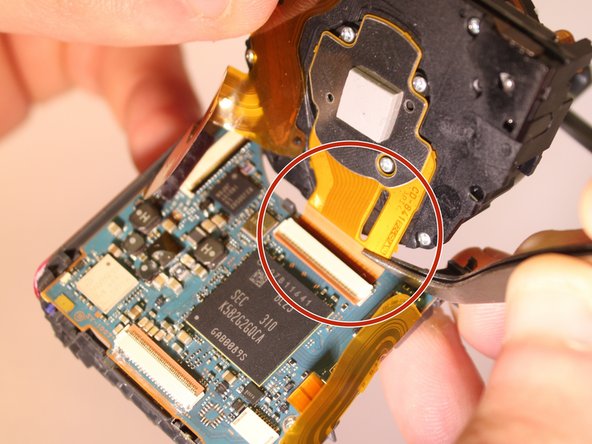
Using a pair of tweezers, remove the gold ribbon from its connection located to the right of the removed blue ribbon. Reference the second image.
-
Your LCD screen is now removed and you can replace it!
-
-
-
After the LCD screen has been removed there is a black metal plate that can be pulled off revealing the motherboard and the lens.
-


To reassemble your device, follow these instructions in reverse order.
To reassemble your device, follow these instructions in reverse order.
Annulation : je n'ai pas terminé ce tutoriel.
2 autres ont terminé cette réparation.

Équipe

Eastern Washington University, Team 2-5, Matresse Spring 2015 Membre de l'équipe Eastern Washington University, Team 2-5, Matresse Spring 2015
EWU-MATRESSE-S15S2G5
4 membres
7 tutoriels rédigés