Aller au contenu principal

Sony Ericsson W200i Back Case Replacement

Ce dont vous avez besoin

  1. Sony Ericsson W200i Back Case Replacement, Disassembling Sony Ericsson W200i Battery: étape 1, image 1 de 2 Sony Ericsson W200i Back Case Replacement, Disassembling Sony Ericsson W200i Battery: étape 1, image 2 de 2
    • Slide the battery cover up and off the phone.

  2. Sony Ericsson W200i Back Case Replacement: étape 2, image 1 de 2 Sony Ericsson W200i Back Case Replacement: étape 2, image 2 de 2
    • Pop the battery out of its slot by lifting it up.

  3. Sony Ericsson W200i Back Case Replacement, Front Case: étape 3, image 1 de 3 Sony Ericsson W200i Back Case Replacement, Front Case: étape 3, image 2 de 3 Sony Ericsson W200i Back Case Replacement, Front Case: étape 3, image 3 de 3
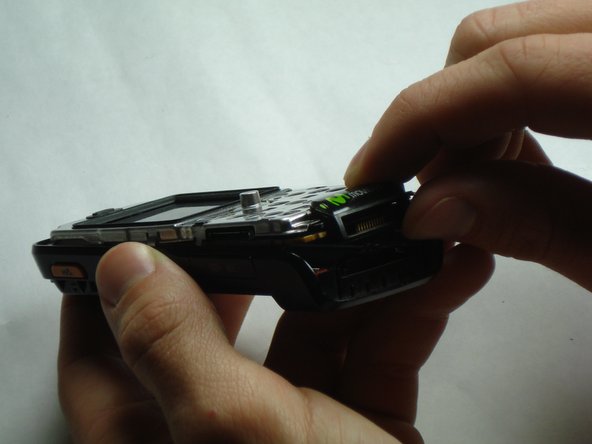
    • Insert the plastic opening tool in between the front case and the back case.

    • Apply downward pressure to make the case lift upwards, thus popping the front case off.

    • Use caution when removing the front case. It may seem stuck but just ease it out.

  4. Sony Ericsson W200i Back Case Replacement, Core: étape 4, image 1 de 2 Sony Ericsson W200i Back Case Replacement, Core: étape 4, image 2 de 2
    • Remove the 4 screws in the corners of the front of the phone using a T6 screwdriver.

    • Note that the top 2 screws are silver and the bottom 2 screws are black.

  5. Sony Ericsson W200i Back Case Replacement: étape 5, image 1 de 3 Sony Ericsson W200i Back Case Replacement: étape 5, image 2 de 3 Sony Ericsson W200i Back Case Replacement: étape 5, image 3 de 3
    • There is a black tab in the top left corner holding the core in place.

    • Remove the core by pulling straight up to prevent breaking the tab.

  6. Sony Ericsson W200i Back Case Replacement, Back Case: étape 6, image 1 de 3 Sony Ericsson W200i Back Case Replacement, Back Case: étape 6, image 2 de 3 Sony Ericsson W200i Back Case Replacement, Back Case: étape 6, image 3 de 3
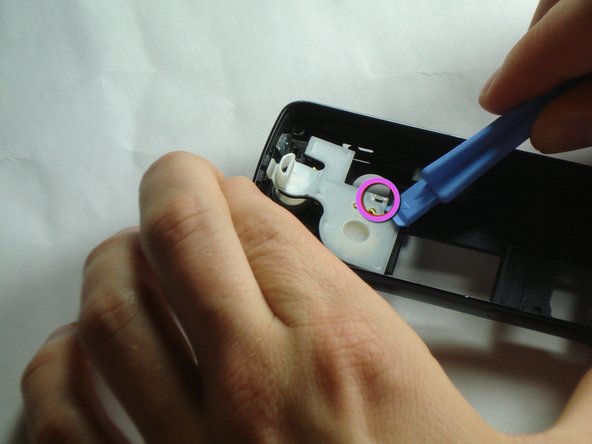
    • Pull back on the indicated tab of the white plastic cover to unhook it from the top of the phone.

    • Using the plastic opening tool, undo the indicated clip on the bottom of the white plastic cover.

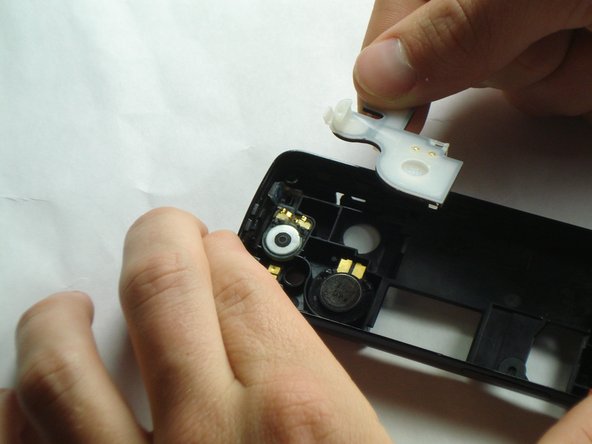
    • Remove the white plastic cover.

Conclusion

To reassemble your device, put removed pieces into the new back casing, then follow the steps in reverse order.

Emily Prescott

Membre depuis le 01/10/11

531 Réputation

4 tutoriels rédigés

Équipe

Cal Poly, Team 14-10, Forte Winter 2011 Membre de l'équipe Cal Poly, Team 14-10, Forte Winter 2011

CPSU-FORTE-W11S14G10

5 membres

16 tutoriels rédigés

0 commentaires

Ajouter un commentaire

Nombre de vues :

Dernières 24 heures : 0

7 derniers jours : 0

30 derniers jours : 2

Total : 3,641