Aller au contenu principal

Sony RDR HX750 HX950 Disassembly

Ce dont vous avez besoin

  1. Sony RDR HX750 HX950 Disassembly, Remove cover: étape 1, image 1 de 3 Sony RDR HX750 HX950 Disassembly, Remove cover: étape 1, image 2 de 3 Sony RDR HX750 HX950 Disassembly, Remove cover: étape 1, image 3 de 3
    • Remove the screws from the back and sides of the top cover.

  2. Sony RDR HX750 HX950 Disassembly, Remove Hard Disk: étape 2, image 1 de 3 Sony RDR HX750 HX950 Disassembly, Remove Hard Disk: étape 2, image 2 de 3 Sony RDR HX750 HX950 Disassembly, Remove Hard Disk: étape 2, image 3 de 3
    • Remove the four screws that secure the hard drive mounting bracket to the bottom of the unit.

    • Unplug the two cables from the rear of the hard drive.

    • Remove the four screws from the bottom of the hard drive mounting bracket.

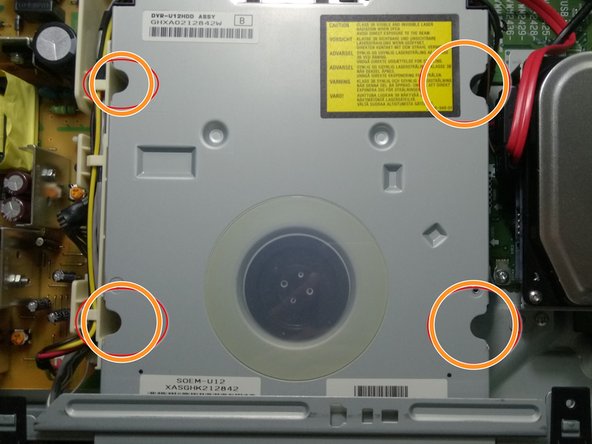
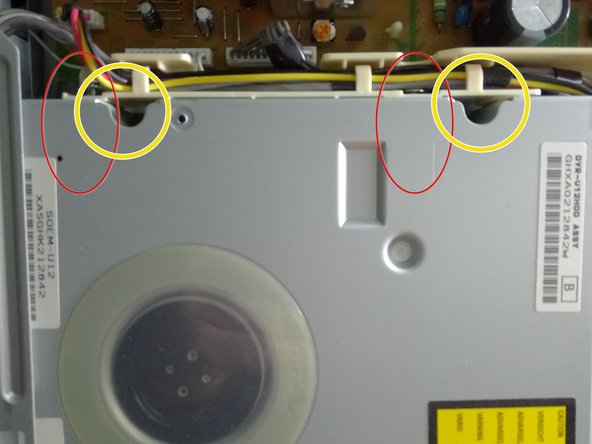
  3. Sony RDR HX750 HX950 Disassembly, Remove DVD player: étape 3, image 1 de 3 Sony RDR HX750 HX950 Disassembly, Remove DVD player: étape 3, image 2 de 3 Sony RDR HX750 HX950 Disassembly, Remove DVD player: étape 3, image 3 de 3
    • Remove the screws from the back

    • Remove the screws from the DVD cover

    • Remove the screws from the plastic cable holder

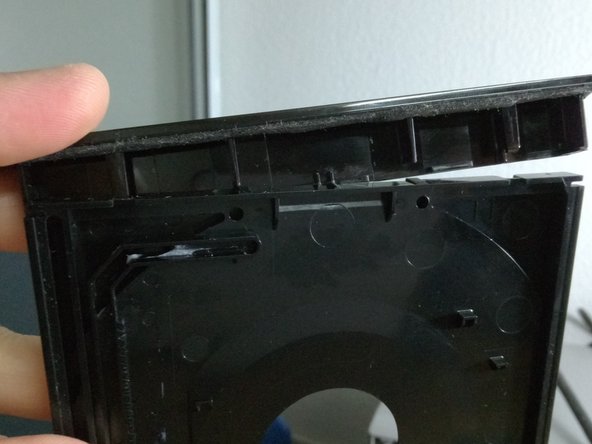
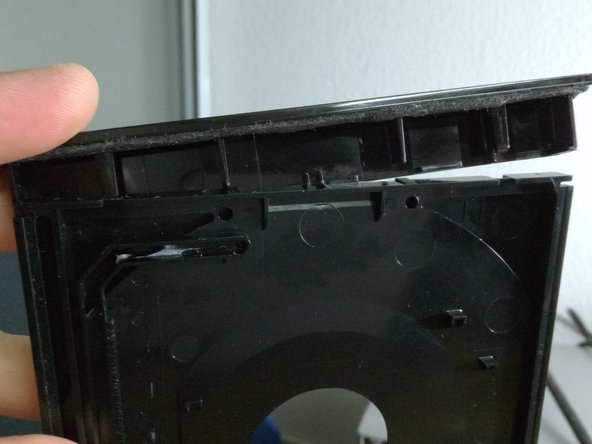
  4. Sony RDR HX750 HX950 Disassembly, Remove front Panel: étape 4, image 1 de 3 Sony RDR HX750 HX950 Disassembly, Remove front Panel: étape 4, image 2 de 3 Sony RDR HX750 HX950 Disassembly, Remove front Panel: étape 4, image 3 de 3
    • Insert the paper under each "click" to remove the front panel.

    • Once each "click" is loose, push the front panel gently.

    • The table of the compact disk has a little plastic piece in front that goes up to come out with a "click"

  5. Sony RDR HX750 HX950 Disassembly, Remove  DVD block: étape 5, image 1 de 3 Sony RDR HX750 HX950 Disassembly, Remove  DVD block: étape 5, image 2 de 3 Sony RDR HX750 HX950 Disassembly, Remove  DVD block: étape 5, image 3 de 3
    • Unplug the cables show in photo.

    • Disconnect the cable hidden on the side.

    • Remove the piece on the cd reader

  6. Sony RDR HX750 HX950 Disassembly, Remove cover of dvd player: étape 6, image 1 de 3 Sony RDR HX750 HX950 Disassembly, Remove cover of dvd player: étape 6, image 2 de 3 Sony RDR HX750 HX950 Disassembly, Remove cover of dvd player: étape 6, image 3 de 3
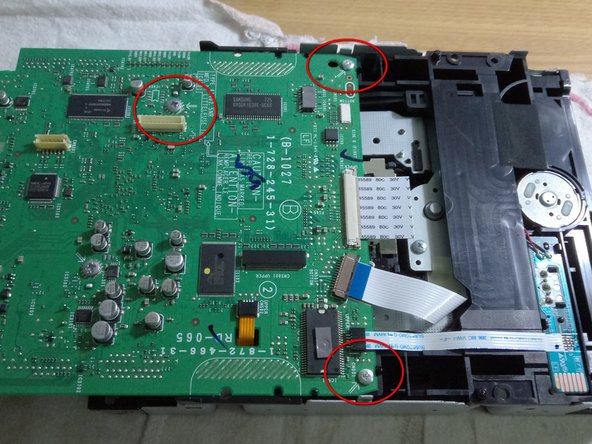
    • Under the DVD block, remove the screws as shown.

    • Remove the screws on the board.

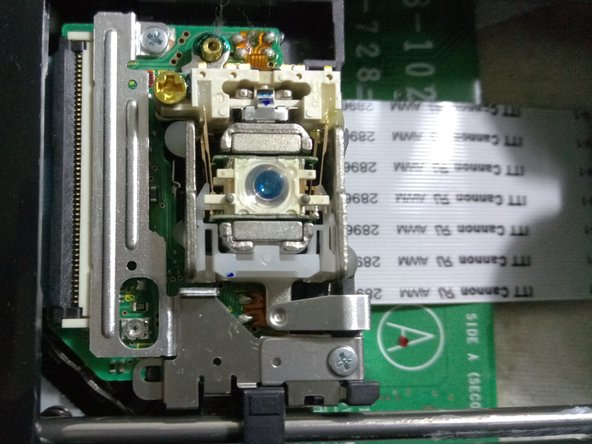
    • Now the laser can be accessed.

  7. Sony RDR HX750 HX950 Disassembly, Sony RDR HX750 laser: étape 7, image 1 de 3 Sony RDR HX750 HX950 Disassembly, Sony RDR HX750 laser: étape 7, image 2 de 3 Sony RDR HX750 HX950 Disassembly, Sony RDR HX750 laser: étape 7, image 3 de 3
    • Inserir instruções aqui.

Conclusion

To open this dvd recorder folow this tutorial

2 autres ont terminé cette réparation.

Cafony

Membre depuis le 02/17/15

687 Réputation

4 tutoriels rédigés

Un commentaire

Hello,HX950 work only with hdd 250Gb,or another,with 500 or 1000Gb ???

Cornelus - Réponse

Ajouter un commentaire

Nombre de vues :

Dernières 24 heures : 1

7 derniers jours : 8

30 derniers jours : 48

Total : 5,373