Aller au contenu principal

Sony RM-LVR1 LCD Screen Replacement

Ce dont vous avez besoin

  1. Sony RM-LVR1 LCD Screen Replacement, Battery: étape 1, image 1 de 1
    • Use a Phillips #00 screwdriver to remove the four (4) screws on the back of the device.

    • If the screws strips or is previously stripped, refer to the stripped screw repair guide.

  2. Sony RM-LVR1 LCD Screen Replacement: étape 2, image 1 de 1
    • Battery is the rectangular and silver object in the center of device.

    • Remove battery with finger by prying at the rear.

    • If unable to remove battery, pry out using spudger.

  3. Sony RM-LVR1 LCD Screen Replacement, LCD Screen: étape 3, image 1 de 2 Sony RM-LVR1 LCD Screen Replacement, LCD Screen: étape 3, image 2 de 2
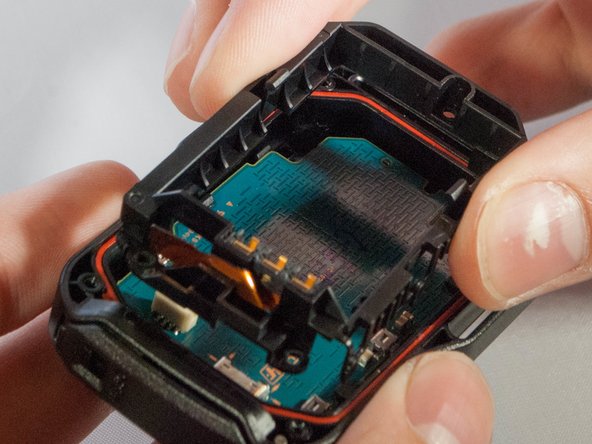
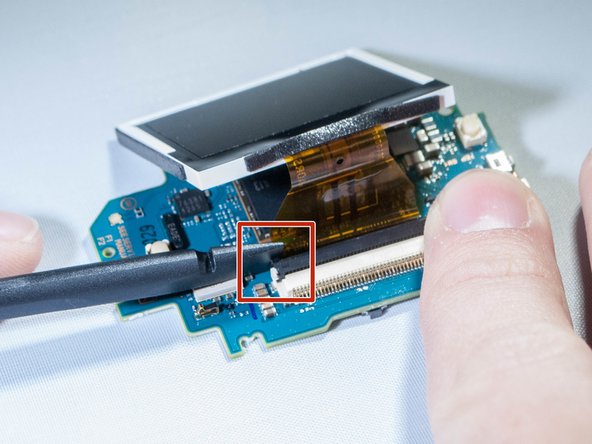
    • Unscrew the 3 (three) screws holding the bracket in place.

    • Then remove the bracket by prying one end up.

    • Do not rip the ribbon cable connecting the bracket to the motherboard.

  4. Sony RM-LVR1 LCD Screen Replacement: étape 4, image 1 de 1
    Outil utilisé dans cette étape :
    Tweezers
    $4.99
    J'achète
    • With tweezers, unplug the ribbon cable from the white connector.

  5. Sony RM-LVR1 LCD Screen Replacement: étape 5, image 1 de 1
    • Remove motherboard from the device by pulling upward gently, with fingers or tweezers.

  6. Sony RM-LVR1 LCD Screen Replacement: étape 6, image 1 de 1
    • Gently push out on these two clips holding the LCD to the motherboard

    • Once you have the first two off, ever so carefully, push the LCD towards the remaining two clips.

    • There is a ribbon cable underneath the LCD connecting it to the motherboard. Avoid sharp, sudden movements to prevent it from being damged

  7. Sony RM-LVR1 LCD Screen Replacement: étape 7, image 1 de 2 Sony RM-LVR1 LCD Screen Replacement: étape 7, image 2 de 2
    • Undo the ribbon cable attached between the motherboard and screen by prying up black tab which holds the cable, using spudger. (See pictures)

  8. Sony RM-LVR1 LCD Screen Replacement: étape 8, image 1 de 1
    • Remove the screen from the motherboard.

Conclusion

To reassemble your device, follow these instructions in reverse order.

Une autre personne a terminé cette réparation.

Alexander Thomas

Membre depuis le 09/28/17

265 Réputation

2 tutoriels rédigés

4 commentaires

здорово!

подскажите где купить дисплей?, или его маркировку?. на дисплее ничего не написано, не могу найти.

Александр - Réponse

Hi

I cant find an replacement lcd.

Could anybody help me where to get one?

Cheers

Sven

Sven van Bellen - Réponse

any link to the replacement LCD please?

Bart Ptachowski - Réponse

Hi .

search : HD 170 LCD Drift aliexp****

i think it will do the job .

cheers

ruigyl - Réponse

Ajouter un commentaire

Nombre de vues :

Dernières 24 heures : 0

7 derniers jours : 1

30 derniers jours : 6

Total : 504