Aller au contenu principal

Sony SRS-X55 Motherboard Replacement

Ce dont vous avez besoin

  1. Sony SRS-X55 Motherboard Replacement, Battery: étape 1, image 1 de 3 Sony SRS-X55 Motherboard Replacement, Battery: étape 1, image 2 de 3 Sony SRS-X55 Motherboard Replacement, Battery: étape 1, image 3 de 3
    • Remove the six screw covers with a spudger.

    • Remove the six 11 mm Phillips screws from the bottom panel.

    • Remove the bottom panel of the speaker.

  2. Sony SRS-X55 Motherboard Replacement: étape 2, image 1 de 1
    • Disconnect the battery cable from the motherboard.

    • Remove the battery.

  3. Sony SRS-X55 Motherboard Replacement, Speaker Panel: étape 3, image 1 de 1
    • Remove the speaker grill by pushing on the two tabs in the corners.

  4. Sony SRS-X55 Motherboard Replacement: étape 4, image 1 de 1
    • Remove the eight 0.5mm Phillips #1 screws from the speaker panel.

  5. Sony SRS-X55 Motherboard Replacement, Motherboard: étape 5, image 1 de 3 Sony SRS-X55 Motherboard Replacement, Motherboard: étape 5, image 2 de 3 Sony SRS-X55 Motherboard Replacement, Motherboard: étape 5, image 3 de 3
    • Flip open the speaker panel to access the interior of the device.

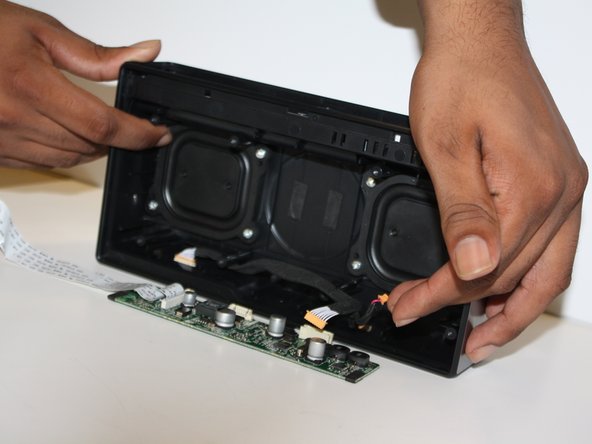
    • Carefully unplug the three cables and one ribbon connector connected to the motherboard.

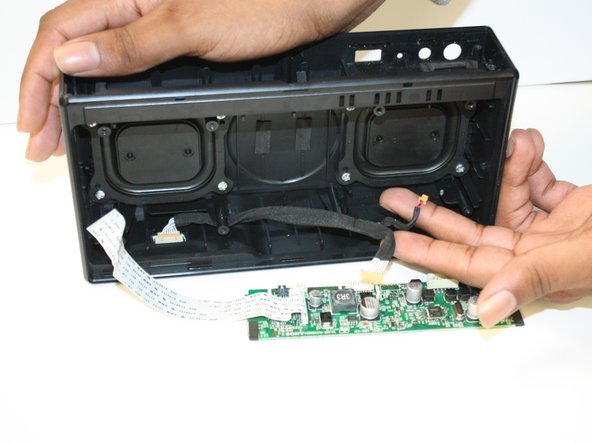
    • Remove the motherboard.

Conclusion

To reassemble your device, follow these instructions in reverse order.

Jordon McDuffie

Membre depuis le 01/31/16

101 Réputation

2 tutoriels rédigés

Équipe

0 commentaires

Ajouter un commentaire

Nombre de vues :

Dernières 24 heures : 1

7 derniers jours : 6

30 derniers jours : 19

Total : 3,204