Aller au contenu principal

Sony SRS-XB40 Auxiliary Input Replacement

Ce dont vous avez besoin

  1. Sony SRS-XB40 Auxiliary Input  Replacement, Speaker Assembly Replacement: étape 1, image 1 de 1
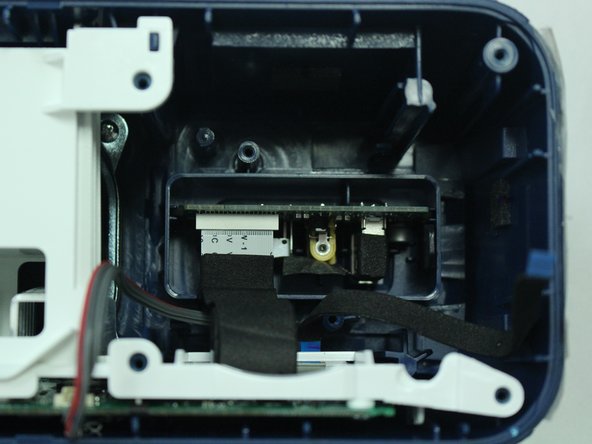
    • Remove the speaker case from the outer casing by prying it from the base of the speaker using a metal spudger.

  2. Sony SRS-XB40 Auxiliary Input  Replacement: étape 2, image 1 de 1
    • Remove the four T-8 screws (15 mm long) from the black speaker face.

  3. Sony SRS-XB40 Auxiliary Input  Replacement: étape 3, image 1 de 1
    • Pry the two rubber end pieces loose enough to pry off two pieces of the long plastic casing from the speaker body using a metal spudger.

  4. Sony SRS-XB40 Auxiliary Input  Replacement: étape 4, image 1 de 1
    • Pry the two remaining rubber pieces of the casing completely away from the body of the speaker with the same metal pry tool.

  5. Sony SRS-XB40 Auxiliary Input  Replacement: étape 5, image 1 de 2 Sony SRS-XB40 Auxiliary Input  Replacement: étape 5, image 2 de 2
    • Once you have removed the outer blue casing, four T-8 screws (15 mm long) will be revealed on each corner. After removing these screws, simply pull the top part of the speaker way from the body to get the the inner part of the speaker.

  6. Sony SRS-XB40 Auxiliary Input  Replacement: étape 6, image 1 de 1
    • Once you have gotten to the internal parts of the speaker, there are seven wires connecting the speaker plate to the body of the speaker. Pinch the release tabs at the top of each of the four main wires to remove them.

  7. Sony SRS-XB40 Auxiliary Input  Replacement: étape 7, image 1 de 3 Sony SRS-XB40 Auxiliary Input  Replacement: étape 7, image 2 de 3 Sony SRS-XB40 Auxiliary Input  Replacement: étape 7, image 3 de 3
    • Simply pull the thin wires on each side to remove them from their attachment points.

    • Remove the final red and black wire by gently pulling it apart.

    • This will ultimately detach the speaker plate from the base.

  8. Sony SRS-XB40 Auxiliary Input  Replacement, Auxiliary Input: étape 8, image 1 de 2 Sony SRS-XB40 Auxiliary Input  Replacement, Auxiliary Input: étape 8, image 2 de 2
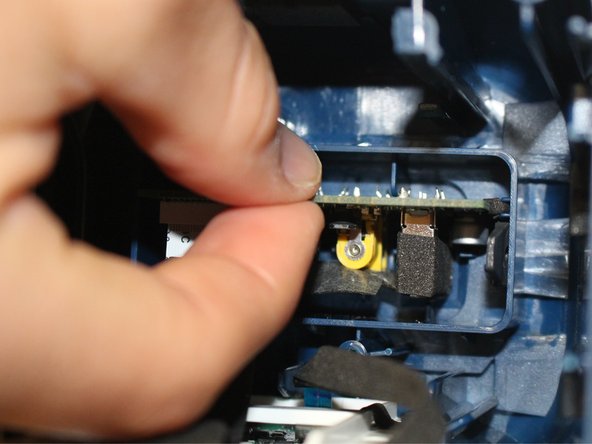
    • Unscrew the PH 1 (10 mm) screws from the black outer casing of the auxiliary port.

  9. Sony SRS-XB40 Auxiliary Input  Replacement: étape 9, image 1 de 2 Sony SRS-XB40 Auxiliary Input  Replacement: étape 9, image 2 de 2
    • After removing the screws, pry the black cover from the base of the speaker on both sides using a metal spudger.

  10. Sony SRS-XB40 Auxiliary Input  Replacement: étape 10, image 1 de 3 Sony SRS-XB40 Auxiliary Input  Replacement: étape 10, image 2 de 3 Sony SRS-XB40 Auxiliary Input  Replacement: étape 10, image 3 de 3
    • Once the black casing has been removed, you can pull the auxiliary port out of the inside of the speaker.

    • The Auxiliary input is attached to the USB port and reset button. One new part will replace all three components of the speaker.

Conclusion

To reassemble your device, follow these instructions in reverse order.

2 autres ont terminé cette réparation.

Shelby Ramsey

Membre depuis le 01/29/18

451 Réputation

2 tutoriels rédigés

Équipe

5 commentaires

Yea but where do I buy the aux input? You say one new part. They don’t offer it on the Sony parts supplier website. https://sony.encompass.com/model/SONSRSX...

Sean Pryor - Réponse

Where can i find the part to repair it?

michaelcyrdupuis - Réponse

I am trying to find the auxiliary port, I can’t find it anywhere right now.

tesolowski2000 - Réponse

Did you find one? If so where please?

kate_eskes -

Where can I source the aux in part? This is the same question as the last 3 comments! Have I missed something?

kate_eskes - Réponse

Ajouter un commentaire

Nombre de vues :

Dernières 24 heures : 1

7 derniers jours : 2

30 derniers jours : 12

Total : 2,128