Aller au contenu principal

Sony VAIO SVE14AJ16L RAM Replacement

Ce dont vous avez besoin

  1. Sony VAIO SVE14AJ16L RAM Replacement, RAM: étape 1, image 1 de 1
    • Turn your laptop off before starting.

    • Turn the laptop upside down onto the closed lid so that the bottom is facing you.

  2. Sony VAIO SVE14AJ16L RAM Replacement: étape 2, image 1 de 2 Sony VAIO SVE14AJ16L RAM Replacement: étape 2, image 2 de 2
    • Locate and remove the lone screw on the RAM cover with a Phillips #0 head screw driver.

    • Carefully pry the RAM cover up.

    • There will be some resistance, so use strength and not speed to remove the cover.

  3. Sony VAIO SVE14AJ16L RAM Replacement: étape 3, image 1 de 3 Sony VAIO SVE14AJ16L RAM Replacement: étape 3, image 2 de 3 Sony VAIO SVE14AJ16L RAM Replacement: étape 3, image 3 de 3
    Outil utilisé dans cette étape :
    iFixit Opening Tool
    $1.99
    J'achète
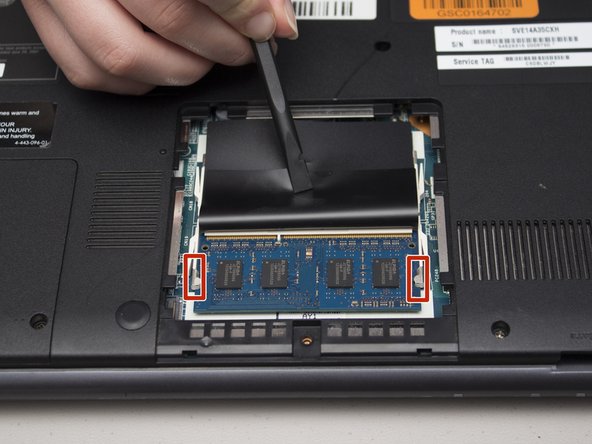
    • With the cover removed, peel back the black protective plastic to expose one of the two RAM sticks.

    • Make sure not to touch any part of the blue board itself, and only handle the stick from it's edges.

    • Gently, but firmly push back the two side anchors that hold in the RAM using either an iFixit Opening Tool or your fingernails.

  4. Sony VAIO SVE14AJ16L RAM Replacement: étape 4, image 1 de 2 Sony VAIO SVE14AJ16L RAM Replacement: étape 4, image 2 de 2
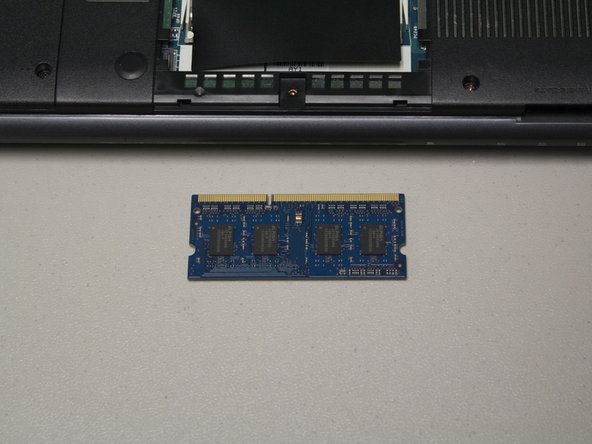
    • Once both anchors are released from the RAM stick, the stick will spring up at an angle

    • Finally, carefully pull the RAM stick away from the laptop at the same angle it is sitting at.

Conclusion

To reassemble your device, follow these instructions in reverse order.

Dustin Smith

Membre depuis le 09/21/18

236 Réputation

2 tutoriels rédigés

Équipe

0 commentaires

Ajouter un commentaire

Nombre de vues :

Dernières 24 heures : 0

7 derniers jours : 2

30 derniers jours : 3

Total : 534