Aller au contenu principal

Sony Vaio PCG-41216L Hard Drive Replacement

Ce dont vous avez besoin
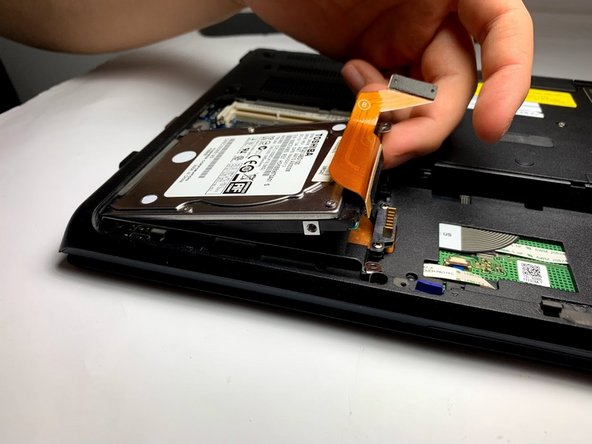
  1. Sony Vaio PCG-41216L Hard Drive Replacement, Hard Drive: étape 1, image 1 de 2 Sony Vaio PCG-41216L Hard Drive Replacement, Hard Drive: étape 1, image 2 de 2
    • Flip the laptop over to begin the process.

    • Make sure the laptop is turned off and unplugged from the power cable.

  2. Sony Vaio PCG-41216L Hard Drive Replacement: étape 2, image 1 de 3 Sony Vaio PCG-41216L Hard Drive Replacement: étape 2, image 2 de 3 Sony Vaio PCG-41216L Hard Drive Replacement: étape 2, image 3 de 3
    • Remove the two 7mm Phillips #1 screws holding the battery cover.

  3. Sony Vaio PCG-41216L Hard Drive Replacement: étape 3, image 1 de 3 Sony Vaio PCG-41216L Hard Drive Replacement: étape 3, image 2 de 3 Sony Vaio PCG-41216L Hard Drive Replacement: étape 3, image 3 de 3
    • Peel off the ribbon cable, starting at the top by the wifi card.

  4. Sony Vaio PCG-41216L Hard Drive Replacement: étape 4, image 1 de 3 Sony Vaio PCG-41216L Hard Drive Replacement: étape 4, image 2 de 3 Sony Vaio PCG-41216L Hard Drive Replacement: étape 4, image 3 de 3
    • Remove all of the 7mm Phillips #1 casing screws around the hard drive.

  5. Sony Vaio PCG-41216L Hard Drive Replacement: étape 5, image 1 de 1
    • Pull the hard drive out, then remove the 3mm Phillips screws that connect the hard drive to the casing.

Conclusion

To reassemble your device, follow these instructions in reverse order.

john nunnelee

Membre depuis le 01/10/19

174 Réputation

1 tutoriel rédigé

0 commentaires

Ajouter un commentaire

Nombre de vues :

Dernières 24 heures : 3

7 derniers jours : 10

30 derniers jours : 29

Total : 2,223