Aller au contenu principal

Sony Vaio VPC-Y2190X Hard Drive Replacement

Ce dont vous avez besoin

  1. Sony Vaio VPC-Y2190X Hard Drive Replacement, Battery: étape 1, image 1 de 1
    • Flip your laptop so that the bottom is facing up.

  2. Sony Vaio VPC-Y2190X Hard Drive Replacement: étape 2, image 1 de 1
    • Slide the “Lock” switch to the right.

    • Slide and hold the “Release” switch to the left.

  3. Sony Vaio VPC-Y2190X Hard Drive Replacement: étape 3, image 1 de 2 Sony Vaio VPC-Y2190X Hard Drive Replacement: étape 3, image 2 de 2
    • While holding the “Release” switch, lift the lip of the battery.

    • Lift the battery up and out of the laptop.

  4. Sony Vaio VPC-Y2190X Hard Drive Replacement, Hard Drive: étape 4, image 1 de 1
    • Using a #0PH screwdriver, unscrew the three 4.80mm screws on the back of the device.

    • The screws are held into the panel by washers, they will not fall out once unscrewed.

  5. Sony Vaio VPC-Y2190X Hard Drive Replacement: étape 5, image 1 de 1
    • Remove the panel.

    • Use the #0PH screwdriver to remove the four 3.61mm screws.

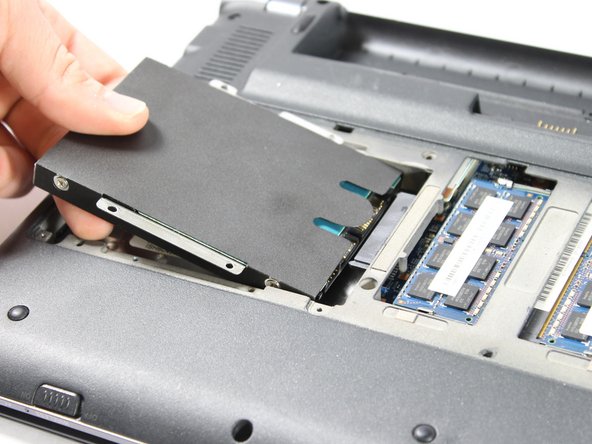
  6. Sony Vaio VPC-Y2190X Hard Drive Replacement: étape 6, image 1 de 2 Sony Vaio VPC-Y2190X Hard Drive Replacement: étape 6, image 2 de 2
    • Carefully lift the hard drive.

    • Remove the hard drive by pulling it to the left.

Conclusion

To reassemble your device, follow these instructions in reverse order.

Une autre personne a terminé cette réparation.

Kris Fleming

Membre depuis le 01/31/19

285 Réputation

2 tutoriels rédigés

0 commentaires

Ajouter un commentaire

Nombre de vues :

Dernières 24 heures : 1

7 derniers jours : 3

30 derniers jours : 5

Total : 340