Aller au contenu principal

Sony Vaio PCG-61411L RAM Replacement

Tutoriel Archivé
Ce tutoriel est conservé uniquement à des fins de suivis historiques. Utilisez la version actuelle du tutoriel pour effectuer votre réparation.

Ce dont vous avez besoin

  1. Sony Vaio PCG-61411L RAM Replacement, Battery: étape 1, image 1 de 3 Sony Vaio PCG-61411L RAM Replacement, Battery: étape 1, image 2 de 3 Sony Vaio PCG-61411L RAM Replacement, Battery: étape 1, image 3 de 3
    • Be sure to disconnect the device charger and power down the device before beginning.

    • Turn the device over onto its back, where the battery is at the top of the device. Slide the "lock" switch to the right.

  2. Sony Vaio PCG-61411L RAM Replacement: étape 2, image 1 de 3 Sony Vaio PCG-61411L RAM Replacement: étape 2, image 2 de 3 Sony Vaio PCG-61411L RAM Replacement: étape 2, image 3 de 3
    • Slide the "release" switch to the left and gently lift the battery up to remove it.

    • Completely remove the battery from the device.

  3. Sony Vaio PCG-61411L RAM Replacement, RAM: étape 3, image 1 de 1
    • The RAM cards reside in the rectangle shaped plate in the center of the back panel of the device.

  4. Sony Vaio PCG-61411L RAM Replacement: étape 4, image 1 de 2 Sony Vaio PCG-61411L RAM Replacement: étape 4, image 2 de 2
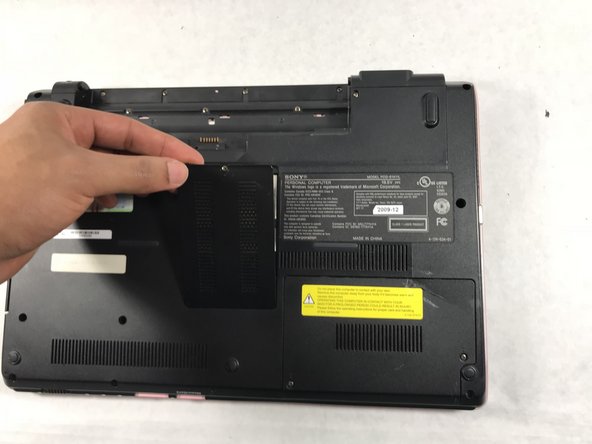
    • Unscrew the single PH1 6mm screw at the top of the panel. The screw remains in the panel.

    • Remove the panel by lifting it towards yourself.

  5. Sony Vaio PCG-61411L RAM Replacement: étape 5, image 1 de 3 Sony Vaio PCG-61411L RAM Replacement: étape 5, image 2 de 3 Sony Vaio PCG-61411L RAM Replacement: étape 5, image 3 de 3
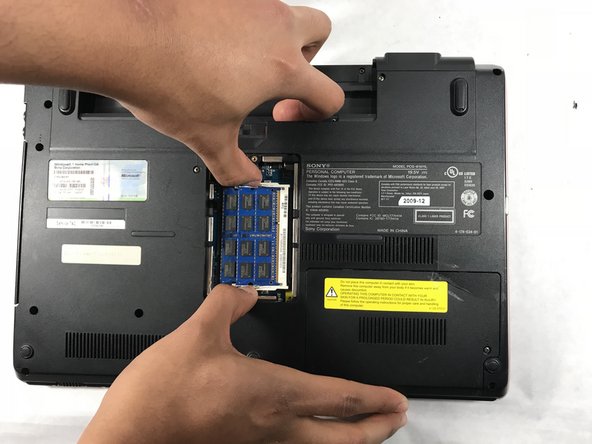
    • To remove the individual RAM card panels, snap back the metal latches on each side of the cards.

  6. Sony Vaio PCG-61411L RAM Replacement: étape 6, image 1 de 2 Sony Vaio PCG-61411L RAM Replacement: étape 6, image 2 de 2
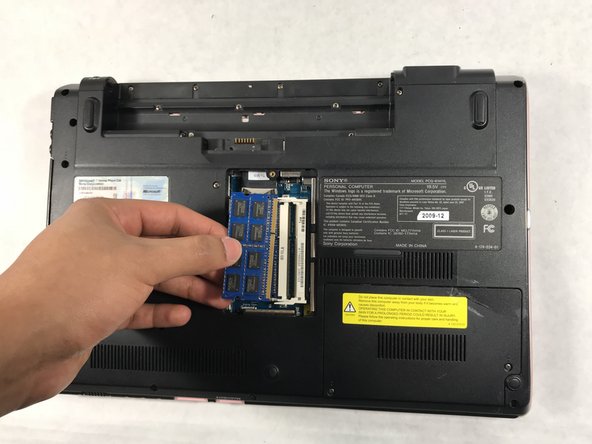
    • After pinching the metal latches, the RAM card should pop out slightly upward.

    • Remove the cards by pulling them out to the left.

    • Repeat for the second panel of RAM cards.

Conclusion

To reassemble your device, follow these instructions in reverse order.

Sean Lyon

Membre depuis le 03/01/18

381 Réputation

3 tutoriels rédigés

Équipe

UMass Dartmouth, Team S2-G1, Simcock Spring 2018 Membre de l'équipe UMass Dartmouth, Team S2-G1, Simcock Spring 2018

UMASSD-SIMCOCK-S18S2G1

3 membres

5 tutoriels rédigés

0 commentaires

Ajouter un commentaire

Nombre de vues :

Dernières 24 heures : 0

7 derniers jours : 1

30 derniers jours : 1

Total : 1,147