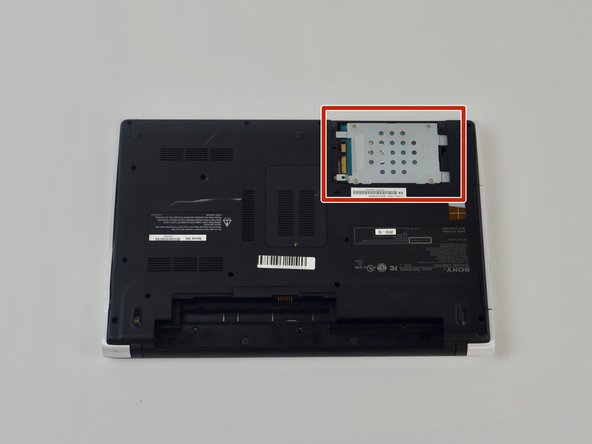
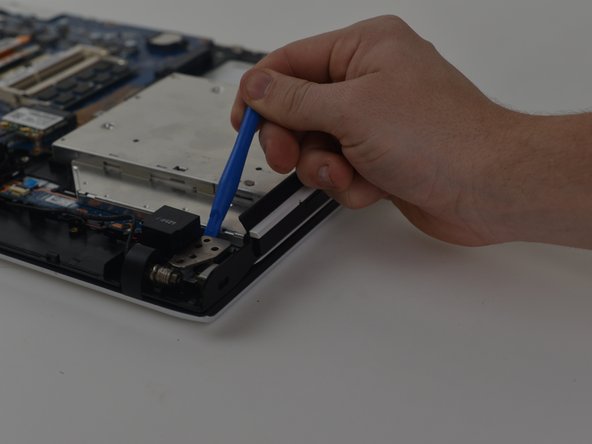
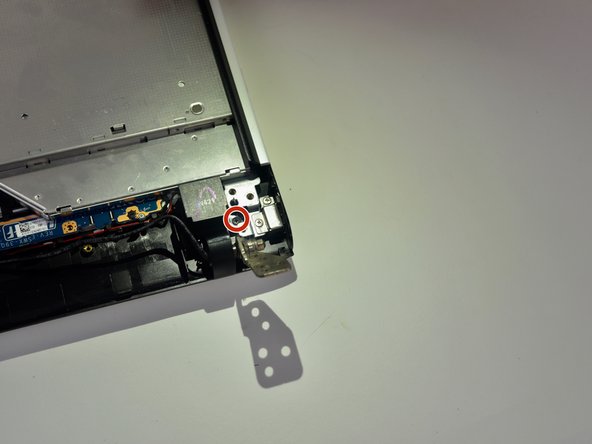
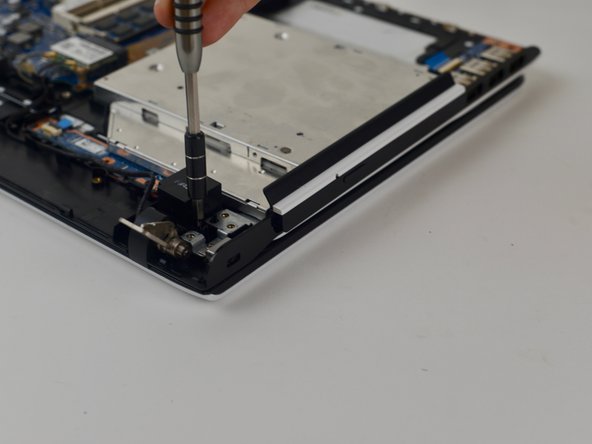
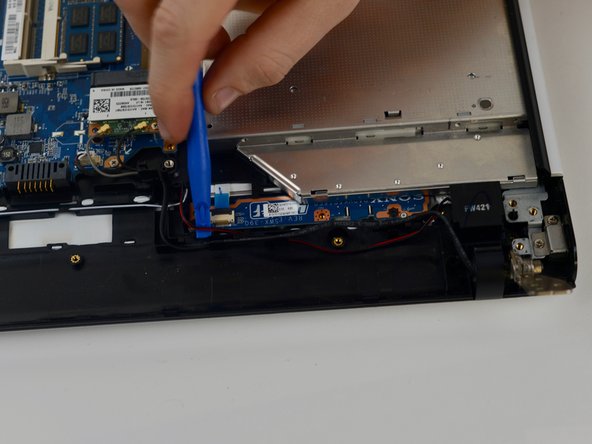
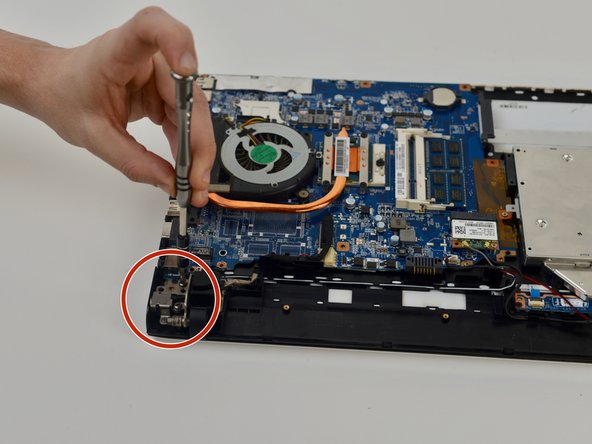
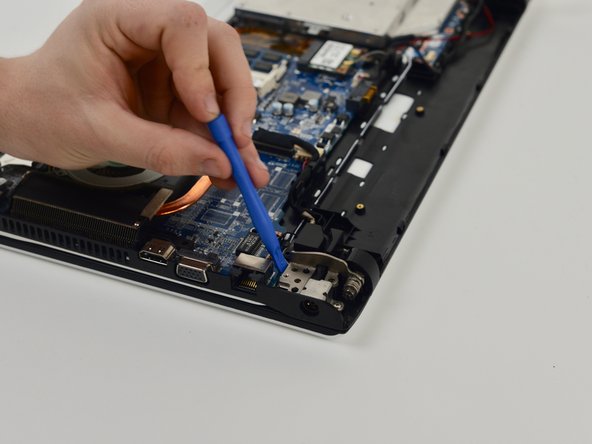
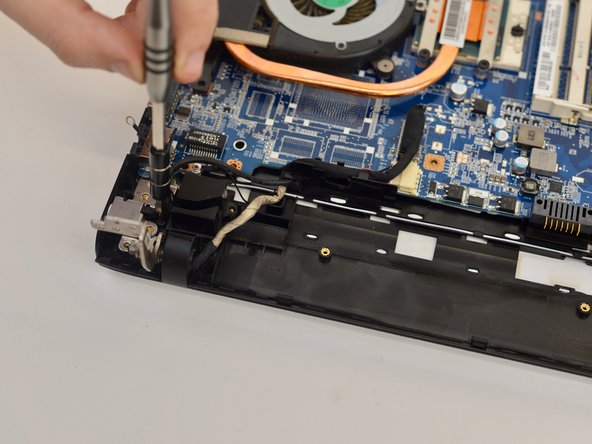
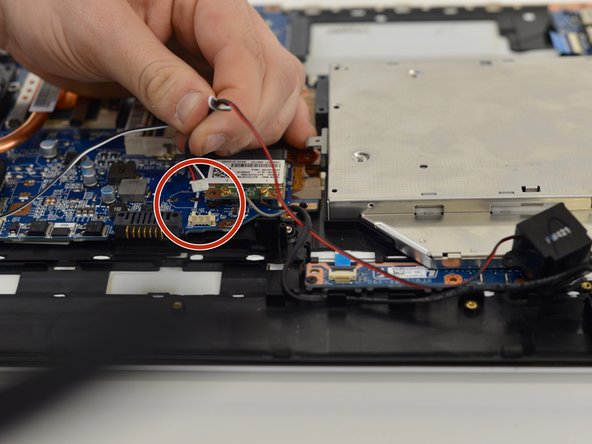
Aller au contenu principal

Sony Vaio SVE151G11L Speaker Replacement

Ce dont vous avez besoin

  1. Sony Vaio SVE151G11L Speaker Replacement, Battery: étape 1, image 1 de 1
    • Turn the laptop over so its underside is facing upwards and visible.

  2. Sony Vaio SVE151G11L Speaker Replacement: étape 2, image 1 de 1
    • Standing so that the barcode and warning labels are upright and legible, push the left tab up and away from yourself.

  3. Sony Vaio SVE151G11L Speaker Replacement: étape 3, image 1 de 1
    • Standing so that the barcode and warning labels are upright and legible, push the right tab up and away from yourself.

  4. Sony Vaio SVE151G11L Speaker Replacement: étape 4, image 1 de 1
    • Locate the small gap where the battery and the laptop shell meet. Lift from the gap and rotate the battery up and away from yourself.

  5. Sony Vaio SVE151G11L Speaker Replacement: étape 5, image 1 de 1
    • Pull battery away from laptop.

  6. Sony Vaio SVE151G11L Speaker Replacement, Hard Disk Drive: étape 6, image 1 de 1
    • Flip laptop over so the bottom is facing upwards.

  7. Sony Vaio SVE151G11L Speaker Replacement: étape 7, image 1 de 1
    • Remove 2 bottom screws in the top right on the HDD cover, with a size P000 screwdriver.

  8. Sony Vaio SVE151G11L Speaker Replacement: étape 8, image 1 de 2 Sony Vaio SVE151G11L Speaker Replacement: étape 8, image 2 de 2
    • Pop open the cover to the HDD.

  9. Sony Vaio SVE151G11L Speaker Replacement: étape 9, image 1 de 1
    • Remove the screws on the HDD with a Phillips #000 screwdriver.

  10. Sony Vaio SVE151G11L Speaker Replacement: étape 10, image 1 de 2 Sony Vaio SVE151G11L Speaker Replacement: étape 10, image 2 de 2
    • Pull plastic tab away from the laptop.

    • Lift HDD away from laptop.

  11. Sony Vaio SVE151G11L Speaker Replacement, Speakers: étape 11, image 1 de 3 Sony Vaio SVE151G11L Speaker Replacement, Speakers: étape 11, image 2 de 3 Sony Vaio SVE151G11L Speaker Replacement, Speakers: étape 11, image 3 de 3
    • Remove the back cover.

  12. Sony Vaio SVE151G11L Speaker Replacement: étape 12, image 1 de 2 Sony Vaio SVE151G11L Speaker Replacement: étape 12, image 2 de 2
    • Remove 4 hinge screws with a Phillips #0 screwdriver.

  13. Sony Vaio SVE151G11L Speaker Replacement: étape 13, image 1 de 3 Sony Vaio SVE151G11L Speaker Replacement: étape 13, image 2 de 3 Sony Vaio SVE151G11L Speaker Replacement: étape 13, image 3 de 3
    • Pop open hinge.

    • Remove black screw size P000.

  14. Sony Vaio SVE151G11L Speaker Replacement: étape 14, image 1 de 2 Sony Vaio SVE151G11L Speaker Replacement: étape 14, image 2 de 2
    • Remove wiring along its guide.

  15. Sony Vaio SVE151G11L Speaker Replacement: étape 15, image 1 de 3 Sony Vaio SVE151G11L Speaker Replacement: étape 15, image 2 de 3 Sony Vaio SVE151G11L Speaker Replacement: étape 15, image 3 de 3
    • Remove two hinge screws size P00.

    • Pop open hinge.

  16. Sony Vaio SVE151G11L Speaker Replacement: étape 16, image 1 de 2 Sony Vaio SVE151G11L Speaker Replacement: étape 16, image 2 de 2
    • Remove black screw.

  17. Sony Vaio SVE151G11L Speaker Replacement: étape 17, image 1 de 2 Sony Vaio SVE151G11L Speaker Replacement: étape 17, image 2 de 2
    • Remove secondary black screw.

  18. Sony Vaio SVE151G11L Speaker Replacement: étape 18, image 1 de 1
    • Remove speaker.

  19. Sony Vaio SVE151G11L Speaker Replacement: étape 19, image 1 de 2 Sony Vaio SVE151G11L Speaker Replacement: étape 19, image 2 de 2
    • Follow wire down its wire channel and remove it from the channel.

    • Pull up on the connector to disconnect the speakers to the motherboard.

  20. Sony Vaio SVE151G11L Speaker Replacement: étape 20, image 1 de 1
    • Remove speaker and wire from the laptop.

Conclusion

To reassemble your device, follow these instructions in reverse order.

Une autre personne a terminé cette réparation.

Alex Theg

Membre depuis le 10/15/18

758 Réputation

4 tutoriels rédigés

Équipe

UMass Dartmouth, Team S9-G9, Valliere Fall 2018 Membre de l'équipe UMass Dartmouth, Team S9-G9, Valliere Fall 2018

UMASSD-VALLIERE-F18S9G9

4 membres

12 tutoriels rédigés

0 commentaires

Ajouter un commentaire

Nombre de vues :

Dernières 24 heures : 0

7 derniers jours : 2

30 derniers jours : 9

Total : 398