Introduction
Comment retirer le lecteur optique d’un ordinateur portable Sony Vaio VGN-S260.
Ce dont vous avez besoin
-
-
Retournez l’ordinateur portable de sorte que le logo Vaio soit orienté vers le bas.
-
Repérez la batterie sur la partie supérieure et repérez le loquet de déverrouillage et le loquet d’éjection sur la batterie.
-
Faites glisser le loquet de déverrouillage en position déverrouillée.
-
Faites glisser le loquet d’éjection dans la direction indiquée par la flèche, c. -à-d, en direction du loquet de de déverrouillage.
-
-
-
Retournez l’ordinateur portable de sorte que le logo Vaio soit orienté vers le bas.
-
Dévissez les deux vis près du compartiment de la batterie.
-
-
-
Appuyez sur la coque externe grise autour du clavier.
-
Utilisez un spudger pour soulever délicatement le clavier.
There are 2 spring-held latches, one above the F4 and one above the F12. Push a latch up into the frame of the keyboard, then lift the keyboard gently in that area so the latch doesn't spring back. Then push the other latch and the keyboard will be released.
-
-
-
-
Faites pivoter l’ordinateur de sorte que le logo Vaio soit orienté vers le bas.
-
Repérez et retirez un total de 8 vis sur la partie inférieure du boîtier.
There are 2 more screws on the bottom, one in the middle of the front next to the flash stick socket, and one under the memory door.
-
-
-
Retournez l’ordinateur portable de sorte que le logo Vaio soit orienté vers le haut.
-
Utilisez un spudger pour détacher la partie supérieure du boîtier.
-
Débranchez la nappe de connexion qui relie la partie supérieure du boîtier à la carte mère.
There are also 5 screws from the top of the uppercasing.
The are 4 cables to remove: flat cable for the power and S buttons at top center; flat cable for the touchpad at bottom center; and 2 twisted pairs for the speakers.
The speaker cable socket is very delicate. If all you are getting at is the CPU or the hard drive, it may be enough to disconnect the flat cables and gently rotate the uppercasing shifting it left to allow access to the right-hand side with the CPU fan and the hard drive.
The top panel has cutouts that allow the cables to be disconnected before the top of the case is removed. The two flat cables are not clamped and can be pulled vertically out of their connectors. The delicate speaker cables are connected to the motherboard with plugs which can be gently levered up out of their sockets.
-
-
-
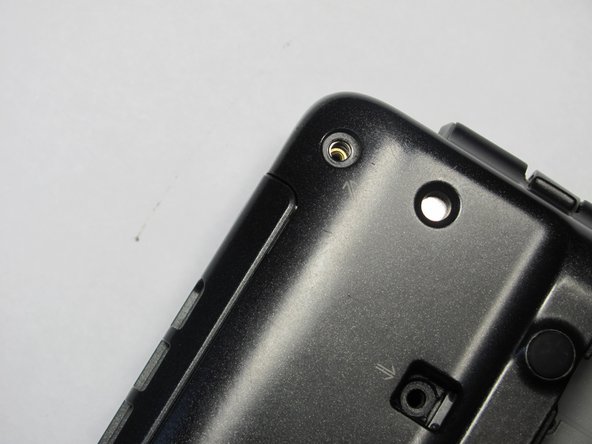
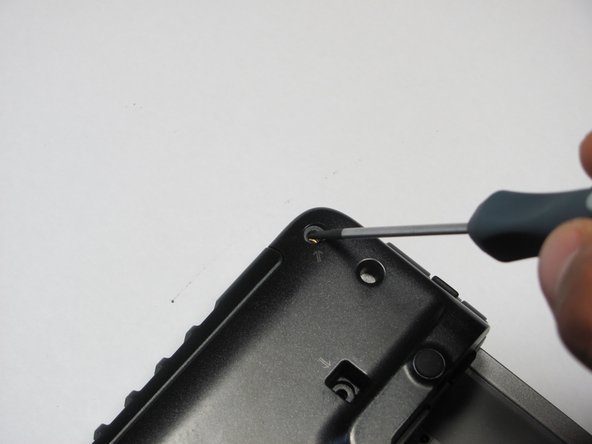
Retirez la vis qui maintient le support de montage du lecteur optique à la carte mère.
This screw is from the bottom, will not be there since you removed it to get the uppercasing.
However, there is a screw on the bottom right of the PC-CARD cage to remove.
-


Pour remonter votre appareil, suivez ces instructions dans l’ordre inverse.
Pour remonter votre appareil, suivez ces instructions dans l’ordre inverse.
Annulation : je n'ai pas terminé ce tutoriel.
Une autre personne a terminé cette réparation.
Merci à ces traducteurs :
100%

Brendan nous aide à réparer le monde ! Vous voulez contribuer ?
Commencez à traduire ›

Équipe

Cal Poly, Team 16-4, Maness Spring 2010 Membre de l'équipe Cal Poly, Team 16-4, Maness Spring 2010
CPSU-MANESS-S10S16G4
4 membres
30 tutoriels rédigés