Aller au contenu principal

Sony Xperia TL Camera Replacement

Ce dont vous avez besoin

  1. Sony Xperia TL Camera Replacement, Remove Top Plastic Section: étape 1, image 1 de 3 Sony Xperia TL Camera Replacement, Remove Top Plastic Section: étape 1, image 2 de 3 Sony Xperia TL Camera Replacement, Remove Top Plastic Section: étape 1, image 3 de 3
    • Use the plastic opening tool to pry the top plastic section off.

  2. Sony Xperia TL Camera Replacement, Remove Bottom Plastic Section: étape 2, image 1 de 2 Sony Xperia TL Camera Replacement, Remove Bottom Plastic Section: étape 2, image 2 de 2
    • Use the plastic opening tool to pry the bottom plastic section off.

  3. Sony Xperia TL Camera Replacement, Unscrewing the Back Off: étape 3, image 1 de 3 Sony Xperia TL Camera Replacement, Unscrewing the Back Off: étape 3, image 2 de 3 Sony Xperia TL Camera Replacement, Unscrewing the Back Off: étape 3, image 3 de 3
    • Remove the four 5mm screws.

    • Use the plastic opening tool to pry off the back.

  4. Sony Xperia TL Camera Replacement, Battery: étape 4, image 1 de 3 Sony Xperia TL Camera Replacement, Battery: étape 4, image 2 de 3 Sony Xperia TL Camera Replacement, Battery: étape 4, image 3 de 3
    • Use the plastic opening tool to detach the ribbon running across the battery.

    • Use the plastic opening tool to detach the ribbon connecting the battery to the motherboard.

  5. Sony Xperia TL Camera Replacement, Sony Xperia TL Auxiliary Cord Replacement: étape 5, image 1 de 2 Sony Xperia TL Camera Replacement, Sony Xperia TL Auxiliary Cord Replacement: étape 5, image 2 de 2
    • Use the plastic opening tool to unlatch the cord's ends off the motherboard and loud speaker module. The cord can be located on the right side of the phone.

  6. Sony Xperia TL Camera Replacement, Motherboard: étape 6, image 1 de 3 Sony Xperia TL Camera Replacement, Motherboard: étape 6, image 2 de 3 Sony Xperia TL Camera Replacement, Motherboard: étape 6, image 3 de 3
    • Use the Phillips #00 to remove the 3 5mm screws.

    • Lift the plastic cover off.

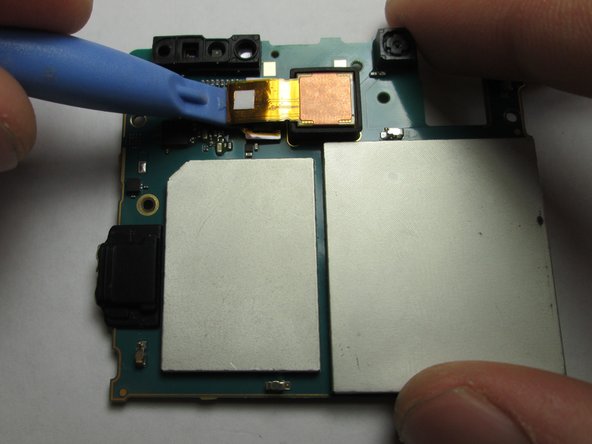
    • Use the plastic opening tool to pry the motherboard out of the phone shell.

  7. Sony Xperia TL Camera Replacement, Camera: étape 7, image 1 de 3 Sony Xperia TL Camera Replacement, Camera: étape 7, image 2 de 3 Sony Xperia TL Camera Replacement, Camera: étape 7, image 3 de 3
    • 'Use the plastic opening tool to detach the camera from the motherboard.'

    • The camera attachment is on the back of the motherboard.

Conclusion

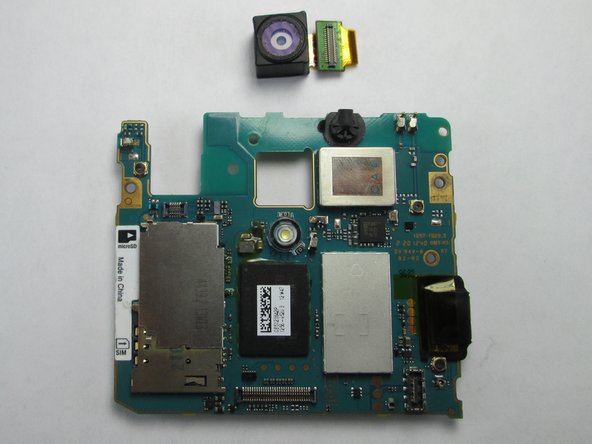
To reassemble your device, follow these instructions in reverse order.

2 autres ont terminé cette réparation.

Adam Giniger

Membre depuis le 09/22/14

1 303 Réputation

8 tutoriels rédigés

Équipe

USF Tampa, Team 4-4, Brown Fall 2014 Membre de l'équipe USF Tampa, Team 4-4, Brown Fall 2014

USFT-BROWN-F14S4G4

3 membres

10 tutoriels rédigés

0 commentaires

Ajouter un commentaire

Nombre de vues :

Dernières 24 heures : 0

7 derniers jours : 0

30 derniers jours : 0

Total : 196