Aller au contenu principal

Sony Xperia XA1 Ultra Loudspeaker Replacement

Ce dont vous avez besoin

  1. Sony Xperia XA1 Ultra Loudspeaker Replacement, Back Assembly: étape 1, image 1 de 2 Sony Xperia XA1 Ultra Loudspeaker Replacement, Back Assembly: étape 1, image 2 de 2
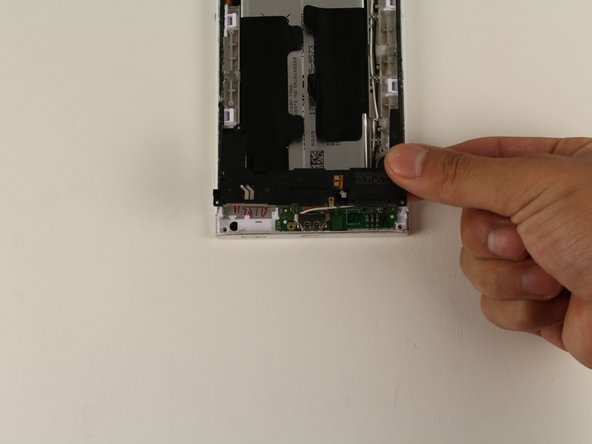
    • Wedge your finger under the bottom ridge of the SD card insert.

    • Pull outwards with your fingers to remove the SD card from the left side of device.

  2. Sony Xperia XA1 Ultra Loudspeaker Replacement: étape 2, image 1 de 1
    • Use a hair dryer to heat each corner of the phone.

    • Alternate heating each corner for a minute to loosen the adhesive binding the back cover to the phone.

    • Don't heat one area for too long; the phone may get damaged from overheating.

  3. Sony Xperia XA1 Ultra Loudspeaker Replacement: étape 3, image 1 de 1
    • Press a suction cup on a heated corner of the device.

    • Hold the phone down and gently lift the suction cup to create a small gap.

    • You may hear crunching or popping sounds when you lift up the back cover.

  4. Sony Xperia XA1 Ultra Loudspeaker Replacement: étape 4, image 1 de 1
    Outil utilisé dans cette étape :
    Plastic Cards
    $2.99
    J'achète
    • Insert your iFixit Opening Tool in the small gap between your phone and the back cover.

    • Lift up on the iFixit Opening Tool and insert your plastic card in the small gap between your phone and the back cover.

  5. Sony Xperia XA1 Ultra Loudspeaker Replacement: étape 5, image 1 de 1
    • Slide your plastic card along the side of your phone to loosen the adhesive.

    • Move the card along the sides of the phone to lift all of the corners.

  6. Sony Xperia XA1 Ultra Loudspeaker Replacement: étape 6, image 1 de 1
    • Lift up the back cover by lifting up the sides of the phone with your hand.

    • Apply a new strip of adhesive for reassembly.

  7. Sony Xperia XA1 Ultra Loudspeaker Replacement, Loudspeaker: étape 7, image 1 de 1
    • Remove the five 4mm T5 screws connecting the speaker to your phone.

  8. Sony Xperia XA1 Ultra Loudspeaker Replacement: étape 8, image 1 de 2 Sony Xperia XA1 Ultra Loudspeaker Replacement: étape 8, image 2 de 2
    • Insert your iFixit Opening Tool underneath the speaker and gently lift up.

    • Once the speaker is slightly lifted, use your hands to remove the piece from the device.

Conclusion

To reassemble your device, follow these instructions in reverse order.

Une autre personne a terminé cette réparation.

Jacob Jung

Membre depuis le 04/18/18

1 429 Réputation

9 tutoriels rédigés

Équipe

Cal Poly, Team S16-G3, Livingston Spring 2018 Membre de l'équipe Cal Poly, Team S16-G3, Livingston Spring 2018

CPSU-LIVINGSTON-S18S16G3

4 membres

9 tutoriels rédigés

0 commentaires

Ajouter un commentaire

Nombre de vues :

Dernières 24 heures : 0

7 derniers jours : 0

30 derniers jours : 5

Total : 954