Ce dont vous avez besoin
-
Cette étape n’est pas traduite. Aidez à la traduire
-
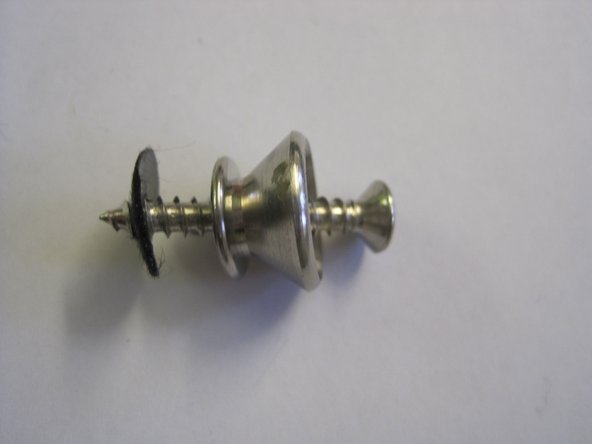
Pull off the end cap on the pickup selector.
-
Note: This is not how the switch should normally look. This one is bent slightly; the tip should be pointing straight up.
-
-
Cette étape n’est pas traduite. Aidez à la traduire
-
Unscrew the three bolts holding the tone/volume potentiometers to the scratch plate.
-
-
Cette étape n’est pas traduite. Aidez à la traduire
-
Remove the 3 washers from the tone/volume potentiometers
-
-
Cette étape n’est pas traduite. Aidez à la traduire
-
Unscrew the eight screws which hold the pick guard to the main body.
-
-
Cette étape n’est pas traduite. Aidez à la traduire
-
Unscrew the two screws holding the pickup selector in place.
-
-
Cette étape n’est pas traduite. Aidez à la traduire
-
unscrew the six screws holding the three pickups in place.
-
-
Cette étape n’est pas traduite. Aidez à la traduire
-
Lift off the scratch plate, revealing the electronics inside the main body
-
-
Cette étape n’est pas traduite. Aidez à la traduire
-
Another method of dis-assembly: remove the pickguard screws (leaving pickup screws, pots and switch untouched).
-
Remove the jack plate, desolder or cut the output jack wires, flip over the guitar and desolder the ground wire on the tremolo. Remove the pickguard with all electronics attached.
-
This method gives easy access to do electronics repairs/mods, without having to readjust pickup heights and individual components won't move around when you're soldering.
-
-
-
Cette étape n’est pas traduite. Aidez à la traduire
-
Remove the springs which were on the underside of the pickups.
-
-
Cette étape n’est pas traduite. Aidez à la traduire
-
Unscrew the two screws holding the lead input cover in place and lift off the cover.
-
-
Cette étape n’est pas traduite. Aidez à la traduire
-
Unscrew the input threaded bolt, which holds the output jack in place.
-
-
Cette étape n’est pas traduite. Aidez à la traduire
-
Unscrew the screw holding the bottom strap button in position.
-
-
Cette étape n’est pas traduite. Aidez à la traduire
-
Carry out the same process to remove the top strap button.
-
-
Cette étape n’est pas traduite. Aidez à la traduire
-
Remove the six screws securing the bridge to the body.
-
-
Cette étape n’est pas traduite. Aidez à la traduire
-
Take out the six screws holding the white back plate in place.
-
-
Cette étape n’est pas traduite. Aidez à la traduire
-
Remove the three tremolo springs from the spring claw and tremolo block.
-
-
Cette étape n’est pas traduite. Aidez à la traduire
-
Unscrew the two screws holding the spring claw to the body.
-
-
Cette étape n’est pas traduite. Aidez à la traduire
-
Undo the 6 screws holding the saddles to the bridge. Then remove the spring and unscrew the 12 threaded bars.
-
-
Cette étape n’est pas traduite. Aidez à la traduire
-
Remove the four wood screws holding the neck to the body of the guitar.
-
-
Cette étape n’est pas traduite. Aidez à la traduire
-
Unscrew the two small screws securing the string trees to the headstock.
-
-
Cette étape n’est pas traduite. Aidez à la traduire
-
Unscrew the tuner bushings with a 10mm hex driver
-
-
Cette étape n’est pas traduite. Aidez à la traduire
-
Push the tuners from the front to pop them loose. It make take a bit of force if the alignment peg is stuck. Some use screws instead.
-
-
Cette étape n’est pas traduite. Aidez à la traduire
-
Remove the tension screw followed by the tuner button, metal and then fiber washer.
-


10 commentaires
Awesome teardown! Keep up the good work!
totally agree
lon -
Great for a "tear-down" per-se, but horrible first steps for anyone to use to get inside their Fender Strat.
To get inside, don't unscrew every screw from the surface as is described here. The faceplate of a Fender Strat (and many other guitars) holds all the electronics to itself, so you only need to undo the screws around the edges and then lift off the faceplate to get to everything inside. From here you can remove the components that matter and solder or re-wire as is necessary, and then replace the faceplate as a single unit.
The steps in this article will lead to far more work than is necessary if you plan on fixing or replacing aspects of the guitar.
when I pulled off the knobs they pulled out a metal pin and the pin will not come out of the knob and I cant get the knob and pin to go back in
I'm having the same problem. Does anyone know the fix or have you found a solution?
Manny OK -