Introduction
If you ever find that the bumpers on your Steam Controller are not being sensed in game, it's likely that the plastic mount holding the trigger and resting over the physical button on the circuit board has broken. This guide goes through how to take apart and replace the faulty part with a 3D printed replacement.
Ce dont vous avez besoin
-
-
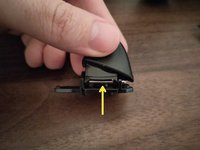
Slide the lever on the bottom to the side to pop out the back cover.
-
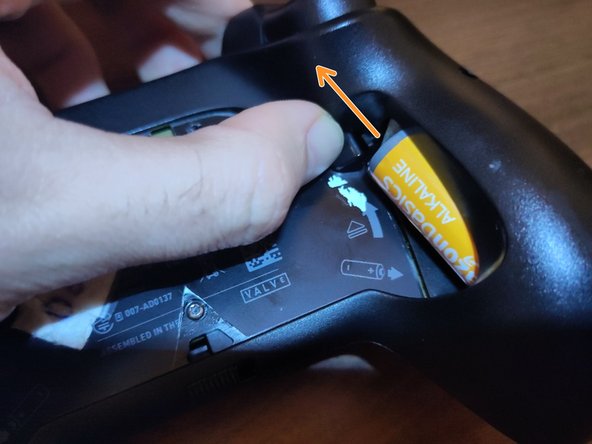
If the controller has batteries, push up on the black levers next to the battery to pop them out and remove them.
-
-
-
Use a Torx T6 screwdriver to remove the three screws inside the back cover, and the four screws around the handles.
-
If you never opened the controller before, the screws are hidden underneath the sticker. Either cleanly remove the sticker using Goo-Gone, or punch through the sticker with the screwdriver or a thin blade at these locations to expose the pre-drilled holes.
-
-
-
The back cover can be removed. Be careful that the release levers for the batteries may be hanging onto the back cover, or they could fall off.
-
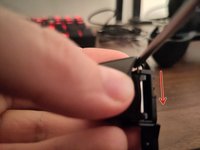
If you're struggling to remove the back chassis, you can use a spudger or prying tool to separate the two parts.
-
Use the Torx T6 screwdriver to remove four more screws, two up by the trigger mounts and two more lower down by the handles.
-
-
-
-
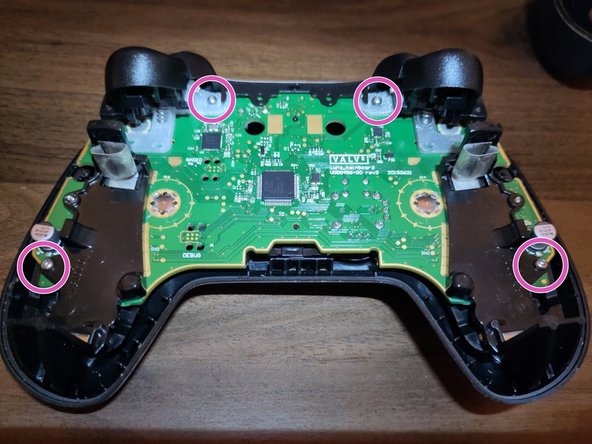
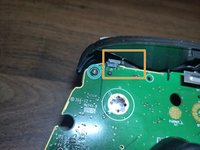
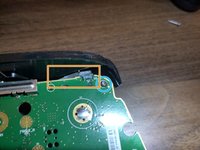
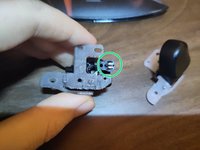
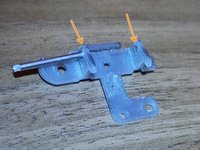
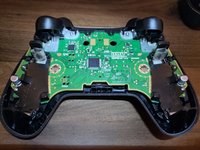
Turn the printed circuit board over, and remove two Torx T6 screws in the top corners holding the trigger mounts in place.
-
If you do NOT see some rectangular plastic piece resting on the bumper button on the printed circuit board, your controller's bumper is likely broken.
-
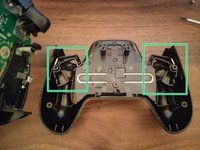
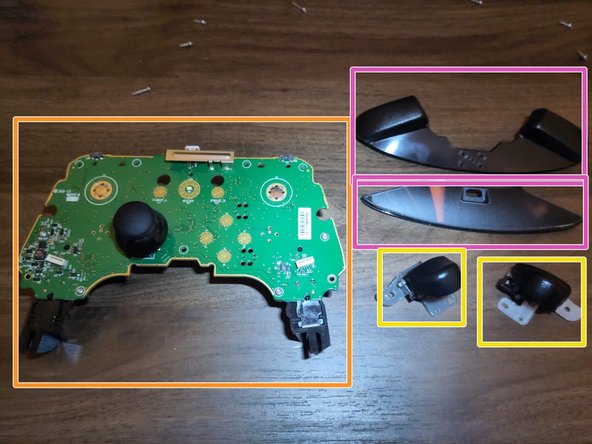
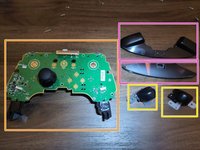
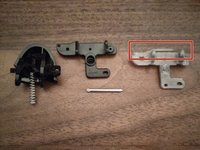
Once the screws are removed, we should have:
-
the printed circuit board,
-
trigger mounts,
-
and the top bar assembly holding the micro USB charging pre-drilled hole and outside bumper buttons. These are technically two pieces, but they sandwich together easily at four square points in the middle.
-
-
-
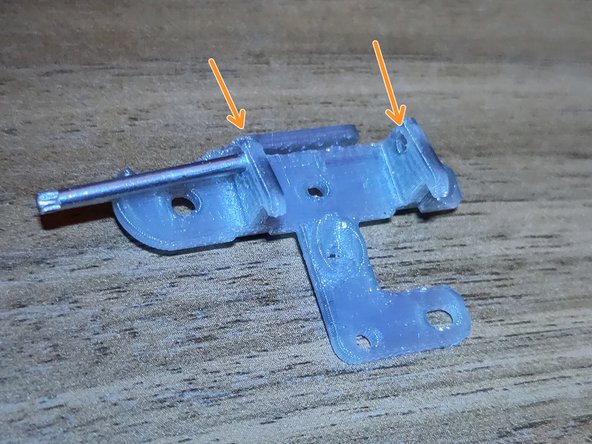
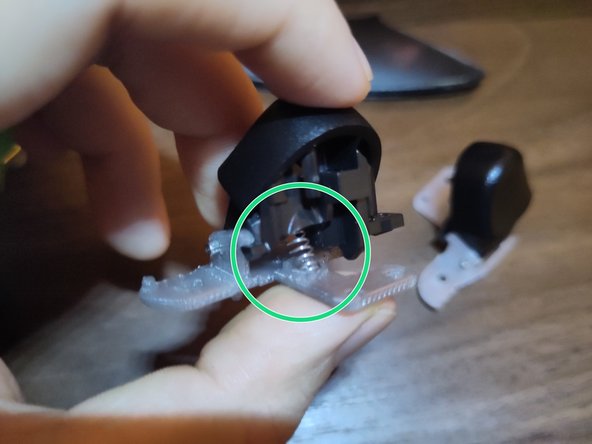
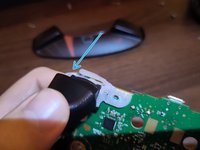
The trigger mount assembly comes in two parts: the trigger itself, and the ground plane around it which also acts as the bumper button. The ground plane is going to be replaced.
-
Remove the trigger mechanism by sliding out the metal horizontal bar. Use a long, sturdy bar to place in the gap against the side of the bar, then apply steady pressure to the bar until it slides out the other side.
-
-
-
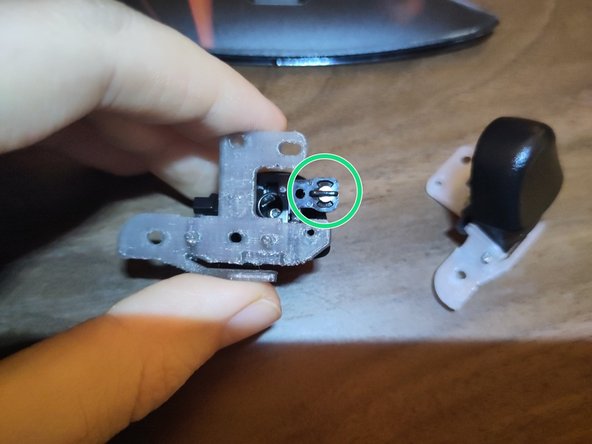
Pictured is the disassembled trigger mount, next to a 3D printed replacement ground plane, which will act as the RB or LB of the controller.
-
Notice the rectangular flange hanging on the top of the 3D printed ground plane. And notice how it's missing from the original piece; it's broken off, making the bumper button impossible to press normally.
-
This will lay between the actual button on the printed circuit board and the outer bumper button when the controller is reassembled.
-
The metal bar from the trigger will slide across the two holes on the replacement part.
-
In case the drilled holes are too small or tight, apply some lubricant grease to the inside of the holes. The bar should slide through the holes of the trigger mount and the two slots from the bottom of the plane.
-
Make sure that the spring is between the deep divet on the trigger and the larger half-hole in at the top of the L on the ground plane as you place the trigger in between the trigger and plane.
-
-
-
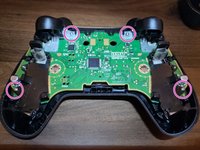
Replace the new mounts onto the respective corner of the back of the printed circuit board, and while it's laid flat, tighten a screw into the corner through the mount and the printed circuit board to hold the trigger assembly in place.
-
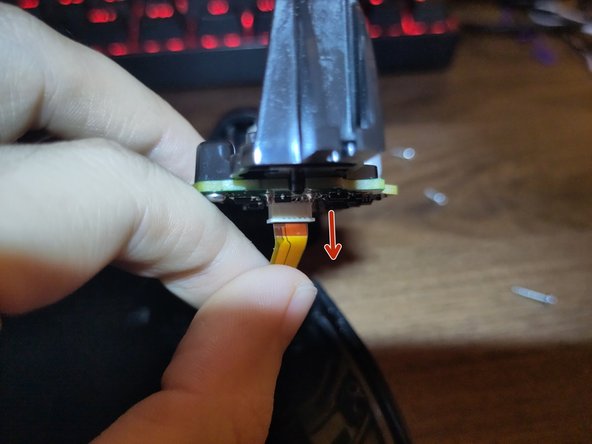
Start laying the top of the printed circuit board back onto the front of the controller, and reattach the trackpad ribbon cables carefully.
-
Ensure that the button mesh and the release lever popper at the bottom are laid in place.
-
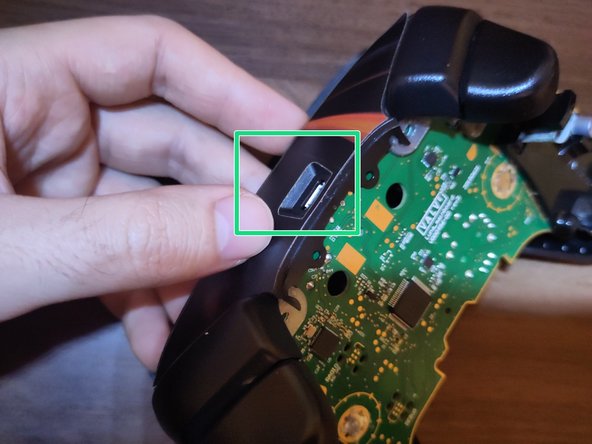
Lift up the top of the circuit board, and replace the USB port cover two-piece over the top of the printed circuit. Ensure that it goes over the bumper levers of the trigger mounts, and that the micro USB port is flush.
-
Replace the four T6 screws attached to the trigger mounts and the back of the PCB through the front chassis.
-
-
-
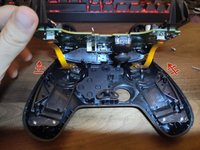
To get the back chassis on, place the release levers inside the upper posts on the sides of the grip like so, then lay the chassis flat and place the top of the controller right into the chassis.
-
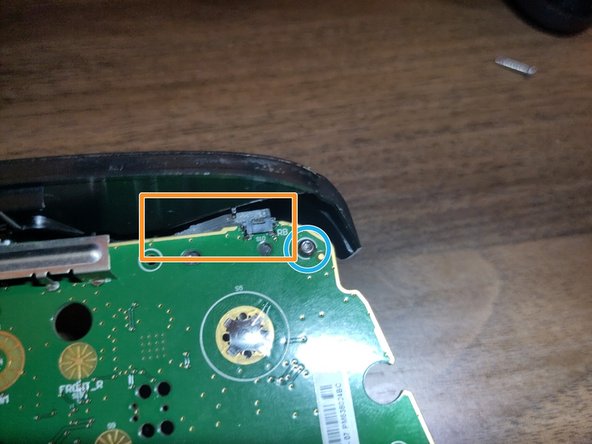
Ensure that you still have the little spring on the battery cover release lever on the bottom, or the battery cover may not stay in place when reattached.
-


Reinsert batteries, ensure the device still turns on, and check the bumper buttons are functioning in Steam Settings.
Reinsert batteries, ensure the device still turns on, and check the bumper buttons are functioning in Steam Settings.
Annulation : je n'ai pas terminé ce tutoriel.
2 autres ont terminé cette réparation.
