Aller au contenu principal

TCL Stylus Battery Replacement

Ce dont vous avez besoin

    • Press and hold the Power button for 2 seconds.

    • Then, select "Power off".

  1. TCL Stylus Battery Replacement, Remove back panel: étape 2, image 1 de 3 TCL Stylus Battery Replacement, Remove back panel: étape 2, image 2 de 3 TCL Stylus Battery Replacement, Remove back panel: étape 2, image 3 de 3
    • Insert a jimmy tool into the casing to create a gap.

    • Then, put a plastic pick in the gap and remove the jimmy tool.

    • Finally, lift up to remove the panel.

  2. TCL Stylus Battery Replacement, Remove plastic shielding: étape 3, image 1 de 2 TCL Stylus Battery Replacement, Remove plastic shielding: étape 3, image 2 de 2
    • Remove the 10 Phillips screws holding the plastic shielding from the motherboard.

    • Then, grab a pick and put in in the slot show on picture 2.

    • You should then be able to lift the rest of it off.

  3. TCL Stylus Battery Replacement, Unplug battery: étape 4, image 1 de 2 TCL Stylus Battery Replacement, Unplug battery: étape 4, image 2 de 2
    • With your fingernail, lift up the battery connector.

  4. TCL Stylus Battery Replacement, Unpeel tape: étape 5, image 1 de 2 TCL Stylus Battery Replacement, Unpeel tape: étape 5, image 2 de 2
    • Unpeel the tape holding the battery.

  5. TCL Stylus Battery Replacement, Remove battery: étape 6, image 1 de 2 TCL Stylus Battery Replacement, Remove battery: étape 6, image 2 de 2
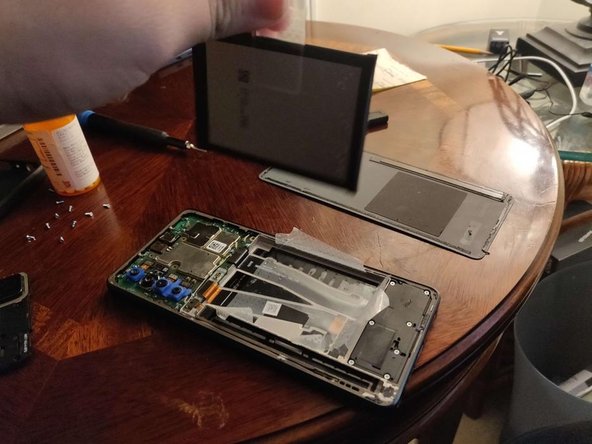
    • Pull on the sticker located on the middle of the left side (colored green) of the battery to remove it.

    • NOTE: The pull tab may have resistance.

Conclusion

To reassemble your device, follow these instructions in reverse order.

Lee Hunt

Membre depuis le 12/08/16

1 037 Réputation

6 tutoriels rédigés

0 commentaires

Ajouter un commentaire

Nombre de vues :

Dernières 24 heures : 1

7 derniers jours : 17

30 derniers jours : 87

Total : 1,235