Aller au contenu principal

Tama 22 Inch Kick Drum Plastic Cover Replacement

Ce dont vous avez besoin

  1. Tama 22 Inch Kick Drum Plastic Cover Replacement, Plastic Cover: étape 1, image 1 de 1
    • Remove any attachments of the kick drum.

    • This includes symbols, toms, and kick pedal.

    • Leave the leg supports of the kick drum attached.

  2. Tama 22 Inch Kick Drum Plastic Cover Replacement: étape 2, image 1 de 2 Tama 22 Inch Kick Drum Plastic Cover Replacement: étape 2, image 2 de 2
    • Turn the kick drum over so the broken plastic screen is facing up.

    • It may be beneficial to have some cushion between the floor and the drum to avoid any scratches on either object.

  3. Tama 22 Inch Kick Drum Plastic Cover Replacement: étape 3, image 1 de 2 Tama 22 Inch Kick Drum Plastic Cover Replacement: étape 3, image 2 de 2
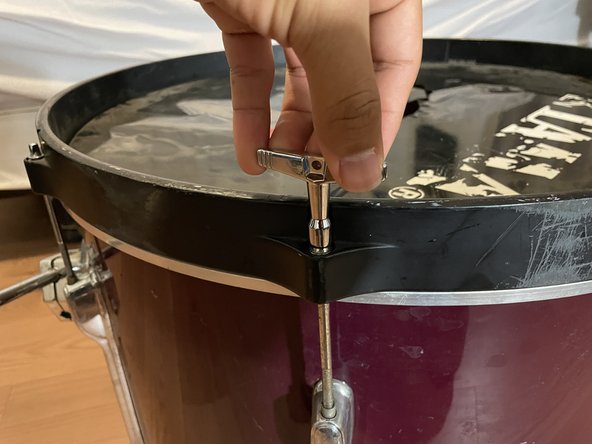
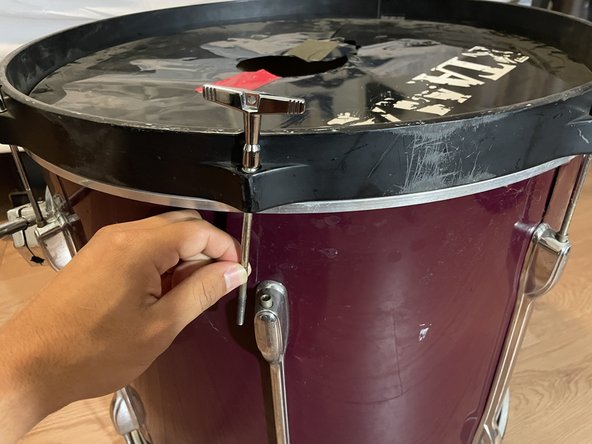
    • Use a drum key tuner to loosen the bolt by rotating counterclockwise.

    • It is not necessary to completely take the bolt out from the rim.

  4. Tama 22 Inch Kick Drum Plastic Cover Replacement: étape 4, image 1 de 3 Tama 22 Inch Kick Drum Plastic Cover Replacement: étape 4, image 2 de 3 Tama 22 Inch Kick Drum Plastic Cover Replacement: étape 4, image 3 de 3
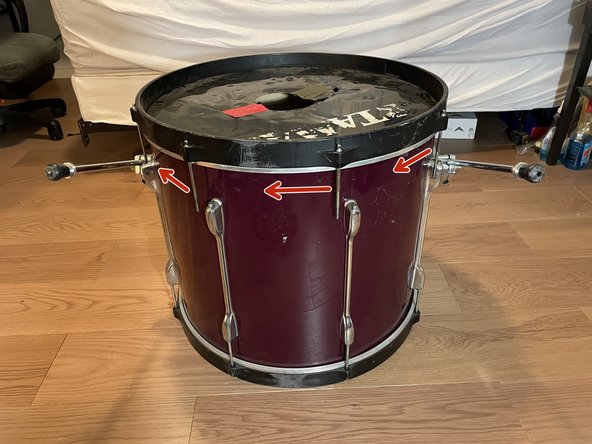
    • Repeat step 3 for all bolts that surround the rim.

    • Detach the bolts from the body of the drum; however, leave them attached and hanging loosely to the rim.

    • Rotate the rim to be sure that all bolts are free.

  5. Tama 22 Inch Kick Drum Plastic Cover Replacement: étape 5, image 1 de 1
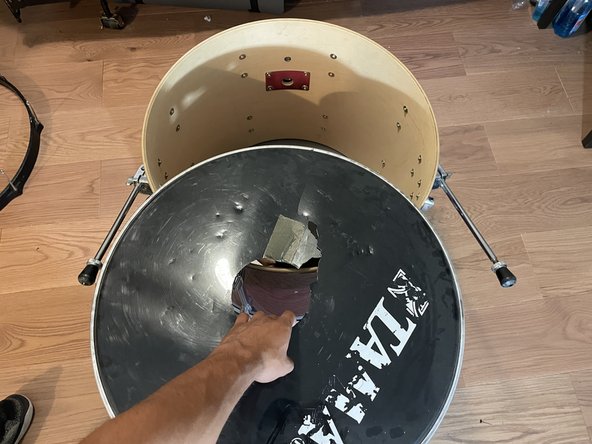
    • With both hands, remove the rim that still has the bolts attached and place aside for further use.

  6. Tama 22 Inch Kick Drum Plastic Cover Replacement: étape 6, image 1 de 2 Tama 22 Inch Kick Drum Plastic Cover Replacement: étape 6, image 2 de 2
    • Remove the plastic microphone port from the drum.

    • This can be thrown away in the recycle bin.

    • Older models of a port screen tend to have a thinner screen without protection. Carelessness in handling may result in a severe cut.

  7. Tama 22 Inch Kick Drum Plastic Cover Replacement: étape 7, image 1 de 2 Tama 22 Inch Kick Drum Plastic Cover Replacement: étape 7, image 2 de 2
    • Place the new plastic cover port on top of the drum so it sits perfectly on it.

    • Depending which microphone port is being placed, adjust the cover so that words will be properly read when the drum is placed upright.

    • Press down on the edges of the drum cover so it is snuggled into the drum.

    • Take into consideration the position of the hole when the drum is placed upright.

  8. Tama 22 Inch Kick Drum Plastic Cover Replacement: étape 8, image 1 de 3 Tama 22 Inch Kick Drum Plastic Cover Replacement: étape 8, image 2 de 3 Tama 22 Inch Kick Drum Plastic Cover Replacement: étape 8, image 3 de 3
    • Place the rim used in Step 5 back onto the drum.

    • Align the bolts so each bolt has an input that is attached to the center of the drum.

  9. Tama 22 Inch Kick Drum Plastic Cover Replacement: étape 9, image 1 de 2 Tama 22 Inch Kick Drum Plastic Cover Replacement: étape 9, image 2 de 2
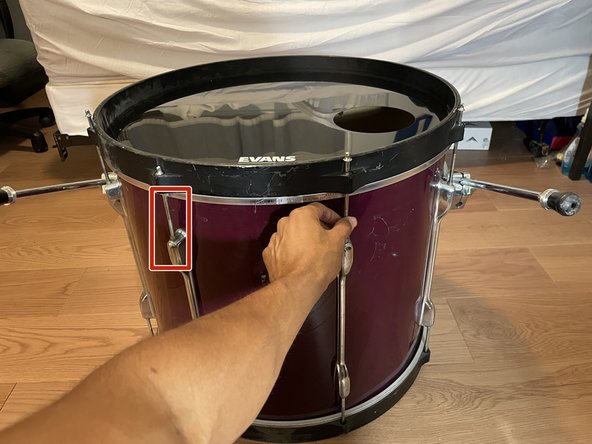
    • Finger tighten the bolts in a clockwise motion. Do this to all of the remaining bolts that are loose.

    • Evenly tighten the bolts with the same amount of pressure.

    • For an easier experience, tighten the bolts underneath the rim rather than above the rim. See the red box location in the pictures for clarification.

  10. Tama 22 Inch Kick Drum Plastic Cover Replacement: étape 10, image 1 de 1
    • Use the drum key to tighten the bolts in a clockwise manner.

    • Turn the drum key one full turn (360 degrees) and move to the next bolt so that the same pressure is evenly applied to each key.

    • Turning the bolts too many times may result in severe damage on the drum and its plastic cover.

Conclusion

To reassemble your device, follow these instructions in reverse order.

Steve Perez

Membre depuis le 02/03/22

181 Réputation

1 tutoriel rédigé

Équipe

CSU Los Angeles, Team 31-31, Harris Spring 2022 Membre de l'équipe CSU Los Angeles, Team 31-31, Harris Spring 2022

CSULA-HARRIS-S22S31G31

1 membre

1 tutoriel rédigé

0 commentaires

Ajouter un commentaire

Nombre de vues :

Dernières 24 heures : 0

7 derniers jours : 3

30 derniers jours : 16

Total : 392