Cette version peut contenir des modifications incorrectes. Passez au dernier aperçu vérifié.
Ce dont vous avez besoin
-
-
Faites glisser la batterie sous le ruban métallique marron.
-
Faites attention aux fils encore connectés à l'autre extrémité de la batterie. Ne tirez pas ou des dommages pourraient survenir.
-
-
-
Cette étape n’est pas traduite. Aidez à la traduire
-
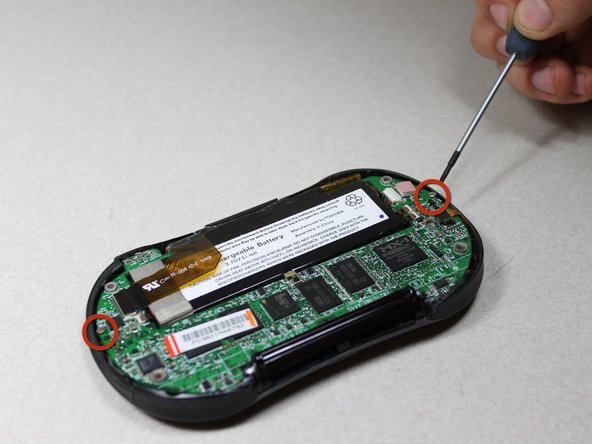
Unscrew the 2 Philips #00 screws on each end of the motherboard.
-
-
Cette étape n’est pas traduite. Aidez à la traduire
-
Unscrew the 2 Philips #00 screws on each side of the charging port.
-
-
Cette étape n’est pas traduite. Aidez à la traduire
-
Disconnect 2 brown wire-tape ends from each end of the motherboard. Gently pull straight out with tweezers.
-
-
Cette étape n’est pas traduite. Aidez à la traduire
-
Grasp the upper left edge of the motherboard and slide diagonally up and left away from the auxiliary port entrance.
-
-
Cette étape n’est pas traduite. Aidez à la traduire
-
Unscrew the 2 silver Philips #00 screws from both sides of the directional pad component on the front casing.
-
-
Cette étape n’est pas traduite. Aidez à la traduire
-
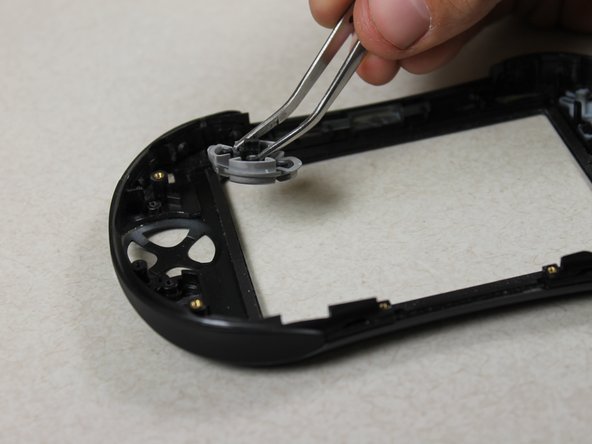
Take out the 2 pieces of the directional pad with tweezers.
-


Annulation : je n'ai pas terminé ce tutoriel.
Une autre personne a terminé cette réparation.
Équipe

Cal Poly, Team 10-33, Amido Winter 2012 Membre de l'équipe Cal Poly, Team 10-33, Amido Winter 2012
CPSU-AMIDO-W12S10G33
4 membres
10 tutoriels rédigés