Aller au contenu principal

Tengda S5 Plus Home Button Replacement

Ce dont vous avez besoin

  1. Tengda S5 Plus Home Button Replacement, Back Panel: étape 1, image 1 de 1
    • Place the phone screen-side down.

  2. Tengda S5 Plus Home Button Replacement: étape 2, image 1 de 2 Tengda S5 Plus Home Button Replacement: étape 2, image 2 de 2
    • Using your fingernail or any prying tool (we used the Metal Spudger), begin to pry away the back panel starting at the bottom of the phone.

    • Continue to work your way around the phone counterclockwise until you can pull the back cover off.

  3. Tengda S5 Plus Home Button Replacement, Battery: étape 3, image 1 de 1
    • Remove the battery by placing your thumb in the slot, pushing the battery up and pulling it out.

  4. Tengda S5 Plus Home Button Replacement, Home Button: étape 4, image 1 de 1
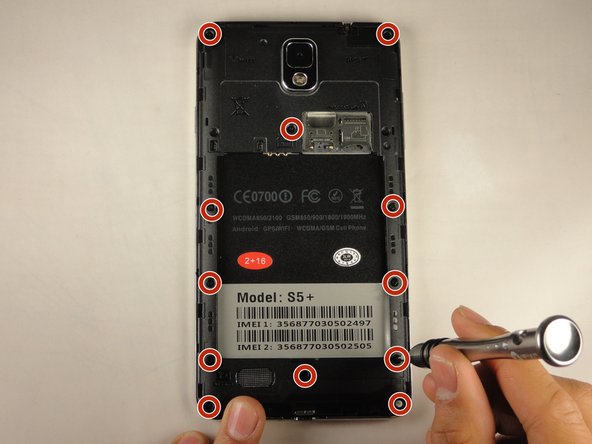
    • Unscrew the twelve 3 mm screws from the back panel using a Phillips #00 screwdriver.

    • Keep these screws in a safe place. They are very small and easy to lose.

  5. Tengda S5 Plus Home Button Replacement: étape 5, image 1 de 2 Tengda S5 Plus Home Button Replacement: étape 5, image 2 de 2
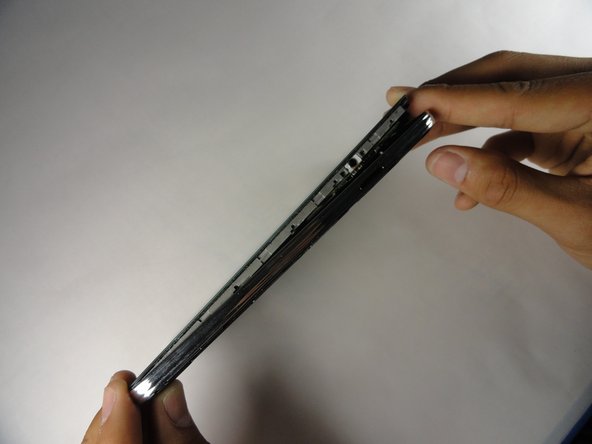
    • Using the plastic opening tool, create a small gap between the front screen and the metal casing. Slide the plastic opening tool around the phone counterclockwise to make this gap around the entire phone.

    • Once the screen is separated from the back panel, pull the two pieces apart.

  6. Tengda S5 Plus Home Button Replacement: étape 6, image 1 de 1
    Outil utilisé dans cette étape :
    Tweezers
    $4.99
    J'achète
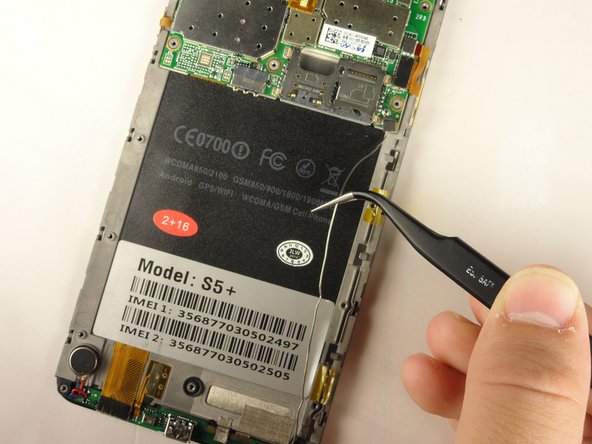
    • Lay your device with the screen faced down.

    • Using tweezers, lift the two pieces of yellow tape holding the wire in place.

  7. Tengda S5 Plus Home Button Replacement: étape 7, image 1 de 2 Tengda S5 Plus Home Button Replacement: étape 7, image 2 de 2
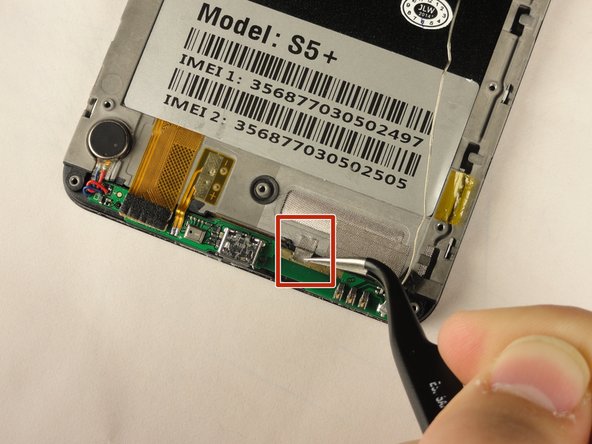
    • Using the tweezers again, grasp the wire and free it from the crevice.

    • This will provide slack for you to work with the lower motherboard.

  8. Tengda S5 Plus Home Button Replacement: étape 8, image 1 de 3 Tengda S5 Plus Home Button Replacement: étape 8, image 2 de 3 Tengda S5 Plus Home Button Replacement: étape 8, image 3 de 3
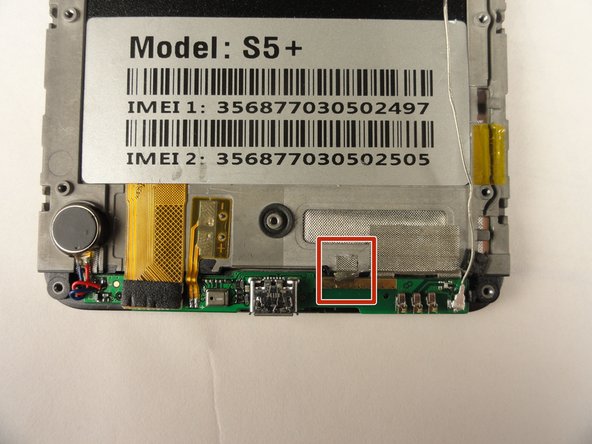
    • Remove the silver tape that holds the lower motherboard to the front panel of the phone.

  9. Tengda S5 Plus Home Button Replacement: étape 9, image 1 de 2 Tengda S5 Plus Home Button Replacement: étape 9, image 2 de 2
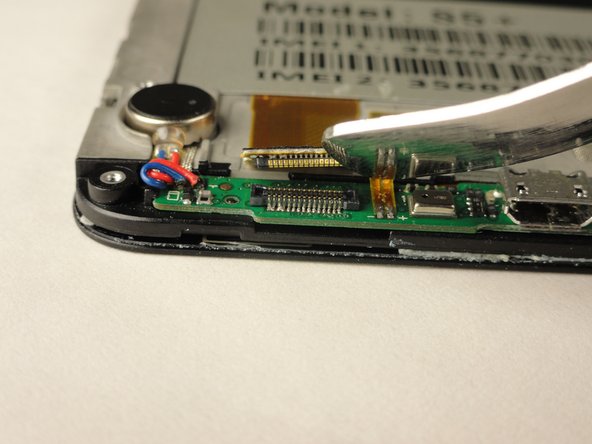
    • Using your fingers, or the Metal Spudger, disconnect the black cable connector.

    • The cable connector should easy snap out with little force.

  10. Tengda S5 Plus Home Button Replacement: étape 10, image 1 de 3 Tengda S5 Plus Home Button Replacement: étape 10, image 2 de 3 Tengda S5 Plus Home Button Replacement: étape 10, image 3 de 3
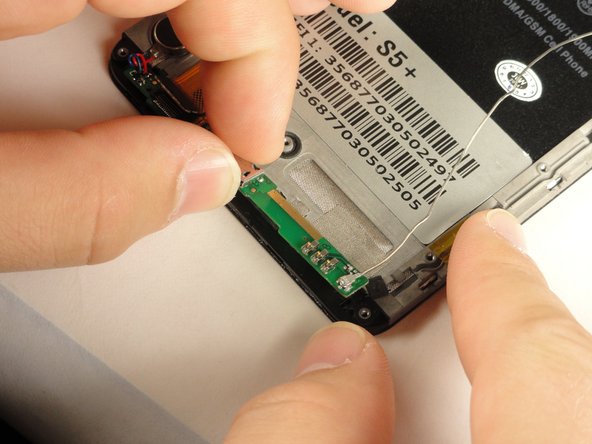
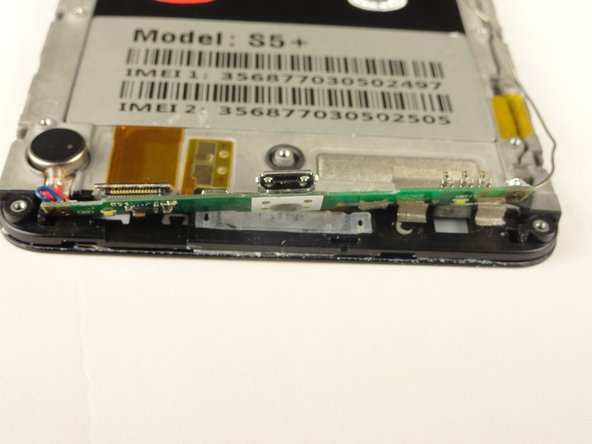
    • Using your fingers, slide the lower motherboard towards you.

    • The lower motherboard will still be attached to the front panel by a red and blue cable on the left side and a long silver wire on the right side, but you should now have visibility of the home button.

  11. Tengda S5 Plus Home Button Replacement: étape 11, image 1 de 2 Tengda S5 Plus Home Button Replacement: étape 11, image 2 de 2
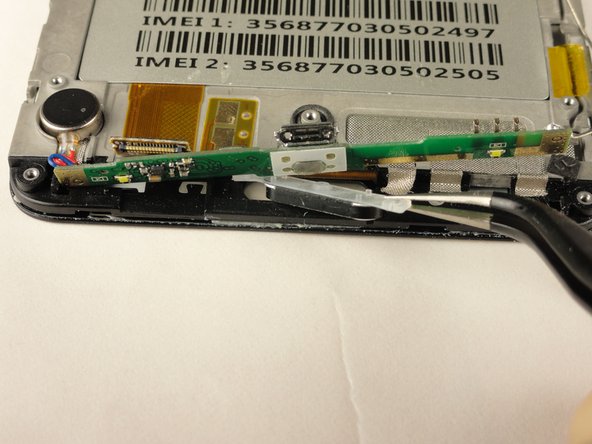
    • Clean away any dirt from the back side of the lower motherboard, underneath the charging port.

    • Using tweezers, grasp and remove the home button.

Conclusion

To reassemble your device, follow these instructions in reverse order.

Kenny Levy

Membre depuis le 04/20/15

116 Réputation

1 tutoriel rédigé

Équipe

Cal Poly, Team 14-9, Amido Spring 2015 Membre de l'équipe Cal Poly, Team 14-9, Amido Spring 2015

CPSU-AMIDO-S15S14G9

4 membres

10 tutoriels rédigés

0 commentaires

Ajouter un commentaire

Nombre de vues :

Dernières 24 heures : 0

7 derniers jours : 3

30 derniers jours : 7

Total : 346