Aller au contenu principal

Texas Instruments TI-15 Battery Replacement

Ce dont vous avez besoin

  1. Texas Instruments TI-15 Battery Replacement, Battery: étape 1, image 1 de 3 Texas Instruments TI-15 Battery Replacement, Battery: étape 1, image 2 de 3 Texas Instruments TI-15 Battery Replacement, Battery: étape 1, image 3 de 3
    • With a Y000 screwdriver, loosen the four 1mm Phillips head screws and set them aside.

  2. Texas Instruments TI-15 Battery Replacement: étape 2, image 1 de 3 Texas Instruments TI-15 Battery Replacement: étape 2, image 2 de 3 Texas Instruments TI-15 Battery Replacement: étape 2, image 3 de 3
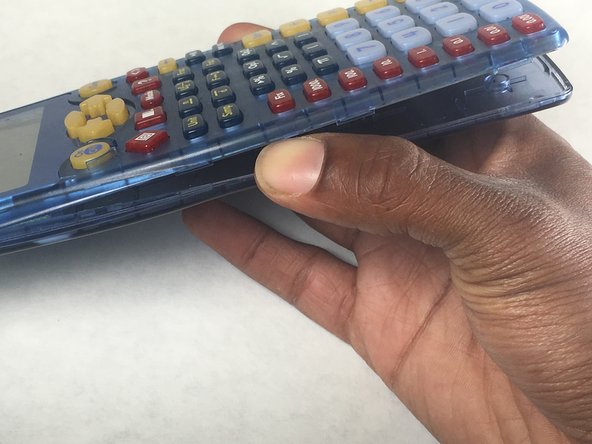
    • With an iFixit opening tool, pry apart a total of 3 notches on the top and bottom of the calculator.

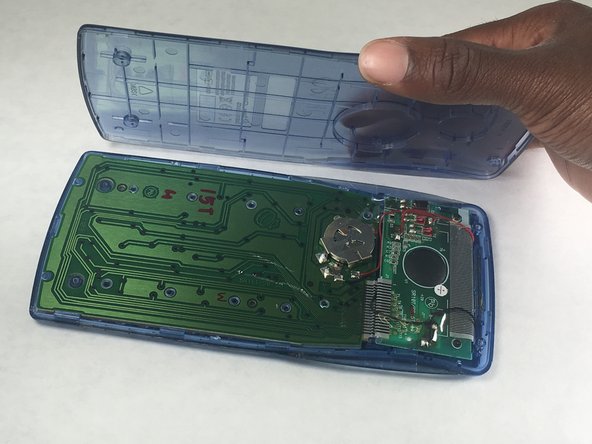
  3. Texas Instruments TI-15 Battery Replacement: étape 3, image 1 de 3 Texas Instruments TI-15 Battery Replacement: étape 3, image 2 de 3 Texas Instruments TI-15 Battery Replacement: étape 3, image 3 de 3
    • Separate the two panels to reveal the calculator's green circuit board.

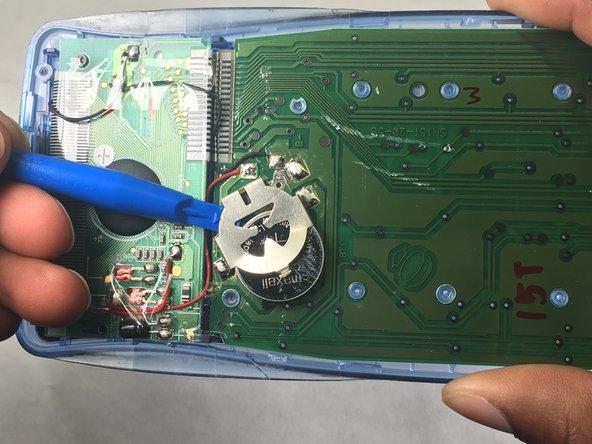
  4. Texas Instruments TI-15 Battery Replacement: étape 4, image 1 de 2 Texas Instruments TI-15 Battery Replacement: étape 4, image 2 de 2
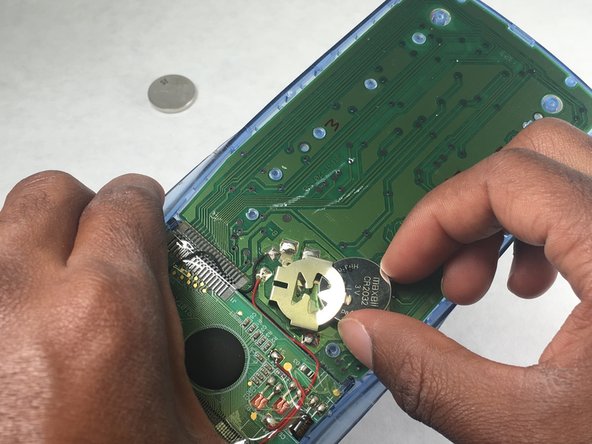
    • Using the iFixit opening tool , slide underneath the battery cover until the battery comes out.

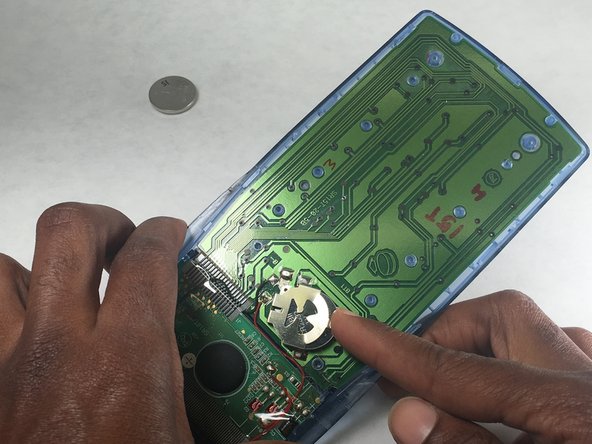
  5. Texas Instruments TI-15 Battery Replacement: étape 5, image 1 de 3 Texas Instruments TI-15 Battery Replacement: étape 5, image 2 de 3 Texas Instruments TI-15 Battery Replacement: étape 5, image 3 de 3
    • Remove the old battery and insert the new battery.

    • Properly dispose or recycle the old battery.

Ligne d'arrivée

3 autres ont terminé cette réparation.

kayla neal

Membre depuis le 10/06/16

173 Réputation

1 tutoriel rédigé

Équipe

University of Memphis, Team 4-1, Baddour Fall 2016 Membre de l'équipe University of Memphis, Team 4-1, Baddour Fall 2016

UM-BADDOUR-F16S4G1

2 membres

1 tutoriel rédigé

0 commentaires

Ajouter un commentaire

Nombre de vues :

Dernières 24 heures : 0

7 derniers jours : 1

30 derniers jours : 16

Total : 2,556