Aller au contenu principal

Toilet Seat Replacement

Ce dont vous avez besoin

  1. Toilet Seat Replacement, Toilet Seat: étape 1, image 1 de 1
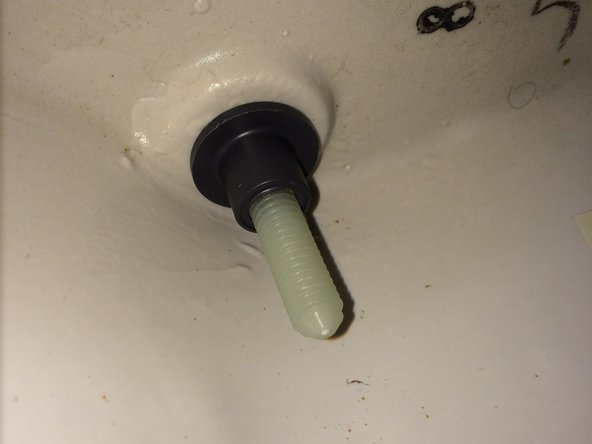
    • Measure the size of your toilet bowl to know what size seat to purchase.

  2. Toilet Seat Replacement: étape 2, image 1 de 2 Toilet Seat Replacement: étape 2, image 2 de 2
    • Twist the tops of the hinges of the currently installed toilet seat and pull toilet seat off to expose the screws.

  3. Toilet Seat Replacement: étape 3, image 1 de 3 Toilet Seat Replacement: étape 3, image 2 de 3 Toilet Seat Replacement: étape 3, image 3 de 3
    • Unscrew the screws to detach the seat.

    • If the screw is not loosening but is spinning as if it were, then hold the back plastic nut so that it can unscrew from the nut.

    • Clean the newly exposed area. This opportunity will not present itself again anytime soon so take advantage of it.

  4. Toilet Seat Replacement: étape 4, image 1 de 2 Toilet Seat Replacement: étape 4, image 2 de 2
    • Insert new special 20mm screws that are provided with the purchase of the toilet seat in the holes and tighten them.

  5. Toilet Seat Replacement: étape 5, image 1 de 1
    • Then re install the toilet seat by fitting the heads of the screws in the holes on the hinges of the seat.

  6. Toilet Seat Replacement: étape 6, image 1 de 1
    • Close caps by twisting them in the opposite direction that you did to take off the seat.

Conclusion

To re-install your previous seat, follow these instructions in reverse order.

2 autres ont terminé cette réparation.

Christopher Carter

Membre depuis le 02/24/15

231 Réputation

1 tutoriel rédigé

Équipe

Cal Poly, Team 24-5, Green Winter 2015 Membre de l'équipe Cal Poly, Team 24-5, Green Winter 2015

CPSU-GREEN-W15S24G5

3 membres

4 tutoriels rédigés

0 commentaires

Ajouter un commentaire

Nombre de vues :

Dernières 24 heures : 2

7 derniers jours : 3

30 derniers jours : 14

Total : 1,907