Cette version peut contenir des modifications incorrectes. Passez au dernier aperçu vérifié.
Ce dont vous avez besoin
-
Cette étape n’est pas traduite. Aidez à la traduire
-
First, lift the bottom part of the band to start removing the wristband from the button area of the watch.
-
-
Cette étape n’est pas traduite. Aidez à la traduire
-
Continue to lift up on the band until the screen of the watch becomes loose from the band.
-
Continue to pull up on the wristband until it is completely off the watch.
-
-
Cette étape n’est pas traduite. Aidez à la traduire
-
Grab the watch once it is separated from the wristband.
-
-
-
Cette étape n’est pas traduite. Aidez à la traduire
-
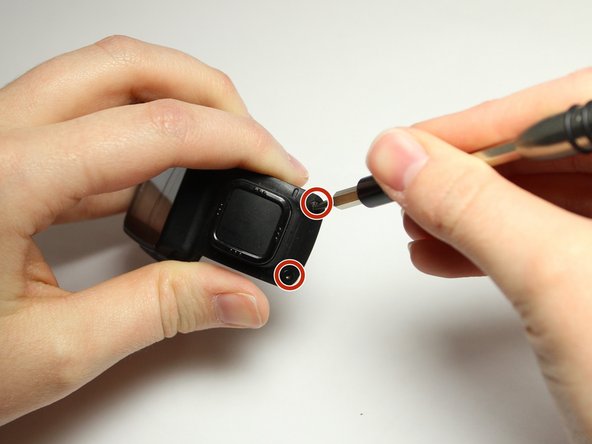
Remove the two 3.0 mm Torx screws from the front. Use a T4 Torx screwdriver to remove the screws.
-
The two 3.0 mm Torx screws are painted blue at the end. These screws have screw holders around them that will also need to be removed.
-
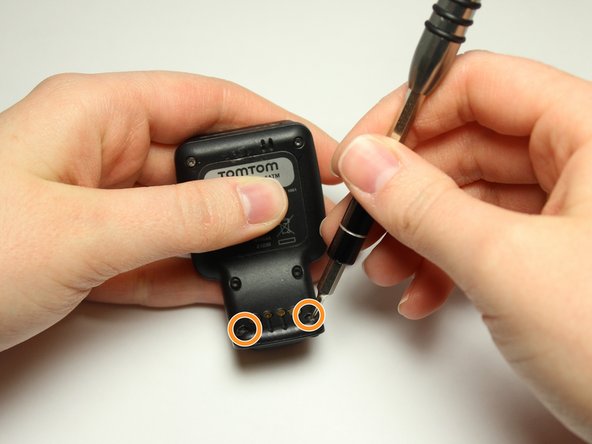
Unscrew the screws from the front of the watch casing and the screw holders fall out from the back of the watch casing.
-
-
Cette étape n’est pas traduite. Aidez à la traduire
-
Gently pull the back panel away from the front panel.
-
-
Cette étape n’est pas traduite. Aidez à la traduire
-
Gently wiggle the black box vibrator component away from the back panel with your fingers or a Spudger tool.
-
-
Cette étape n’est pas traduite. Aidez à la traduire
-
Grab the back panel and a blue, plastic opening tool to pry the black battery pack off the back panel.
-
After removing the battery, you are ready to replace it with a new one.
-
If you need to replace the back panel, you are ready to take out the old battery and place it in the new back panel.
-


Annulation : je n'ai pas terminé ce tutoriel.
19 autres ont terminé cette réparation.
Équipe

Texas Tech, Team S8-G6, Bennett Spring 2017 Membre de l'équipe Texas Tech, Team S8-G6, Bennett Spring 2017
TTU-BENNETT-S17S8G6
4 membres
15 tutoriels rédigés
29 commentaires
Very nice explaination. Would be good to mention the replacementbattery.
Very hard to find on the www.
Anyone found out already?
Know it’s lithium polymer with capacity of 190 mAh / 3,7V
When size is known, a replacement must be somewere.
Can someone advise where we can purchase these batteries
Anyone know where can i buy this battery?