Ce dont vous avez besoin
-
Cette étape n’est pas traduite. Aidez à la traduire
-
Say "Hello" to Libretto!
-
This is very small, the dimensions are about 21x11,5x3
-
The best OS fitting inside it is Windows 95, the base RAM is 16Mb (yes, that's 16!) and the bundled HD has 810Mb of memory.
-
There is no floppy integrated, only a PCMCIA slot, a IR port mapped as COM2, a mini-jack for audio (back), a speaker, the power connector and the base attachment.
-
The screen is about 6", 16-bit color, the backlit is powered by a CCFL light as usual in LCDs.
-
-
Cette étape n’est pas traduite. Aidez à la traduire
-
Before starting with screwdrivers it's better to remove first the battery.
-
It's like nowadays notebooks, move the slide-button and pull the battery.
-
The battery-pack contains 9 batteries, as usual 1.2v each 1200mAh; that makes 10.8v, enough to power the HDD, the PCMCIA, the screen and the processor at the same time.
-
The model number is: PA2497U
-
-
Cette étape n’est pas traduite. Aidez à la traduire
-
Now it's time to remove some screws.
-
Unscrew at the seven indicated points with a cross phillips screwdriver.
-
Remove the HDD door and put it apart.
-
Same thing for the two screws situated in the back.
-
Looks like one is missing? mumble, mumble...
-
-
Cette étape n’est pas traduite. Aidez à la traduire
-
DO NOT TRY TO OPEN, we still have to remove the keyboard.
-
With a flat screwdriver pull up the bar upon the keyboard.
-
Remove the one screw that holds the keyboard, and carefully pull it up.
-
-
Cette étape n’est pas traduite. Aidez à la traduire
-
The keyboard itself is held by two ribbons attached to the frame by screws and, of course, the data cable.
-
Unscrew and pull the ribbons.
-
Open the connector and pull out the cable
-
-
Cette étape n’est pas traduite. Aidez à la traduire
-
There are four screws that have to be removed with a phillips screwdriver.
-
After that the metal cover can be token apart.
-
-
Cette étape n’est pas traduite. Aidez à la traduire
-
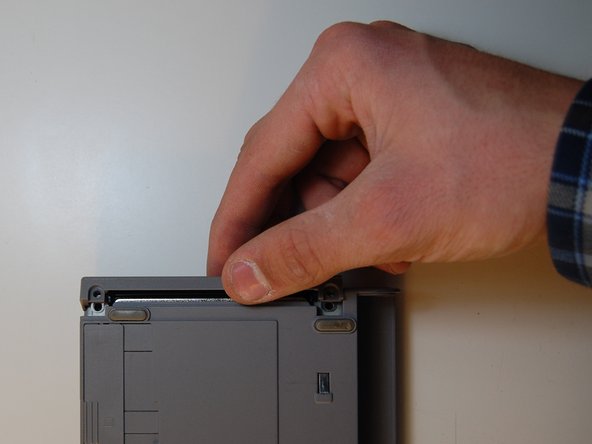
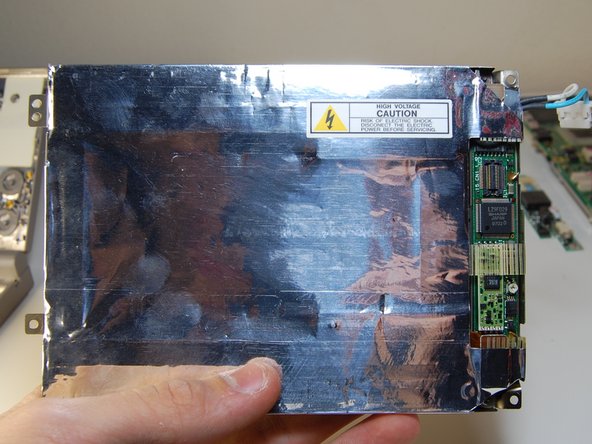
Time to open the lower part.
-
Unlock the two interlockings with applying pressure as shown in the photo.
-
Now raise the upper part and... [wow]
-
-
Cette étape n’est pas traduite. Aidez à la traduire
-
Detatch the screen connector.
-
When reassembling pay attention to the little L-shaped iron part on the heaphones jack, put it back as shown in pict.3
-
-
Cette étape n’est pas traduite. Aidez à la traduire
-
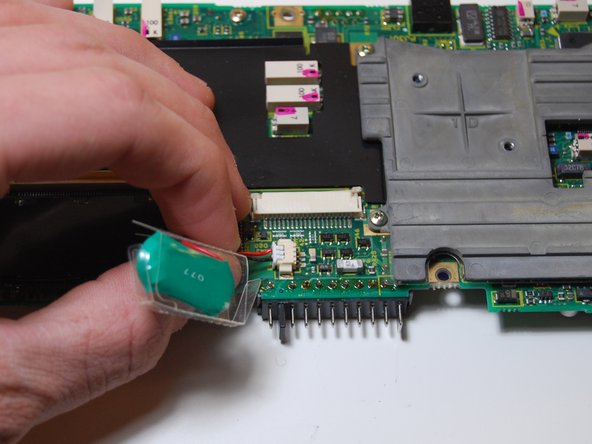
Take the motherboard out, paying attention to remove correctly the power connector.
-
Using the handle detach the HDD, and carefully put it in a safe place.
-
-
-
Cette étape n’est pas traduite. Aidez à la traduire
-
There is a heatsink screwed on the motherboard
-
Remove the four screws indicated, note that there are two types, long and short.
-
Very carefully take away the heat conductor on the CPU to see what's under.
-
-
Cette étape n’est pas traduite. Aidez à la traduire
-
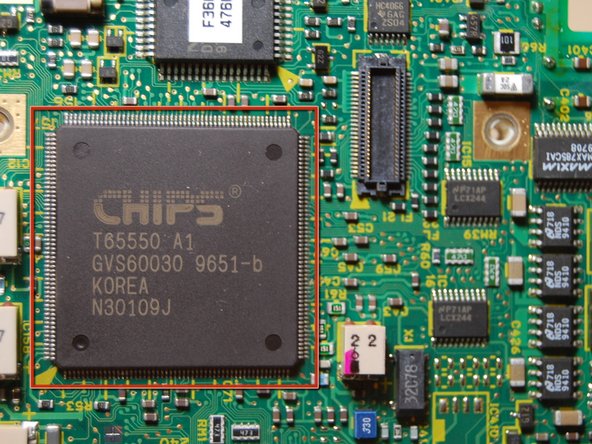
Let's have a look at the chips
-
That's right! The northbridge is made by CHIPS; T6550 A1 GVS60030 9651-b made in KOREA (the last is the serial I think)
-
The CPU is an Intel Pentium PP75 Y856 75Mhz
-
There's another chip with a stick attached to it; F36000 476002
-
-
Cette étape n’est pas traduite. Aidez à la traduire
-
But wait, there's something else: Try removing the black plastic sheet.
-
Here we find three more intresting chips and, of course, the RAM.
-
The first is only labelled F36000 474008.
-
YAMAHA, that's the audio chip, OPL YMF711-S 9645 WAMJ.
-
Toshiba 471HP C1997.
-
-
Cette étape n’est pas traduite. Aidez à la traduire
-
High definition shots of the motherboard.
-
Note that's it is using the multi-layer technology, patented and seen on some other models such as ZENITH Systems, this allows the boards to be much smaller, but it's very hard to see the tracks.
-
-
Cette étape n’est pas traduite. Aidez à la traduire
-
The screen! Not easy to open.
-
First remove the glued tapes at the bottom, so you can access the two screws that hold the upper part.
-
With a screwdriver take away the MousePad.
-
-
Cette étape n’est pas traduite. Aidez à la traduire
-
With a spudger or a flat screwdriver open the screen as shown.
-
-
Cette étape n’est pas traduite. Aidez à la traduire
-
Now you can see the screen, the power elevator for the lamp, the controls and the speaker.
-
Unscrew where shown with a Phillips cross screwdriver.
-
Carefully move the screen to access better the rear cables.
-
-
Cette étape n’est pas traduite. Aidez à la traduire
-
Before detaching the screen cables I suggest you to remove the controls.
-
With a flat screwdriver disconnect the two cables shown in the picture.
-
Take away part by part the mousepad and the mouse buttons.
-
-
Cette étape n’est pas traduite. Aidez à la traduire
-
Now disconnect the cable connected to the control board as shown.
-
Then pull off the speaker
-
-
Cette étape n’est pas traduite. Aidez à la traduire
-
Time to tear out the screen cables.
-
The first is quite easy to take away, the same thing as part-8 (see pict.2)
-
Be careful when disconnecting the wire attached to the elevator board, do not electroshock yourself!
-
-
Cette étape n’est pas traduite. Aidez à la traduire
-
Paying attention not to touch any contact, detach the CCFL cable by simply pulling it.
-
The screen is very small, the maximum real resolution is only 640x480, actually the minimum for Win95.
-
-
Cette étape n’est pas traduite. Aidez à la traduire
-
After removing the mouse buttons try to..
-
What? More screws remaining?
-
-
Cette étape n’est pas traduite. Aidez à la traduire
-
There are some pieces that have to be removed in order to complete the work, so take your time and follow the instructions step by step.
-
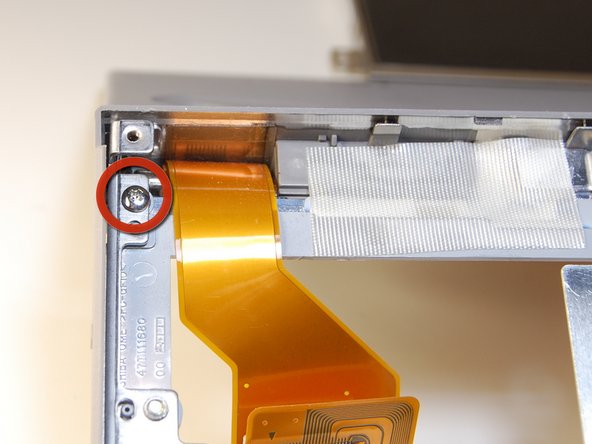
Remove the screen's back panel.
-
With the same Phillips screwdriver remove the last screw...
-
-
Cette étape n’est pas traduite. Aidez à la traduire
-
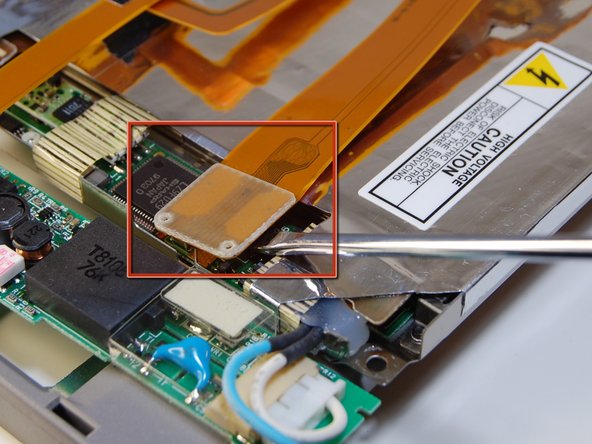
Time to separate the cable from the plastic cover.
-
There's a sticky sheet that is keeping held a little piece of plastic, remove it.
-
Then with a flat screwdriver try to take it off. That's fragile, so be gentile.
-
When done you can pull out the cable.
-
-
Cette étape n’est pas traduite. Aidez à la traduire
-
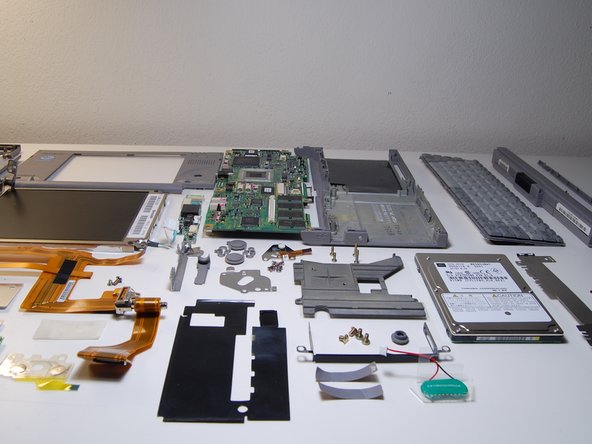
Et voilà! The work is done!
-
This wasn't very hard, but reassembling is not as easy as opening it.
-
I had to follow my own instructions to transform it back to one piece, luckily after that it still worked perfectly.
-
-
Cette étape n’est pas traduite. Aidez à la traduire
-
As you see the little PC is still working perfectly.
-
And now a little comparison to the iPod Touch 3G
-
Results are that the iPod touch does more, costs less and is that simple..! (I've already heard it somewhere)
-
I hope you enjoyed the guide, if you have any corrections, tips, additions or reproaches please post them!
-
Guide made by Mc128k
-


6 commentaires
Good job…^_^
Nice job.
Since you have disassembled everything, could you tell us what’s the exact model of the screen?
I have also a Libretto 50CT and I’m looking for a screen replacement.
I believe it is a Sharp LQ61D133