Cette version peut contenir des modifications incorrectes. Passez au dernier aperçu vérifié.
Ce dont vous avez besoin
-
Cette étape n’est pas traduite. Aidez à la traduire
-
Remove the three 7.7 mm screws from the back panel using a Phillips #0 screwdriver.
-
-
Cette étape n’est pas traduite. Aidez à la traduire
-
Turn the DVD player on its side.
-
Remove the 7.7 mm screw.
-
Flip the DVD player onto its other side.
-
Remove the 7.7 mm screw.
-
-
Cette étape n’est pas traduite. Aidez à la traduire
-
Flip the DVD player over onto its front face.
-
Remove the back panel by lifting up and pulling it towards yourself.
-
-
Cette étape n’est pas traduite. Aidez à la traduire
-
Lift and push away the two tabs located in the middle of the player.
-
-
-
Cette étape n’est pas traduite. Aidez à la traduire
-
Lift and slide forward the single tab on the side.
-
-
Cette étape n’est pas traduite. Aidez à la traduire
-
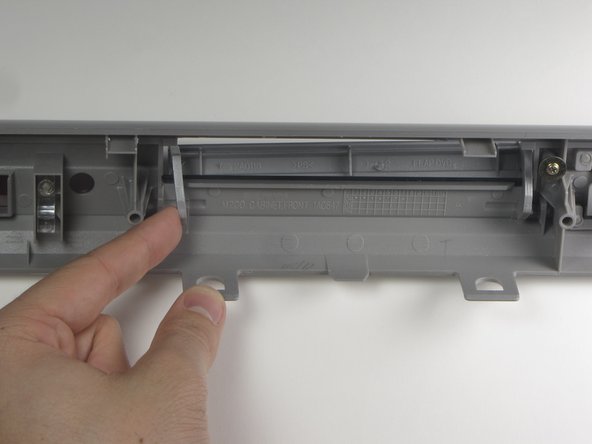
Grasp the front panel and pull forward to your right to remove it.
-
-
Cette étape n’est pas traduite. Aidez à la traduire
-
On back side of front panel very carefully apply pressure to the left hand side of the flap hinge.
-
-
Cette étape n’est pas traduite. Aidez à la traduire
-
Once the peg is free from the left restraint, carefully remove the left part of the flap.
-
Carefully remove the right peg from the restraint.
-
-
Cette étape n’est pas traduite. Aidez à la traduire
-
Remove the spring from the end of the right peg by pulling the door away from the spring.
-
-
Cette étape n’est pas traduite. Aidez à la traduire
-
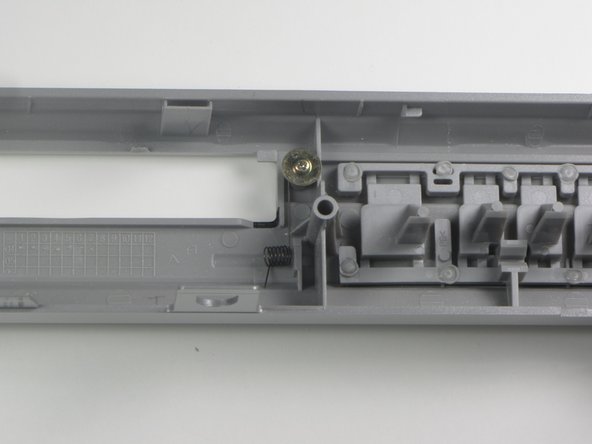
Remove the .384 inch screw holding the spring to front panel.
-


Équipe

Cal Poly, Team 1-16, Amido Winter 2011 Membre de l'équipe Cal Poly, Team 1-16, Amido Winter 2011
CPSU-AMIDO-W11S1G16
4 membres
8 tutoriels rédigés
5 commentaires
Thanks for sharing,
It's very informative for me, I really enjoy this content.
I also have Content about <a href="https://accesssecuritygates.com/"> door spring replacement</a>
Cheers.
Great Article's content. Its worth reading. What type of auto gate repair is best for you? Find out by comparing repair services, prices and tech info. If you're in need of automatic gate repair, <a href="https://www.ozgaragedoorsandgates.com/"#...>Oz Garage Doors And Gates</a> can be a solution.
I got wonderful content after reading your article. Thankyou for information. Find out by comparing repair services, prices and tech info. If you're in need of automatic gate repair, <a href="http://elitecommercialgaterepairs.com/"#/>Elite Commercial Gate Repairs</a> can be a solution.
Thanks for this Article! If anyone looking for a platform which provide services of repairing ad installation doors. <a href="https://http://powermastergateopenerrepair.com/"...>Power Master Gate Opener Repair Specialist</a> can be a solution.
Thanks for sharing us this informative article. If you're in need of automatic gate repair, <a href="https://http://miamioverheadgaterepair.com/"#/>Miami Overhead Gate Repair</a> can be a solution.