Cette version peut contenir des modifications incorrectes. Passez au dernier aperçu vérifié.
Ce dont vous avez besoin
-
Cette étape n’est pas traduite. Aidez à la traduire
-
Remove the three 7.7 mm screws from the back panel using a Phillips #0 screwdriver.
-
-
Cette étape n’est pas traduite. Aidez à la traduire
-
Turn the DVD player on its side.
-
Remove the 7.7 mm screw.
-
Flip the DVD player onto its other side.
-
Remove the 7.7 mm screw.
-
-
Cette étape n’est pas traduite. Aidez à la traduire
-
Flip the DVD player over onto its front face.
-
Remove the back panel by lifting up and pulling it towards yourself.
-
-
Cette étape n’est pas traduite. Aidez à la traduire
-
Lift and push away the two tabs located in the middle of the player.
-
-
Cette étape n’est pas traduite. Aidez à la traduire
-
Lift and slide forward the single tab on the side.
-
-
-
Cette étape n’est pas traduite. Aidez à la traduire
-
Grasp the front panel and pull forward to your right to remove it.
-
-
Cette étape n’est pas traduite. Aidez à la traduire
-
Remove the black tie holding the two rear ribbon cables together by untwisting it.
-
-
Cette étape n’est pas traduite. Aidez à la traduire
-
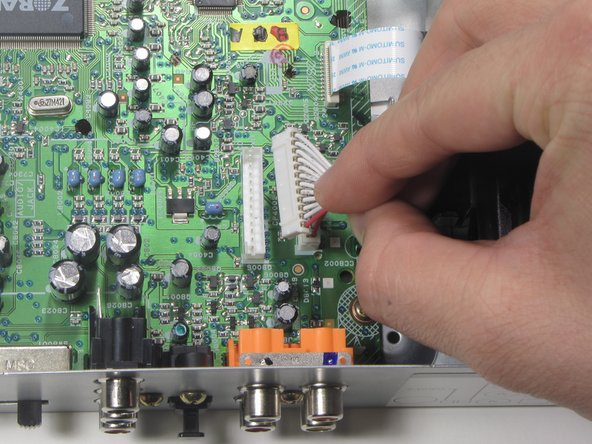
Remove the first of two ribbon cables connected to the motherboard by pulling vertically.
-
-
Cette étape n’est pas traduite. Aidez à la traduire
-
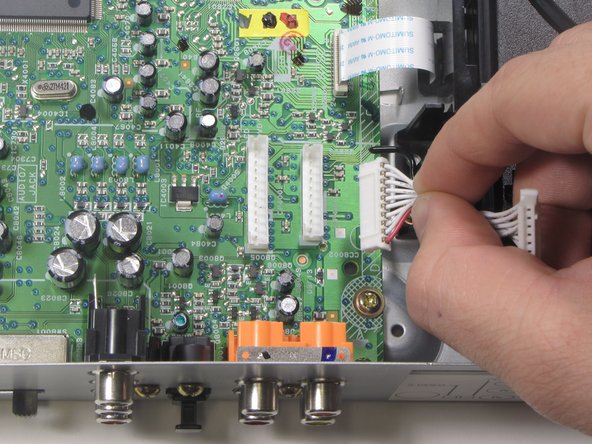
Remove the second of two ribbon cables connected to the motherboard by pulling vertically.
-
-
Cette étape n’est pas traduite. Aidez à la traduire
-
Pull the two cables to the right to disentangle from the disc drive.
-
-
Cette étape n’est pas traduite. Aidez à la traduire
-
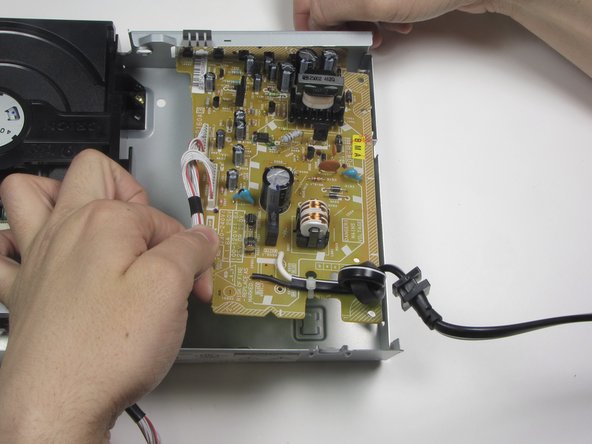
Pull power cord vertically to detach from the casing.
-
-
Cette étape n’est pas traduite. Aidez à la traduire
-
Remove the three .303 inch screws attaching the inverter board to the casing using a #0 Phillips screwdriver.
-
-
Cette étape n’est pas traduite. Aidez à la traduire
-
Push the inverter board forward and to the left to remove from the holding ledges.
-
-
Cette étape n’est pas traduite. Aidez à la traduire
-
Lift the inverter board from the back end and pull toward you to complete removal.
-


Équipe

Cal Poly, Team 1-16, Amido Winter 2011 Membre de l'équipe Cal Poly, Team 1-16, Amido Winter 2011
CPSU-AMIDO-W11S1G16
4 membres
8 tutoriels rédigés