Introduction
Remove the Battery. Whenever tinkering with electronics, always turn them off and remove all sources of power if possible; otherwise you could hurt yourself or damage your machine irreparably.
Ce dont vous avez besoin
-
-
First, slide the latch until you hit resistance. At this point, you have two options.
-
You can either keep pushing the latch until the battery pops out. . .
-
or you can start prying the battery out while pushing the latch (as shown in the second picture above).
-
-
-
Just lift the battery up and out, making sure to lift from the end near the latch.
-
Now the battery is out! To put it back, just insert it back in from the same angle you took it out on.
-
-
-
-
Using a T6 screwdriver, unscrew the two indicated 4mm screws to remove the panel.
-
After that, simply lift and pull out the cover panel.
-
-
-
This step can be kind of tricky. Using a PH00 screwdriver, remove the eight indicated screws. The screws in the four corners are 5mm while the four screws on the left and right sides are 3mm.
-
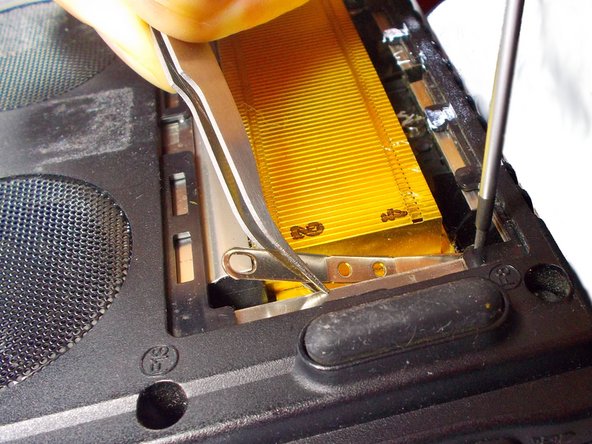
If you’re removing one of the top or bottom (red) ones for that side last, make sure to use a pair of tweezers to hold the other end so that the bracket doesn’t drop into the laptop.
-
-
-
To remove the heat sink, pull it away from the fan and up.
-
Done! The heat sink is out. Check the conclusion for a little information on putting it back in.
-


When re-installing the heat sink, start with one of the top/bottom screws for the bracket, then do the middle two, and then the last top/bottom one. For the last screw, push down on that end of the bracket so the screwholes line up. Otherwise, follow these instructions in reverse order.
When re-installing the heat sink, start with one of the top/bottom screws for the bracket, then do the middle two, and then the last top/bottom one. For the last screw, push down on that end of the bracket so the screwholes line up. Otherwise, follow these instructions in reverse order.
Équipe

UMass Dartmouth, Team 1-5, Shastany Fall 2014 Membre de l'équipe UMass Dartmouth, Team 1-5, Shastany Fall 2014
UMASSD-SHASTANY-F14S1G5
3 membres
9 tutoriels rédigés