Aller au contenu principal

Toshiba Satellite A205-S4577 Motherboard Replacement

Ce dont vous avez besoin

  1. Toshiba Satellite A205-S4577 Motherboard Replacement, Battery: étape 1, image 1 de 1
    • Locate the two sliding locks indicated in the photo.

    • Slide the right lock (labeled "1") to the right. It will remain in the unlocked position.

    • Slide the left lock (labeled "2") to the left and hold it in place.

  2. Toshiba Satellite A205-S4577 Motherboard Replacement: étape 2, image 1 de 1
    • While holding the left lock, place your finger in the indentation next to the battery and lift the battery out.

  3. Toshiba Satellite A205-S4577 Motherboard Replacement, Speaker Cover: étape 3, image 1 de 3 Toshiba Satellite A205-S4577 Motherboard Replacement, Speaker Cover: étape 3, image 2 de 3 Toshiba Satellite A205-S4577 Motherboard Replacement, Speaker Cover: étape 3, image 3 de 3
    • Remove the four screws indicated in the photos using a Phillips 00 Screwdriver. Left to right: 6mm button-head, 3mm flat-head, 6mm button-head, 6mm button-head.

  4. Toshiba Satellite A205-S4577 Motherboard Replacement: étape 4, image 1 de 1
    • With your hands, grasp the speaker cover on the edge nearest to the screen.

    • Pry the speaker cover upward.

  5. Toshiba Satellite A205-S4577 Motherboard Replacement: étape 5, image 1 de 1
    • Remove the speaker cover. Your laptop will look like this photo when the speaker cover has been removed.

  6. Toshiba Satellite A205-S4577 Motherboard Replacement, Keyboard: étape 6, image 1 de 1
    • Remove the two 4mm flat-head screws indicated in the photo.

  7. Toshiba Satellite A205-S4577 Motherboard Replacement: étape 7, image 1 de 1
    • Slightly lift and ease the keyboard forward, toward the screen, until the tabs clear the case.

    • When all the tabs are free, slowly lift the bottom of the keyboard while keeping the top of the keyboard angled down. Continue to carefully rotate the keyboard over until you can access the ribbon cable that is still connecting it to the computer.

  8. Toshiba Satellite A205-S4577 Motherboard Replacement: étape 8, image 1 de 1
    • The Ribbon Cable must be disconnected here to release the keyboard.

    • Using a plastic splunger or the tip of your screwdriver gently push upward on the two black tabs securing the connection.

    • When the black plastic bar running across the cable is unseated you can slowly and carefully pull the ribbon cable free.

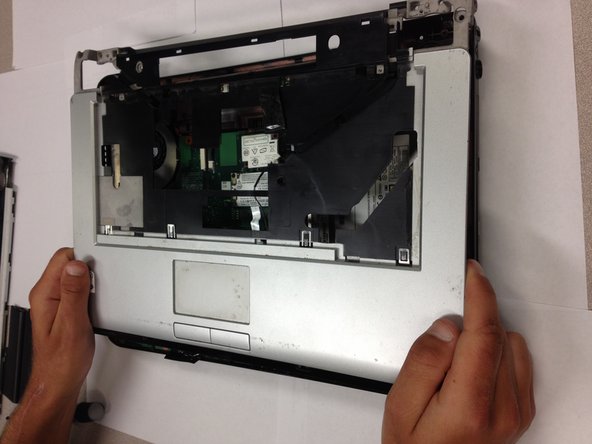
    • You can now lift and remove the keyboard.

  9. Toshiba Satellite A205-S4577 Motherboard Replacement, Monitor: étape 9, image 1 de 3 Toshiba Satellite A205-S4577 Motherboard Replacement, Monitor: étape 9, image 2 de 3 Toshiba Satellite A205-S4577 Motherboard Replacement, Monitor: étape 9, image 3 de 3
    • Locate the gray wire on the right.

    • Detach the white end by gently pulling each socket away from the other.

  10. Toshiba Satellite A205-S4577 Motherboard Replacement: étape 10, image 1 de 2 Toshiba Satellite A205-S4577 Motherboard Replacement: étape 10, image 2 de 2
    • On the left, locate the black and white wires with gold tips on the end.

    • Pull up on the wires to detach them.

  11. Toshiba Satellite A205-S4577 Motherboard Replacement: étape 11, image 1 de 3 Toshiba Satellite A205-S4577 Motherboard Replacement: étape 11, image 2 de 3 Toshiba Satellite A205-S4577 Motherboard Replacement: étape 11, image 3 de 3
    • Locate the thick tan cord on the left.

    • Slide the tan cord as shown to detach it.

  12. Toshiba Satellite A205-S4577 Motherboard Replacement: étape 12, image 1 de 2 Toshiba Satellite A205-S4577 Motherboard Replacement: étape 12, image 2 de 2
    • On the right, locate the thick black wire with the white rectangular end.

    • Pull up on it to detach it.

  13. Toshiba Satellite A205-S4577 Motherboard Replacement: étape 13, image 1 de 3 Toshiba Satellite A205-S4577 Motherboard Replacement: étape 13, image 2 de 3 Toshiba Satellite A205-S4577 Motherboard Replacement: étape 13, image 3 de 3
    • Remove the four 8mm button-head screws that are located in the top right (2) and top left corners (2) of the front cover. Use a Phillips 00 Screwdriver.

  14. Toshiba Satellite A205-S4577 Motherboard Replacement: étape 14, image 1 de 1
    • Once all the wires are detached and screws are removed, pull up on the monitor to remove it.

  15. Toshiba Satellite A205-S4577 Motherboard Replacement, Front Cover: étape 15, image 1 de 1
    • Locate the screws that are shown in the image.

    • Remove the fourteen 6mm button-head screws with a Phillips 00 Screwdriver.

  16. Toshiba Satellite A205-S4577 Motherboard Replacement: étape 16, image 1 de 2 Toshiba Satellite A205-S4577 Motherboard Replacement: étape 16, image 2 de 2
    • Lift up on the front cover to remove it.

  17. Toshiba Satellite A205-S4577 Motherboard Replacement, USB 2.0 Ports: étape 17, image 1 de 1
    • Locate the USB 2.0 cable on the bottom right corner of the laptop.

  18. Toshiba Satellite A205-S4577 Motherboard Replacement: étape 18, image 1 de 2 Toshiba Satellite A205-S4577 Motherboard Replacement: étape 18, image 2 de 2
    • Locate the white slot on the left side of the USB 2.0 wire.

    • Carefully detach the wire by pulling the cable to the right of the slot.

  19. Toshiba Satellite A205-S4577 Motherboard Replacement, Fan: étape 19, image 1 de 1
    • Locate the 6mm flat-head screw in the top right corner of the bottom of the laptop.

    • Remove this screw with the Phillips 00 Screwdriver.

  20. Toshiba Satellite A205-S4577 Motherboard Replacement: étape 20, image 1 de 3 Toshiba Satellite A205-S4577 Motherboard Replacement: étape 20, image 2 de 3 Toshiba Satellite A205-S4577 Motherboard Replacement: étape 20, image 3 de 3
    • Locate and remove the white connector that is .75 inches wide.

  21. Toshiba Satellite A205-S4577 Motherboard Replacement: étape 21, image 1 de 3 Toshiba Satellite A205-S4577 Motherboard Replacement: étape 21, image 2 de 3 Toshiba Satellite A205-S4577 Motherboard Replacement: étape 21, image 3 de 3
    • Locate and remove the smaller white connector (far right) and any tape that is holding it down.

  22. Toshiba Satellite A205-S4577 Motherboard Replacement: étape 22, image 1 de 3 Toshiba Satellite A205-S4577 Motherboard Replacement: étape 22, image 2 de 3 Toshiba Satellite A205-S4577 Motherboard Replacement: étape 22, image 3 de 3
    • Remove any tape that is still covering the fan.

    • Remove the fan.

  23. Toshiba Satellite A205-S4577 Motherboard Replacement, Optical Drive: étape 23, image 1 de 1
    • Locate the 4mm flat-head screw. Remove it using the Phillips 00 Screwdriver.

  24. Toshiba Satellite A205-S4577 Motherboard Replacement: étape 24, image 1 de 1
    • Turn the computer over.

    • Locate the optical drive on the right.

  25. Toshiba Satellite A205-S4577 Motherboard Replacement: étape 25, image 1 de 3 Toshiba Satellite A205-S4577 Motherboard Replacement: étape 25, image 2 de 3 Toshiba Satellite A205-S4577 Motherboard Replacement: étape 25, image 3 de 3
    • Using two fingers, slide the optical drive toward the edge of the computer.

    • Continue to slide the optical drive until it can be removed from the computer.

  26. Toshiba Satellite A205-S4577 Motherboard Replacement, Motherboard: étape 26, image 1 de 3 Toshiba Satellite A205-S4577 Motherboard Replacement, Motherboard: étape 26, image 2 de 3 Toshiba Satellite A205-S4577 Motherboard Replacement, Motherboard: étape 26, image 3 de 3
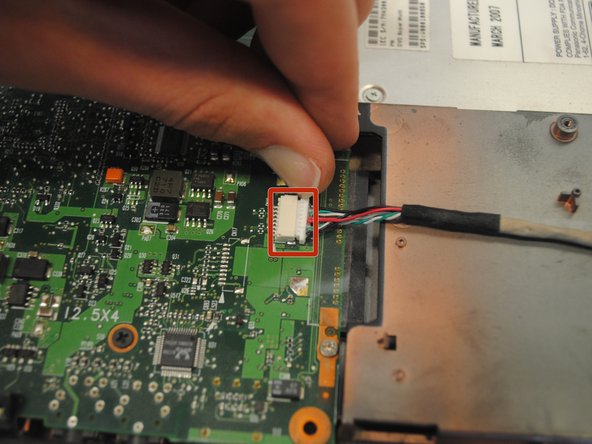
    • Locate the two black and red wires on each side of the motherboard.

    • Slowly pull back on the cables away from the motherboard to detach them from their connector slots.

  27. Toshiba Satellite A205-S4577 Motherboard Replacement: étape 27, image 1 de 2 Toshiba Satellite A205-S4577 Motherboard Replacement: étape 27, image 2 de 2
    • Pinch the plastic cable horizontally and pull it away from the socket in order to remove the cable connecting the motherboard to the speaker cover buttons.

  28. Toshiba Satellite A205-S4577 Motherboard Replacement: étape 28, image 1 de 1
    • Locate the black wire next to optical drive and gently pull it away from the socket to remove it.

  29. Toshiba Satellite A205-S4577 Motherboard Replacement: étape 29, image 1 de 1
    • Remove the six 4mm flat-head screws with a Phillips 00 Screwdriver.

  30. Toshiba Satellite A205-S4577 Motherboard Replacement: étape 30, image 1 de 1
    • Place one hand on the side with the optical drive and one hand on the side with the fan.

    • Pull the motherboard away from the main frame at a slightly upward angle.

Conclusion

To reassemble your device, follow these instructions in reverse order.

7 autres ont terminé cette réparation.

Kelly Palermo

Membre depuis le 04/18/13

112 Réputation

1 tutoriel rédigé

Équipe

Cal Poly, Team 17-6, Regan Spring 2013 Membre de l'équipe Cal Poly, Team 17-6, Regan Spring 2013

CPSU-REGAN-S13S17G6

5 membres

33 tutoriels rédigés

Un commentaire

Thank you for this guide!

smlaptoprepair - Réponse

Ajouter un commentaire

Nombre de vues :

Dernières 24 heures : 0

7 derniers jours : 5

30 derniers jours : 12

Total : 4,988