Aller au contenu principal

Toshiba Satellite L505D-GS6000 Screen Replacement

Ce dont vous avez besoin

  1. Toshiba Satellite L505D-GS6000 Screen Replacement, Battery: étape 1, image 1 de 2 Toshiba Satellite L505D-GS6000 Screen Replacement, Battery: étape 1, image 2 de 2
    • Shut down the computer and disconnect all cables.

    • Flip the computer over so that the bottom is facing up.

    • Slide right switch above the battery so that it is in the rightwards position.

  2. Toshiba Satellite L505D-GS6000 Screen Replacement: étape 2, image 1 de 1
    • Push and hold the left-most switch in the leftward position.

    • While holding the left switch in position, lift up on the battery from the groove in the casing and remove.

  3. Toshiba Satellite L505D-GS6000 Screen Replacement, Screen: étape 3, image 1 de 3 Toshiba Satellite L505D-GS6000 Screen Replacement, Screen: étape 3, image 2 de 3 Toshiba Satellite L505D-GS6000 Screen Replacement, Screen: étape 3, image 3 de 3
    • Ensure that the battery has been removed and any wires are disconnected.

    • Open to a front facing position.

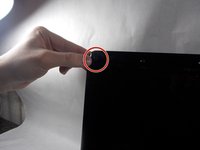
    • Remove screw coverings from casing.

    • Remove the M2 5x6 mm screws that under the screw covers that you removed using a Phillips #0 screwdriver.

    • Keep screws and covers together in a pile for easier reassembly.

  4. Toshiba Satellite L505D-GS6000 Screen Replacement: étape 4, image 1 de 3 Toshiba Satellite L505D-GS6000 Screen Replacement: étape 4, image 2 de 3 Toshiba Satellite L505D-GS6000 Screen Replacement: étape 4, image 3 de 3
    • Carefully pry the screen covering out of place to remove it and set it to the side.

    • It may be helpful to use a plastic opening tool to assist in removal of the screen cover.

  5. Toshiba Satellite L505D-GS6000 Screen Replacement: étape 5, image 1 de 3 Toshiba Satellite L505D-GS6000 Screen Replacement: étape 5, image 2 de 3 Toshiba Satellite L505D-GS6000 Screen Replacement: étape 5, image 3 de 3
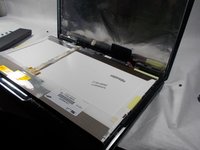
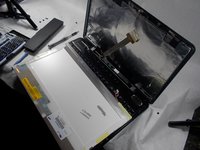
    • Remove the three M2 5x6 mm screws on each side holding the screen in place, using the Phillips #0 screwdriver.

    • Gently rest the screen on the keyboard, making sure not to damage any of the wires attached to it.

  6. Toshiba Satellite L505D-GS6000 Screen Replacement: étape 6, image 1 de 2 Toshiba Satellite L505D-GS6000 Screen Replacement: étape 6, image 2 de 2
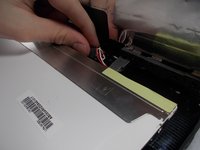
    • Disconnect wire at the base of the screen from the laptop.

    • Be very gentle as to not damage any electrical components of the computer.

  7. Toshiba Satellite L505D-GS6000 Screen Replacement: étape 7, image 1 de 3 Toshiba Satellite L505D-GS6000 Screen Replacement: étape 7, image 2 de 3 Toshiba Satellite L505D-GS6000 Screen Replacement: étape 7, image 3 de 3
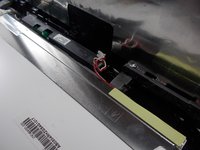
    • Peel back adhesive from the second connection to the screen and unplug the connection.

    • Remove secondary adhesive from the screen connection at the base of the screen.

    • Be cautious when removing the tape, as it will be reused for the replacement screen, so be sure not to rip it.

    • The screen is now free to be removed from the device.

Conclusion

To reassemble your device, follow these instructions in reverse order.

Une autre personne a terminé cette réparation.

Sean Hennedy

Membre depuis le 03/20/18

124 Réputation

1 tutoriel rédigé

Équipe

UMass Dartmouth, Team S4-G2, Covino Spring 2018 Membre de l'équipe UMass Dartmouth, Team S4-G2, Covino Spring 2018

UMASSD-COVINO-S18S4G2

2 membres

5 tutoriels rédigés

0 commentaires

Ajouter un commentaire

Nombre de vues :

Dernières 24 heures : 1

7 derniers jours : 2

30 derniers jours : 4

Total : 639