Introduction
To replace the Satellite L755 motherboard you will need a Phillips (PH0) screwdriver. The motherboard is fragile and should not be bent or pried away from other parts or forced into place since it may break.
Ce dont vous avez besoin
-
-
Begin by unscrewing the screw located underneath the battery.
-
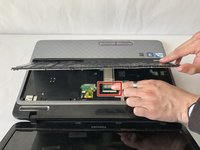
Then, unsnap and remove the bar above the keyboard.
-
-
-
-
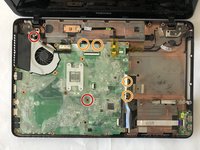
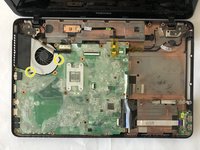
Remove the 5mm Phillips #0 screw in the middle of the motherboard, and the 4mm Phillips #0 screw on the upper left near the fan.
-
Remove the four 4mm Phillips #0 screws under the edge covering flaps.
-
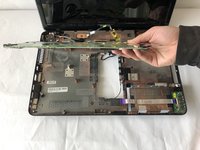
Carefully lift out the motherboard and fan.
-
To detach the fan, remove the two 2mm Phillips #0 screws.
-


To reassemble your device, follow these instructions in reverse order.
To reassemble your device, follow these instructions in reverse order.
Annulation : je n'ai pas terminé ce tutoriel.
Une autre personne a terminé cette réparation.
Équipe

Oregon Institute of Technology, Team S1-G5, Lancaster Spring 2019 Membre de l'équipe Oregon Institute of Technology, Team S1-G5, Lancaster Spring 2019
OIT-LANCASTER-S19S1G5
4 membres
6 tutoriels rédigés