Aller au contenu principal

Toshiba Satellite P55t-A5116 Power Jack Replacement

Ce dont vous avez besoin

  1. Toshiba Satellite P55t-A5116 Power Jack Replacement, Back Casing: étape 1, image 1 de 2 Toshiba Satellite P55t-A5116 Power Jack Replacement, Back Casing: étape 1, image 2 de 2
    • Close laptop and turn it upside down

    • Remove the 14 circular rubber covers with tweezers along with one smaller more cylindrical rubber cover.

  2. Toshiba Satellite P55t-A5116 Power Jack Replacement: étape 2, image 1 de 2 Toshiba Satellite P55t-A5116 Power Jack Replacement: étape 2, image 2 de 2
    • Using the #PH0 screw head, remove 14 (5.7 mm) screws from the back casing.

  3. Toshiba Satellite P55t-A5116 Power Jack Replacement: étape 3, image 1 de 3 Toshiba Satellite P55t-A5116 Power Jack Replacement: étape 3, image 2 de 3 Toshiba Satellite P55t-A5116 Power Jack Replacement: étape 3, image 3 de 3
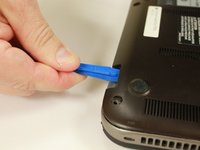
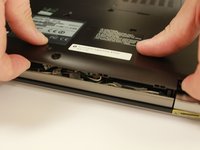
    • Gently pry off the bottom case with the plastic opening tools.

    • Find the seam between the back case and the rest of the laptop casing.

  4. Toshiba Satellite P55t-A5116 Power Jack Replacement, Battery: étape 4, image 1 de 2 Toshiba Satellite P55t-A5116 Power Jack Replacement, Battery: étape 4, image 2 de 2
    • Use the #PH0 screw head, remove 4 (5.7mm) screws.

    • Unplug the battery's 10 pin connector and gently lift the battery out of the laptop.

  5. Toshiba Satellite P55t-A5116 Power Jack Replacement: étape 5, image 1 de 1
    • Gently remove battery from the laptop.

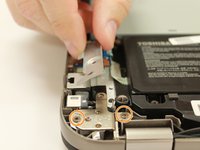
  6. Toshiba Satellite P55t-A5116 Power Jack Replacement, Power Jack: étape 6, image 1 de 3 Toshiba Satellite P55t-A5116 Power Jack Replacement, Power Jack: étape 6, image 2 de 3 Toshiba Satellite P55t-A5116 Power Jack Replacement, Power Jack: étape 6, image 3 de 3
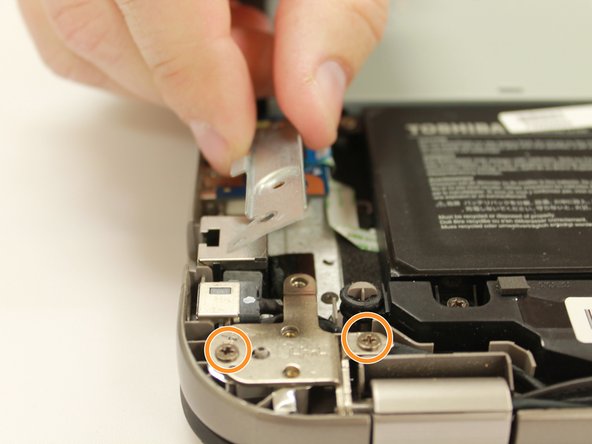
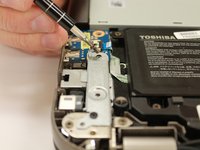
    • Using the #PH0 screw head, remove 2 (5.7 mm) screws.

    • Remove metal plate.

    • Using the #PH0 screw head remove 1 (5.7mm) screw and 1 (4.15mm) screw.

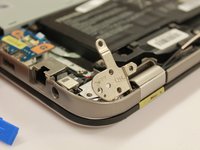
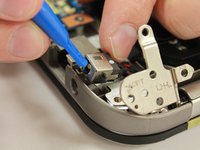
  7. Toshiba Satellite P55t-A5116 Power Jack Replacement: étape 7, image 1 de 2 Toshiba Satellite P55t-A5116 Power Jack Replacement: étape 7, image 2 de 2
    • Use the plastic opening tool to push the left hinge up.

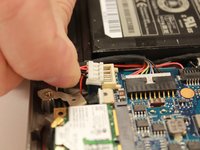
  8. Toshiba Satellite P55t-A5116 Power Jack Replacement: étape 8, image 1 de 2 Toshiba Satellite P55t-A5116 Power Jack Replacement: étape 8, image 2 de 2
    • Gently pull up the power jack. Follow the cord until you reach the connector.

    • Unplug the 4 pin connector and remove from laptop

Conclusion

To reassemble your device, follow these instructions in reverse order.

2 autres ont terminé cette réparation.

Rachael Ferry

Membre depuis le 01/19/17

228 Réputation

1 tutoriel rédigé

Un commentaire

Absolutely terrific tutorial! This helped me immensely. My laptop is Toshiba Satellite P55T-5202 and has the same layout as this. This worked perfectly.

I purchased the part form Amazon, btw. Its a DC Power Jack Replacement

Alampana - Réponse

Ajouter un commentaire

Nombre de vues :

Dernières 24 heures : 1

7 derniers jours : 5

30 derniers jours : 6

Total : 3,783