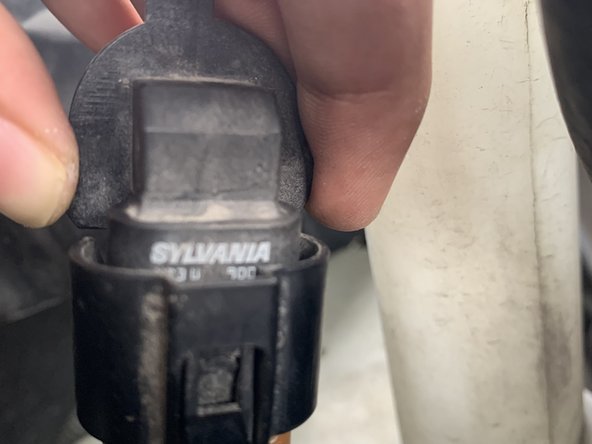
Aller au contenu principal

Toyota Sienna 2009 Lightbulb Replacement Replacement

Ce dont vous avez besoin

  1. Toyota Sienna 2009 Lightbulb Replacement Replacement, Lightbulb Replacement: étape 1, image 1 de 3 Toyota Sienna 2009 Lightbulb Replacement Replacement, Lightbulb Replacement: étape 1, image 2 de 3 Toyota Sienna 2009 Lightbulb Replacement Replacement, Lightbulb Replacement: étape 1, image 3 de 3
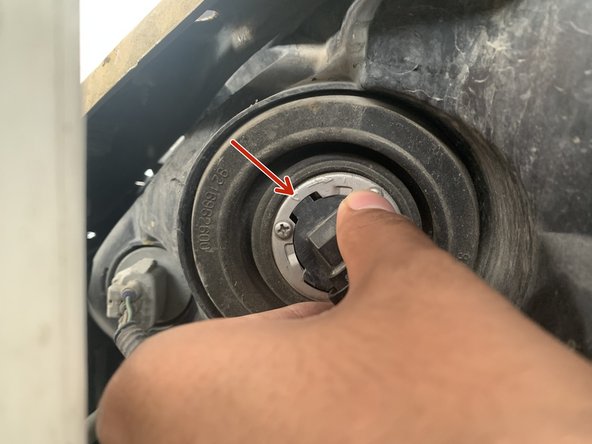
    • Locate the latch on the bottom left of steering wheel.

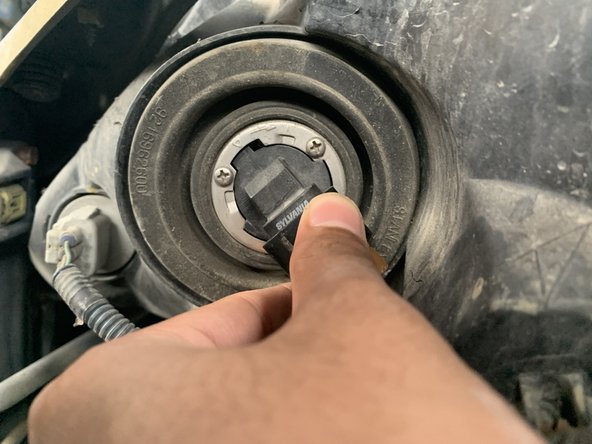
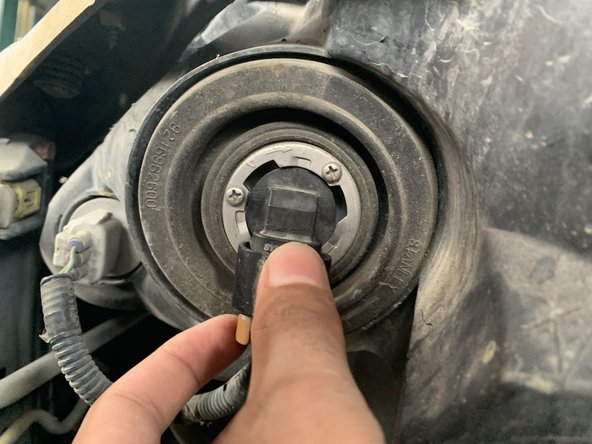
    • Once found, pull in your direction.

  2. Toyota Sienna 2009 Lightbulb Replacement Replacement: étape 2, image 1 de 3 Toyota Sienna 2009 Lightbulb Replacement Replacement: étape 2, image 2 de 3 Toyota Sienna 2009 Lightbulb Replacement Replacement: étape 2, image 3 de 3
    • Now that you have unlocked the hood, locate the latch on top of the logo to fully release the hood.

    • Once found, lift the latch upwards and you have now freed the hood.

  3. Toyota Sienna 2009 Lightbulb Replacement Replacement: étape 3, image 1 de 3 Toyota Sienna 2009 Lightbulb Replacement Replacement: étape 3, image 2 de 3 Toyota Sienna 2009 Lightbulb Replacement Replacement: étape 3, image 3 de 3
    • Locate the lightbulb by locating the access compartment.

    • Once located, twist the compartment counter-clockwise and pull to free the lighbulb.

    • The plastic holding the compartment in place should appear in the gap shown in the picture.

  4. Toyota Sienna 2009 Lightbulb Replacement Replacement: étape 4, image 1 de 3 Toyota Sienna 2009 Lightbulb Replacement Replacement: étape 4, image 2 de 3 Toyota Sienna 2009 Lightbulb Replacement Replacement: étape 4, image 3 de 3
    • Turn the back of the bulb connector towards yourself, and prepare to remove the clasp, freeing the bulb.

    • In order to free the bulb, press firmly on the clasp, and pull with enough force to pull it out, but not enough to break it.

  5. Toyota Sienna 2009 Lightbulb Replacement Replacement: étape 5, image 1 de 2 Toyota Sienna 2009 Lightbulb Replacement Replacement: étape 5, image 2 de 2
    • Once you have the new lightbulb ready, it is time to put everything back together.

    • Simply press the new bulb into where the old one was, making sure it is locked into the clasp.

  6. Toyota Sienna 2009 Lightbulb Replacement Replacement: étape 6, image 1 de 3 Toyota Sienna 2009 Lightbulb Replacement Replacement: étape 6, image 2 de 3 Toyota Sienna 2009 Lightbulb Replacement Replacement: étape 6, image 3 de 3
    • Line the connector with the empty point of where it is supposed to be locked in.

    • And this time, twist it clockwise to lock it into place.

  7. Toyota Sienna 2009 Lightbulb Replacement Replacement: étape 7, image 1 de 1
    • That's it! You are all done! Congratulations on accomplishing this easy and simple fix.

Conclusion

To reassemble your device, follow these instructions in reverse order.

Muhammad Aqeel

Membre depuis le 09/08/23

145 Réputation

1 tutoriel rédigé

Équipe

York University, Team D-3, O'Regan Fall 2023 Membre de l'équipe York University, Team D-3, O'Regan Fall 2023

YORK-O'REGAN-F23SDG3

1 membre

1 tutoriel rédigé

0 commentaires

Ajouter un commentaire

Nombre de vues :

Dernières 24 heures : 0

7 derniers jours : 0

30 derniers jours : 8

Total : 91