Aller au contenu principal

Tribit XSound Go TS-BTS20 Passive Radiator Replacement

Ce dont vous avez besoin

  1. Tribit XSound Go TS-BTS20 Passive Radiator Replacement, Passive Radiator: étape 1, image 1 de 2 Tribit XSound Go TS-BTS20 Passive Radiator Replacement, Passive Radiator: étape 1, image 2 de 2
    • Insert a spudger in the seam between the front speaker grill and chassis.

    • Pry around the perimeter until the front grill releases.

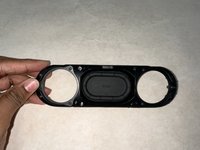
    • Remove the front grill.

  2. Tribit XSound Go TS-BTS20 Passive Radiator Replacement: étape 2, image 1 de 1
    • Unscrew all the screws with the Phillips screwdriver, on the opened panel.

    • Lift off the speaker housing.

  3. Tribit XSound Go TS-BTS20 Passive Radiator Replacement: étape 3, image 1 de 2 Tribit XSound Go TS-BTS20 Passive Radiator Replacement: étape 3, image 2 de 2
    • Hold the frame which has the passive radiator in the middle.

  4. Tribit XSound Go TS-BTS20 Passive Radiator Replacement: étape 4, image 1 de 1
    • Use a spudger to push the damaged passive radiator off the frame

  5. Tribit XSound Go TS-BTS20 Passive Radiator Replacement: étape 5, image 1 de 1
    • Insert the new passive radiator into the frame.

    • The passive bass radiators seal out water from inside the device. Removing them multiple times may compromise the waterproof nature of the speaker.

Conclusion

To reassemble your device, follow these instructions in reverse order.

Hasini Kanuru

Membre depuis le 09/12/23

271 Réputation

1 tutoriel rédigé

Équipe

0 commentaires

Ajouter un commentaire

Nombre de vues :

Dernières 24 heures : 0

7 derniers jours : 2

30 derniers jours : 10

Total : 36