Aller au contenu principal

Turtle Beach Ear Force XO One Adapter Buttons Replacement

Ce dont vous avez besoin

  1. Turtle Beach Ear Force XO One Adapter Buttons Replacement, Adapter Buttons: étape 1, image 1 de 1
    • Using a Philips head screwdriver, unscrew the two screws on the back of the adapter.

    • The recommended screwdriver bit size is a PH 000.

  2. Turtle Beach Ear Force XO One Adapter Buttons Replacement: étape 2, image 1 de 1
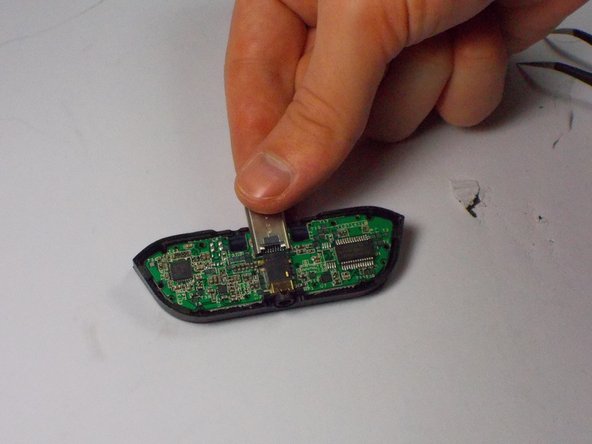
    • Using your hands and/or a prying tool, carefully pry open the adapter.

    • This step may require a bit of force to complete.

    • Be aware that the adapter is held together with clips on the inside at some locations.

    • Do not be alarmed if it makes a snapping sound as it comes apart, this is most likely just the sound of the clips detaching.

  3. Turtle Beach Ear Force XO One Adapter Buttons Replacement: étape 3, image 1 de 3 Turtle Beach Ear Force XO One Adapter Buttons Replacement: étape 3, image 2 de 3 Turtle Beach Ear Force XO One Adapter Buttons Replacement: étape 3, image 3 de 3
    • Now, using the same Philips head screwdriver, unscrew the two screws on either side that hold the circuit board to the adapter case.

    • Once the screws are out, you can remove the circuit board from the casing.

  4. Turtle Beach Ear Force XO One Adapter Buttons Replacement: étape 4, image 1 de 1
    • Push the rubber piece containing the buttons out of the plastic adapter casing.

    • Then, replace it with a new one.

Conclusion

To reassemble your device, follow these instructions in reverse order.

Une autre personne a terminé cette réparation.

Joseph Lane

Membre depuis le 10/27/15

128 Réputation

1 tutoriel rédigé

Équipe

UMass Dartmouth, Team 3-1, Shastany Fall 2015 Membre de l'équipe UMass Dartmouth, Team 3-1, Shastany Fall 2015

UMASSD-SHASTANY-F15S3G1

3 membres

6 tutoriels rédigés

0 commentaires

Ajouter un commentaire

Nombre de vues :

Dernières 24 heures : 0

7 derniers jours : 0

30 derniers jours : 4

Total : 1,555