Aller au contenu principal

VTech Baby's Learning Laptop Battery and Rear Panel Replacement

Ce dont vous avez besoin

  1. VTech Baby's Learning Laptop Battery and Rear Panel Replacement, Battery and Rear Panel: étape 1, image 1 de 1
    • To remove the battery door, loosen the screw shown using a Phillips #2 screwdriver.

    • A coin can also be used to loosen the screw.

  2. VTech Baby's Learning Laptop Battery and Rear Panel Replacement: étape 2, image 1 de 1
    • Remove the battery door.

    • Take out the batteries.

  3. VTech Baby's Learning Laptop Battery and Rear Panel Replacement: étape 3, image 1 de 1
    • Remove the rear panel screws using a Phillips #2 screwdriver.

    • Two 21.6mm (Long)

    • One 9.8mm (Short)

    • Five 13.8mm (Medium)

  4. VTech Baby's Learning Laptop Battery and Rear Panel Replacement: étape 4, image 1 de 2 VTech Baby's Learning Laptop Battery and Rear Panel Replacement: étape 4, image 2 de 2
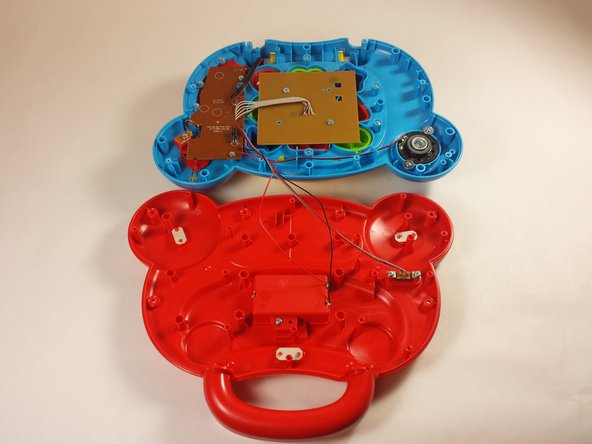
    • Gently pull up on the rear panel.

    • Be careful not to pull on the wire connections.

    • Rest the laptop open on the table.

Conclusion

To reassemble your device, follow these instructions in reverse order.

Une autre personne a terminé cette réparation.

Équipe

USF Tampa, Team 12-2, Blackwell Fall 2015 Membre de l'équipe USF Tampa, Team 12-2, Blackwell Fall 2015

USFT-BLACKWELL-F15S12G2

4 membres

14 tutoriels rédigés

0 commentaires

Ajouter un commentaire

Nombre de vues :

Dernières 24 heures : 0

7 derniers jours : 3

30 derniers jours : 17

Total : 1,112