Aller au contenu principal

Velbon CX690 Tripod Mounting Plate Cap Replacement

Ce dont vous avez besoin

  1. Velbon CX690 Tripod Mounting Plate Cap Replacement, Mounting Plate Cap: étape 1, image 1 de 2 Velbon CX690 Tripod Mounting Plate Cap Replacement, Mounting Plate Cap: étape 1, image 2 de 2
    • Grab the quick-release plate with one hand and the tripod body with the other. Then, pull the quick-release plate straight off of the tripod body.

    • The quick-release plate may need to be twisted off of the tripod body if it does not slide off.

  2. Velbon CX690 Tripod Mounting Plate Cap Replacement: étape 2, image 1 de 2 Velbon CX690 Tripod Mounting Plate Cap Replacement: étape 2, image 2 de 2
    • Grab the side-tilt-locking-nut with your dominant hand and grab the pan handle with your other hand. Twist the side-tilt-locking-nut counterclockwise to loosen it, and then pull it off.

  3. Velbon CX690 Tripod Mounting Plate Cap Replacement: étape 3, image 1 de 2 Velbon CX690 Tripod Mounting Plate Cap Replacement: étape 3, image 2 de 2
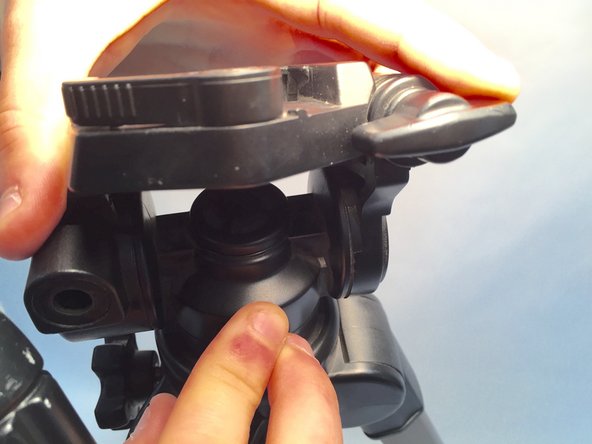
    • Grab the pan handle with your dominant hand and grab the quick-release plate with the other. Twist the pan handle counterclockwise until loose and then pull it off of the quick-release plate.

    • Make sure to leave the washer on the pan handle.

  4. Velbon CX690 Tripod Mounting Plate Cap Replacement: étape 4, image 1 de 2 Velbon CX690 Tripod Mounting Plate Cap Replacement: étape 4, image 2 de 2
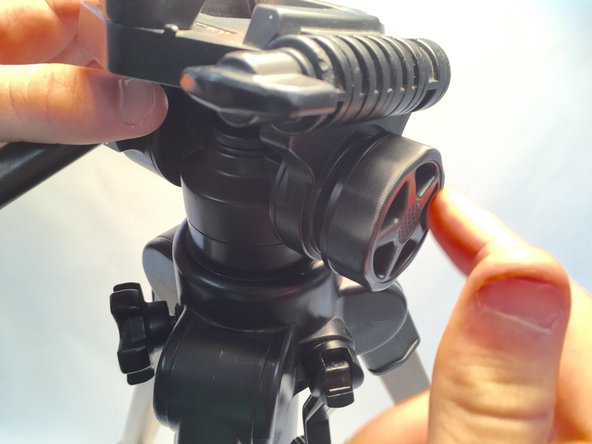
    • Grab the pan head of the quick-release plate with your dominant hand and the other part of the quick-release plate with your other hand. Then, rotate the pan head clockwise 90 degrees.

  5. Velbon CX690 Tripod Mounting Plate Cap Replacement: étape 5, image 1 de 2 Velbon CX690 Tripod Mounting Plate Cap Replacement: étape 5, image 2 de 2
    • Using the more narrow part of the tripod body, place the quick-release plate back onto the tripod body.

  6. Velbon CX690 Tripod Mounting Plate Cap Replacement: étape 6, image 1 de 1
    • In order to reattach the mounting cap, use JB Weld to make a welding solution.

    • Mix the JB Weld solution in a circular motion for about 30 seconds or until it turns grey.

  7. Velbon CX690 Tripod Mounting Plate Cap Replacement: étape 7, image 1 de 1
    • Apply the JB Weld solution to the top of the center column of the tripod body.

    • Do not apply JB Weld solution to the inside of the center column.

    • Do this quickly because the JB Weld solution cures rapidly.

  8. Velbon CX690 Tripod Mounting Plate Cap Replacement: étape 8, image 1 de 3 Velbon CX690 Tripod Mounting Plate Cap Replacement: étape 8, image 2 de 3 Velbon CX690 Tripod Mounting Plate Cap Replacement: étape 8, image 3 de 3
    • Retrieve the mounting cap and hold it on the top of the center column for 60 seconds or until it feels secure.

  9. Velbon CX690 Tripod Mounting Plate Cap Replacement: étape 9, image 1 de 2 Velbon CX690 Tripod Mounting Plate Cap Replacement: étape 9, image 2 de 2
    • Hold the pan handle with your dominant hand. Rotate the mounting plate clockwise, until it gets to the position you would like for use.

    • The position can be changed later by loosening the pan handle.

  10. Velbon CX690 Tripod Mounting Plate Cap Replacement: étape 10, image 1 de 2 Velbon CX690 Tripod Mounting Plate Cap Replacement: étape 10, image 2 de 2
    • Insert the pan handle back into its original hole. Rotate the pan handle clockwise. Make sure the washer is still connected and tighten until it feels tight.

    • Do not use excessive force when tightening the pan handle.

  11. Velbon CX690 Tripod Mounting Plate Cap Replacement: étape 11, image 1 de 2 Velbon CX690 Tripod Mounting Plate Cap Replacement: étape 11, image 2 de 2
    • Insert the side-tilt-locking nut into the hole it came out of. Rotate the side-tilt-locking nut clockwise, until it feels tight.

    • Do not use excessive force when tightening the side tilt locking nut.

Ligne d'arrivée

2 autres ont terminé cette réparation.

Jordan Schleifer

Membre depuis le 06/01/16

110 Réputation

1 tutoriel rédigé

Équipe

0 commentaires

Ajouter un commentaire

Nombre de vues :

Dernières 24 heures : 0

7 derniers jours : 4

30 derniers jours : 15

Total : 967