Aller au contenu principal

Verizon Ellipsis 7 Speaker Replacement

Ce dont vous avez besoin

  1. Verizon Ellipsis 7 Speaker Replacement, Charging Port: étape 1, image 1 de 3 Verizon Ellipsis 7 Speaker Replacement, Charging Port: étape 1, image 2 de 3 Verizon Ellipsis 7 Speaker Replacement, Charging Port: étape 1, image 3 de 3
    • Hold down the power button until the screen goes black to turn off the device.

    • Remove the SIM card from the device to prevent damage.

    • To remove the SIM card, open the SIM card cover on the side of the device.

    • Push SIM card in and pull it out after hearing a click.

  2. Verizon Ellipsis 7 Speaker Replacement: étape 2, image 1 de 2 Verizon Ellipsis 7 Speaker Replacement: étape 2, image 2 de 2
    • Take off the back panel.

    • Pry open the back cover carefully with a plastic opening tool.

    • Use the opening tool to disconnect the cover completely. Do not attempt to pry the back cover off with your hands.

    • Be sure to pry open all sides of the device. Attempting to take off the back cover when part of it is attached may snap the cover.

  3. Verizon Ellipsis 7 Speaker Replacement: étape 3, image 1 de 3 Verizon Ellipsis 7 Speaker Replacement: étape 3, image 2 de 3 Verizon Ellipsis 7 Speaker Replacement: étape 3, image 3 de 3
    Outil utilisé dans cette étape :
    Tweezers
    $4.99
    J'achète
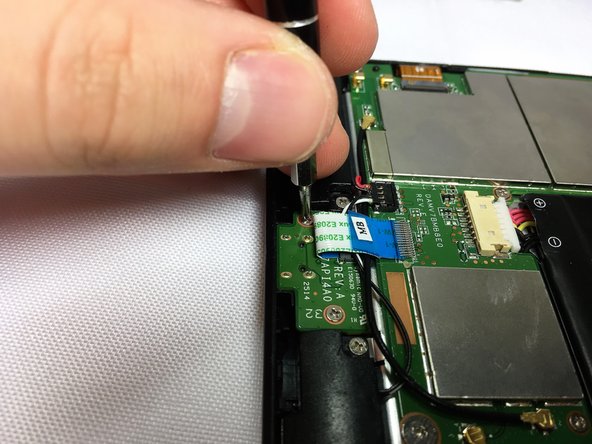
    • Remove the charging (micro-USB) port.

    • Unscrew the indicated screws using the Phillips #00 screwdriver.

    • The screws shown in the picture are the more common 4.76 mm.

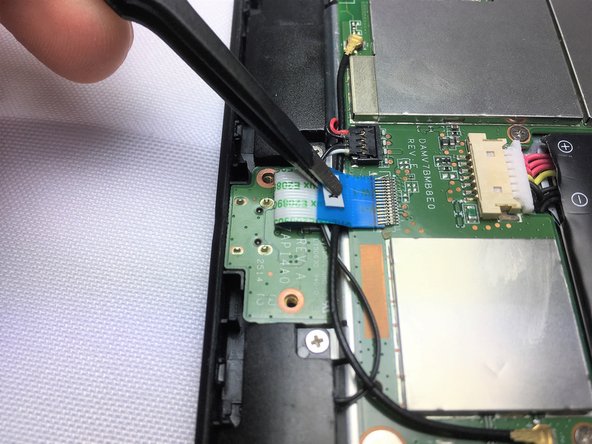
    • Disconnect the ribbon cable connecting the charging port board to the motherboard using tweezers.

    • Use the tweezers to grab the sides of black, plastic connector. Do not grab from the wires or try to wedge it out from the bottom.

    • Be extremely careful when disconnecting the ribbon cable. It is very delicate.

  4. Verizon Ellipsis 7 Speaker Replacement: étape 4, image 1 de 2 Verizon Ellipsis 7 Speaker Replacement: étape 4, image 2 de 2
    • Remove the charging port board from the phone using tweezers.

    • Place the replacement charging port into the phone.

    • Be cautious when replacing the ribbon cable onto the new charging port board.

  5. Verizon Ellipsis 7 Speaker Replacement, Speaker: étape 5, image 1 de 2 Verizon Ellipsis 7 Speaker Replacement, Speaker: étape 5, image 2 de 2
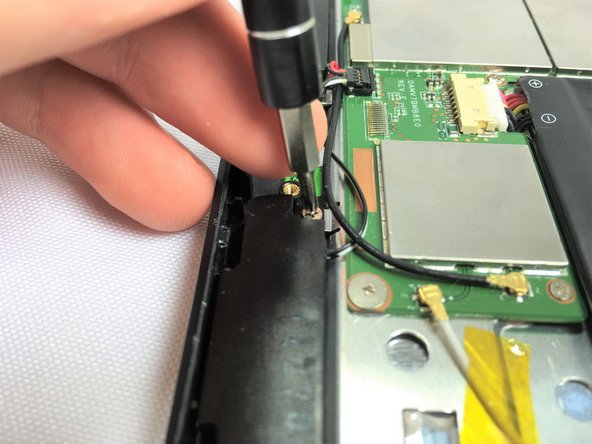
    • Remove 2 screws from each speaker, 4 screws in total, using a Phillips #00 screwdriver.

    • The screws shown in the picture are the more common 4.76 mm.

  6. Verizon Ellipsis 7 Speaker Replacement: étape 6, image 1 de 3 Verizon Ellipsis 7 Speaker Replacement: étape 6, image 2 de 3 Verizon Ellipsis 7 Speaker Replacement: étape 6, image 3 de 3
    Outil utilisé dans cette étape :
    Tweezers
    $4.99
    J'achète
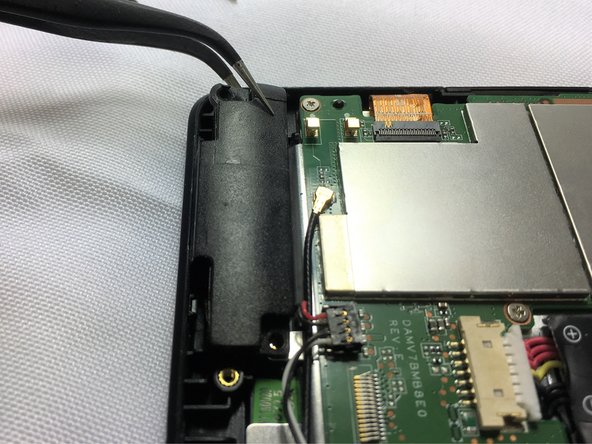
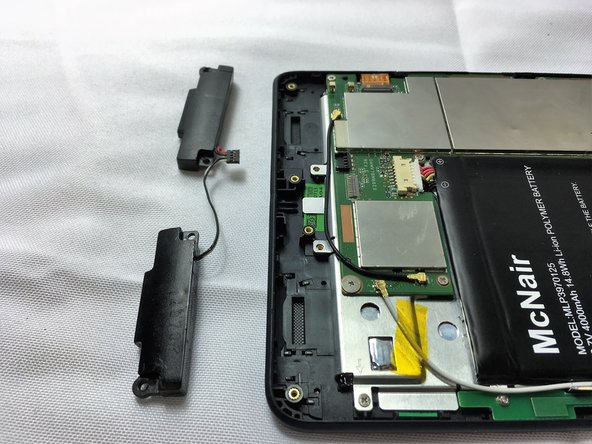
    • Using tweezers carefully lift the connector up to disconnect it from the motherboard.

    • Using tweezers carefully pull the speakers up and out of device.

Conclusion

To reassemble your device, follow these instructions in reverse order.

2 autres ont terminé cette réparation.

Charles Gorbett

Membre depuis le 10/10/16

242 Réputation

2 tutoriels rédigés

Équipe

Sam Houston State, Team 12-7, Blackburne Fall 2016 Membre de l'équipe Sam Houston State, Team 12-7, Blackburne Fall 2016

SHSU-BLACKBURNE-F16S12G7

3 membres

10 tutoriels rédigés

0 commentaires

Ajouter un commentaire

Nombre de vues :

Dernières 24 heures : 0

7 derniers jours : 0

30 derniers jours : 6

Total : 1,182