Introduction
The speaker can be replaced if it is damaged or broken. You will be able to find that the speaker is the problem if it is playing sound with a popping and static sound added, or if there is no sound coming from your device at all. This will help fix any issues with sound output for the device.
Ce dont vous avez besoin
-
-
Lay your device face-down.
-
Use a Phillips #000 screwdriver to remove the two 4 mm screws next to the AUX port and microphone.
-
-
-
-
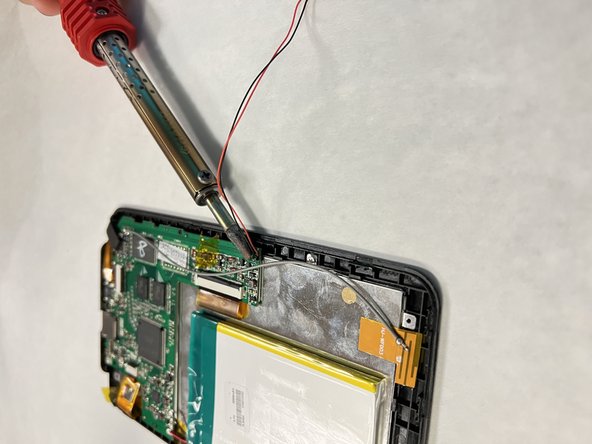
Take the soldering gun and place it on the black and red wires to melt the soldered conncetions.
-
Remove the speaker.
-


To reassemble your device, follow these instructions in reverse order.
To reassemble your device, follow these instructions in reverse order.

Équipe

University of North Texas, Team 1-1, Kilpatrick Fall 2023 Membre de l'équipe University of North Texas, Team 1-1, Kilpatrick Fall 2023
UNT-KILPATRICK-F23S1G1
4 membres
5 tutoriels rédigés